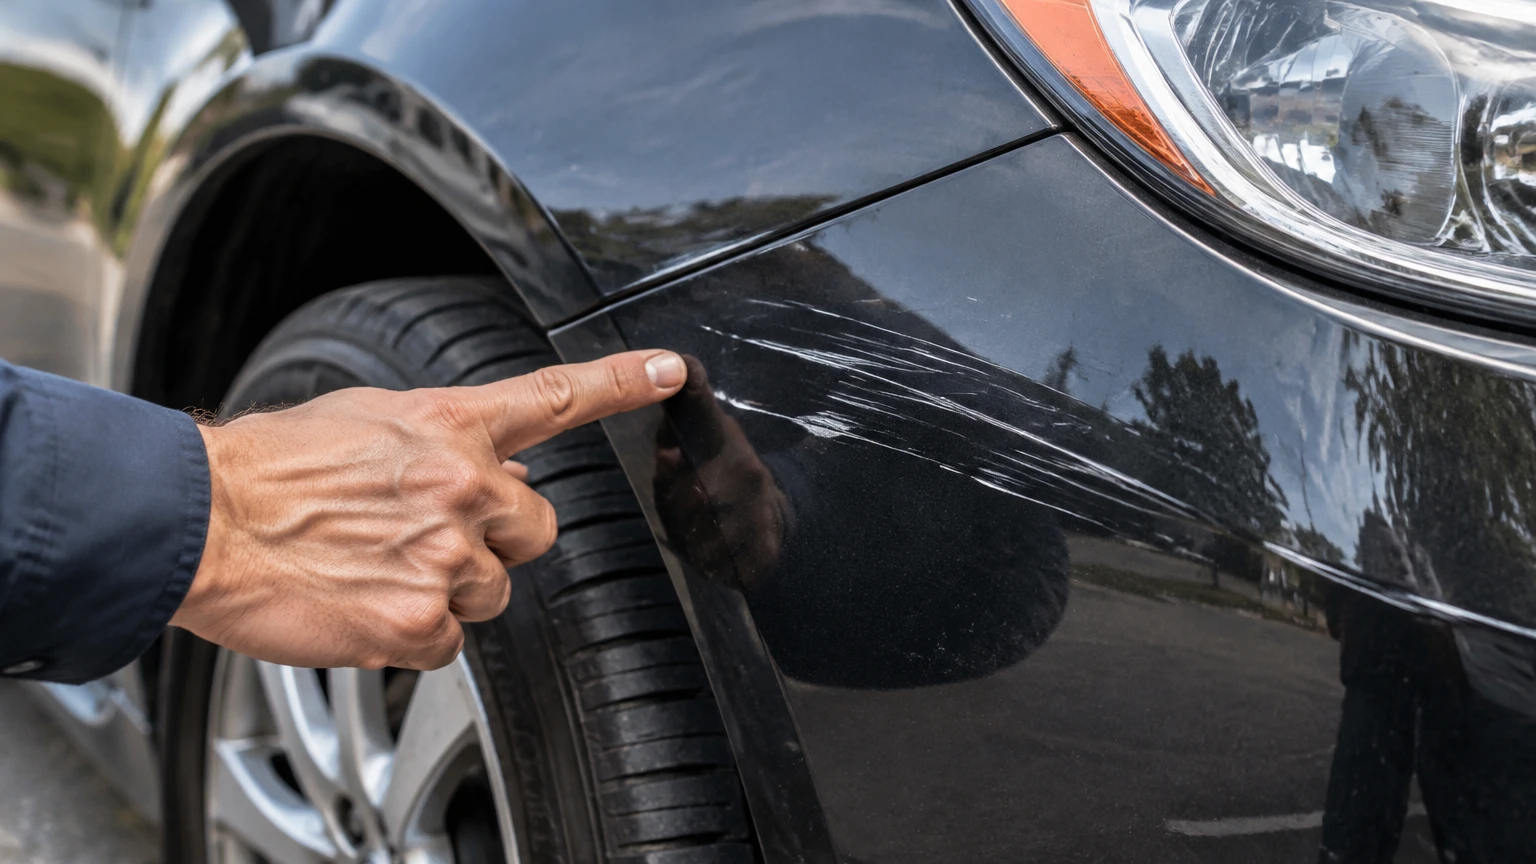
The different types of car paint scratches are clear coat scratches, base coat scratches, primer scratches, and deep scratches that expose metal or plastic. Scratch depth determines the visible symptom, corrosion risk, repair method, cost, and whether polishing can solve the damage. A clean inspection under strong light is the safest way to classify one.
Key Facts at a Glance
A clear coat scratch affects transparent finish only and usually responds to compound and polish.
A base coat scratch removes colored paint and normally requires color-matched touch-up paint.
A primer scratch appears grey, white, or black because the color coat has been breached.
A deep scratch exposes steel, aluminum, or bumper plastic and needs prompt sealing.
A fingernail test helps, but it cannot reliably measure every scratch depth.
Polishing removes surrounding clear coat; it cannot replace missing color or primer.
Why Scratch Depth Determines the Repair
Scratch depth determines repair difficulty because automotive paint is a thin layered system rather than one solid coating. Removing material from only the clear coat may be correctable by leveling and polishing, while removing the base coat requires new pigment and breaching the primer can expose corrosion-sensitive metal.
A typical factory finish has a clear coat around 1.5-2.0 mils thick, or approximately 0.038-0.050 millimeters. The base coat is often about 0.5-1.0 mil, although factory systems vary by manufacturer, color, panel, and application method. These figures are typical ranges, not a safe sanding allowance.
Professional detailers use a paint-thickness gauge when the repair requires sanding or machine polishing near an edge. The gauge measures the complete coating stack, not the remaining clear coat alone. Consequently, an apparently shallow scratch can become a respray if aggressive correction removes too much surrounding finish.
What Layers Does Automotive Paint Have?
Automotive paint usually contains four relevant layers, listed from outside to inside:
| Layer | Typical role | Common appearance when damaged |
|---|---|---|
| Clear coat | Gloss, UV resistance, chemical protection | Gloss loss, white haze, fine lines |
| Base coat | Color pigment and metallic or pearl effect | Color interruption or lighter stripe |
| Primer | Adhesion, filling, corrosion protection | Grey, white, beige, or black line |
| Substrate | Steel, aluminum, plastic, fiberglass, composite | Silver metal, dull aluminum, black or grey plastic |
Some vehicles use a sealer between primer and base coat, and some colors use a three-stage system. A tri-coat finish commonly includes a ground coat, a translucent mid-coat, and clear coat, so a small touch-up may never match perfectly without blending.
What Are the Four Types of Car Paint Scratches?
The four main types of car paint scratches are clear coat scratches, base coat scratches, primer scratches, and substrate scratches. The visible color inside the groove provides the strongest initial clue, but inspection should follow washing because transferred paint and road contamination can imitate deeper damage.
| Scratch type | Layer breached | Reliable visual clue | Typical repair |
|---|---|---|---|
| Clear coat | Clear coat only | Diminishes when wet; no color loss | Compound and polish |
| Base coat | Clear coat and colored paint | Original color is missing | Color-matched touch-up |
| Primer | Clear coat, base coat, and primer boundary | Grey, white, or black line | Primer, base coat, clear coat |
| Deep substrate | All paint layers | Silver metal or raw bumper plastic | Corrosion treatment and refinish |
The categories describe depth, not width. A broad shallow haze can be clear-coat damage, while a narrow key mark can reach bare steel.
How Can You Identify a Clear Coat Scratch?
A clear coat scratch affects only the transparent outer finish and usually looks like a fine white line, haze, or network of swirls without a contrasting color inside the groove. If the mark becomes much less visible when the panel is wet and your fingernail glides over it, polishing may correct it.
Clear-coat damage commonly comes from automatic brushes, dusty towels, dry wiping, abrasive snow removal, and contaminated wash mitts. Repeated circular marks are usually called swirl marks, although the damage is made of many tiny linear scratches rather than true circular cuts.
Wash the panel before judging it. Transfer from a wall, bumper, rubber trim, or another vehicle may sit above the clear coat and can sometimes be removed with a solvent approved for automotive finishes. Do not use household acetone or harsh abrasive cleaners.
A practical correction sequence is:
- Wash and dry the panel.
- Remove bonded contamination with automotive clay if needed.
- Test a mild finishing polish on a small area.
- Move to a compound only if the polish fails.
- Wipe, inspect under direct light, and apply protection.
You should stop when the scratch remains visible after one or two controlled passes. Continued polishing can create a larger dull area, especially on sharp edges and repainted panels.
Can Every Clear Coat Scratch Be Buffed Out?
No. A scratch can be polished only when enough clear coat remains around and beneath the damaged area. If a fingernail catches sharply, the groove exposes another layer, or the mark remains equally visible when wet, polishing alone is unlikely to restore the finish.
The fingernail test is a screening method, not a depth gauge. A soft nail can miss a narrow cut, while a rough edge can catch even when the damage is mostly superficial. Use the test after cleaning and never press hard enough to enlarge the mark.
How Do Base Coat Scratches Look?
A base coat scratch has removed some or all of the colored paint beneath the clear coat, so the groove remains visible when wet and often catches a fingernail. The exposed line may look lighter, duller, or slightly different from the vehicle’s original color, but it may not yet show grey primer.
Shopping carts, keys, bicycle pedals, branches, and low-speed side contact frequently cause base coat damage. Paint loss may occur only at the highest points of the scratch, leaving an irregular edge that makes a simple paint pen repair more visible.
A paint pen can protect and improve an isolated mark, but it does not reproduce factory spray orientation, metallic flake distribution, or clear-coat leveling. Metallic and pearl finishes are particularly difficult because the apparent color changes with viewing angle and light direction.
For a better result, use the manufacturer’s paint code rather than a generic color name. The code may appear on the driver-door jamb, body identification label, service information, or manufacturer parts system.
What Does a Primer Scratch Look Like?
A primer scratch cuts through the clear coat and base coat and exposes the underlying primer, which commonly appears grey, white, beige, or black. The contrasting line remains visible when wet, catches a fingernail, and cannot be removed by compound because the missing layers must be replaced.
Primer is not the same as a finished protective surface. It promotes adhesion and may provide some corrosion resistance, but exposed primer can absorb contamination and leaves surrounding edges vulnerable to further peeling.
Stone impacts, handlebars, parking barriers, and deep door strikes can reach primer. Repair usually requires cleaning, light preparation, primer in the damaged valley, color-matched base coat, and clear coat. Applying color directly over bare primer may leave poor adhesion or a visible low spot.
A primer scratch on a flat, isolated area can sometimes receive a careful touch-up. Damage crossing a crease, wheel arch, door edge, or multiple panels is much harder to blend because sanding and color transition must follow the panel geometry.
When Does a Scratch Expose Metal or Plastic?
A deep scratch exposes the body-panel substrate after breaching clear coat, base coat, and primer. Silver or bright metal indicates steel or aluminum, while a dull black, dark grey, or textured surface often indicates bumper plastic or another composite material.
Steel can develop orange-brown corrosion when moisture and oxygen reach the exposed surface. Aluminum does not form red rust, but exposed aluminum can oxidize and paint adhesion can deteriorate. Plastic bumpers do not rust, although exposed plastic can become chalky, contaminated, or difficult to refinish.
Do not leave bare steel untreated while waiting for a cosmetic repair. Clean and dry the area, remove loose corrosion, and apply a compatible temporary touch-up or corrosion-protection product according to its label. A temporary seal prevents worsening but does not create an invisible repair.
Accident damage may also hide denting, stretched metal, broken clips, sensor damage, or panel misalignment. A deep line near a bumper radar sensor, parking sensor, headlamp, door latch, or structural seam deserves professional inspection.
How Do Scratch Repairs Compare?
Clear-coat correction is the least expensive repair because it removes or levels surrounding finish rather than replacing missing color. Deep substrate damage costs more because the technician must prepare the surface, rebuild the coating layers, blend color, and often refinish part or all of a panel.
| Damage level | DIY materials | Typical DIY time | Typical professional price |
|---|---|---|---|
| Clear coat | $15-$60 | 30 minutes-2 hours | $80-$250 per panel |
| Base coat | $30-$90 | 1-3 hours, plus curing | $200-$600 |
| Primer | $45-$120 | 2-5 hours, plus curing | $350-$850 |
| Bare metal or plastic | $60-$150 | 3-8 hours, plus curing | $500-$1,500+ |
These are typical US ranges for an isolated scratch, not published fixed prices. Labor rates, location, panel size, paint type, rust, denting, blending, and shop equipment can change the total substantially. A tri-coat pearl repair or damage spanning two panels may exceed these ranges.
| Decision factor | Polishable clear coat | Touch-up repair | Body-shop refinish |
|---|---|---|---|
| Missing color | No | Yes, isolated area | Yes, blended area |
| Exposed steel | No | Only for tiny protected spots | Yes, preferred |
| Metallic finish | Usually straightforward | Match may be visible | Better blend |
| Body-line damage | Risk increases at edges | Limited suitability | Best control |
| Appearance target | Improved gloss | Protective improvement | Closest factory result |
How Do You Repair a Clear Coat Scratch?
Repair a clear-coat scratch by cleaning the panel, testing a mild polish, using compound only when necessary, and restoring protection. The process usually takes 30 minutes to two hours, but the success factor is preserving enough surrounding clear coat rather than maximizing abrasion.
Step 1: Wash and Inspect the Panel
Use automotive shampoo, clean water, and a clean microfiber towel. Dry without dragging grit across the paint. Inspect in daylight or under a color-correct inspection lamp from several angles.
You will know the inspection worked when loose dirt, wax residue, and paint transfer no longer outline the mark. A common mistake is polishing contamination into the finish.
Step 2: Test the Least Aggressive Product
Apply a small amount of finishing polish to a foam or microfiber applicator and work an area approximately 20 by 20 centimeters. Use moderate hand pressure for 30-60 seconds, then wipe and inspect.
You will know the test worked when haze decreases and the scratch becomes less visible without a larger dull patch. A common mistake is beginning with a heavy compound or coarse pad.
Step 3: Compound Only When Necessary
Use a fine or medium automotive compound in two short passes, keeping the pad flat and away from sharp edges. A dual-action polisher is safer than a rotary machine for inexperienced users, but either tool can remove excessive material.
You will know the correction is sufficient when the defect is reduced to an acceptable level under direct light. A common mistake is chasing the final faint line until the surrounding clear coat becomes visibly thinner.
Step 4: Polish and Protect
Follow compound with finishing polish, remove residue, and apply wax, synthetic sealant, or a compatible ceramic coating. Protection does not rebuild missing clear coat, but it reduces contamination and improves water behavior.
You will know the finish is ready when gloss is uniform and no oily residue masks the defect. Check again after the panel cools and dries.
How Do You Repair Deeper Paint Scratches?
Repair a deeper scratch by stabilizing the substrate, rebuilding the missing layers in thin coats, leveling the cured repair, and polishing the surrounding finish. The method suits small isolated damage on a flat panel, while long scratches, rust, body lines, and tri-coat finishes are better handled professionally.
Step 1: Clean and Remove Corrosion
Wash the panel, dry it fully, and clean the groove with an automotive-safe panel wipe or isopropyl alcohol used according to product guidance. Remove loose rust without widening the damage.
Do not seal active orange-brown corrosion beneath touch-up paint. Rust left under the repair can continue spreading and lift the surrounding coating.
Step 2: Mask and Prime When Required
Mask the surrounding area with automotive masking tape. Apply compatible primer in very thin layers only where the substrate is exposed, allowing the label-specified flash and cure time.
A common mistake is using household primer, which may contain solvents or binders incompatible with automotive refinishing materials.
Step 3: Add Color-Matched Base Coat
Apply two or three thin color coats with a fine applicator, allowing approximately 10-20 minutes between coats when the product instructions permit. Fill the valley gradually instead of leaving a thick raised blob.
The repair should sit slightly below or near the surrounding surface before clear coat. Exact behavior varies by paint-pen formula and temperature.
Step 4: Apply Clear Coat and Cure
Apply thin clear-coat layers after the color has dried. Leave the repair undisturbed for at least 24-48 hours, or follow the product’s specified cure time.
A common mistake is wet-sanding a soft repair. Sanding before adequate curing can pull paint from the groove and create a larger low spot.
Step 5: Level and Polish Carefully
For experienced DIY users, use 2000-3000 grit wet abrasive on a small rigid or foam block with soapy water. Keep the abrasive on the raised repair, then compound and polish after leveling.
Never wrap sandpaper around bare fingers. Finger pressure creates uneven troughs in the original clear coat. Stop if the surrounding finish becomes dull beyond the intended repair zone.
When Should You Use a Body Shop?
Use a body shop when a scratch exposes steel, spans a body line, includes a dent, crosses multiple panels, shows spreading rust, or must be nearly invisible under direct sunlight. Professional repair is also the safer choice for leased vehicles, collector cars, tri-coat finishes, and late-model panels with sensors.
A body shop can measure coating thickness, identify previous repairs, mix or scan color, blend adjacent areas, and cure the finish under controlled conditions. A detailer is appropriate for clear-coat correction but may not provide panel refinishing.
Ask for an itemized estimate showing preparation, primer, base coat, clear coat, blending, parts, and taxes. Compare the repair price with the vehicle’s age, insurance deductible, lease return standard, and the visual importance of the panel.
What Mistakes Make Scratch Repairs Worse?
The most expensive mistake is treating missing paint as a polishing problem. Abrasive correction can improve gloss around a scratch, but it cannot replace pigment, primer, or metal protection.
| Mistake | Result | Better practice |
|---|---|---|
| Polishing a nail-catching groove repeatedly | Oversized clear-coat failure | Test once, then touch up or refer |
| Using generic black or silver paint | Obvious color mismatch | Match the OEM paint code |
| Applying one thick paint blob | Raised, uneven repair | Build thin coats with a micro-applicator |
| Sanding with bare fingers | Wavy surrounding finish | Use a small rigid backing block |
| Ignoring orange rust | Corrosion under new paint | Remove corrosion before sealing |
| Inspecting under weak garage light | Missed haze and color mismatch | Use daylight and angled inspection light |
Paint transfer is another common trap. A dark streak on a light panel may be material sitting on top, not a cut through the clear coat. Cleaning and solvent-safe removal should precede sanding.
Which Scratch Repair Is Best for Your Situation?
Choose the repair method according to the deepest breached layer, the panel material, and the required appearance. A daily driver may need only corrosion protection, while a luxury vehicle or lease return may justify a blended professional refinish.
| Owner situation | Recommended action | Avoid |
|---|---|---|
| Older daily driver, plastic bumper | Clean, seal, and use touch-up if desired | Paying for invisible blending |
| New vehicle, shallow swirls | Professional or careful DA polishing | Automatic brush washes |
| Small base-coat mark | OEM paint pen and controlled clear coat | Generic hardware-store paint |
| Bare steel on a door | Prompt corrosion protection and estimate | Leaving it exposed |
| Pearl or tri-coat finish | Professional color blending | Expecting a perfect pen match |
A quick protective repair is different from a flawless aesthetic repair. Touch-up paint can stop contamination and corrosion while remaining visible; a body-shop refinish can improve appearance but may cost several hundred dollars.
How Can You Prevent New Paint Scratches?
Prevent new paint scratches by removing grit before contact, using separate wash and wheel tools, and drying with clean, high-quality microfiber towels. Washing technique has more effect on swirl formation than the shampoo brand.
Use a two-bucket method with a grit guard, wash from the roof downward, rinse the mitt frequently, and never wipe a dusty dry panel. Replace towels when they are contaminated, and avoid placing them on the ground or inside wheel wells.
Automatic systems with abrasive brushes create more mechanical contact than touch-free systems, although touch-free washes may use stronger detergents and high-pressure water. Neither method eliminates all risk. Paint protection film offers the strongest defense against stone chips on leading edges, while ceramic coatings mainly improve chemical resistance and cleaning behavior.
Frequently Asked Questions
Is a Scratch That Disappears When Wet Fixable?
A scratch that nearly disappears when wet is often limited to the clear coat, so compound and polish may reduce it substantially. The wet test is not conclusive because water temporarily changes light reflection and can hide some deeper damage. Clean the panel, inspect when dry, and stop polishing if the mark catches strongly.
Can Toothpaste Remove Car Scratches?
Toothpaste is not a reliable automotive scratch remover because its abrasive size, lubrication, and chemical behavior are not controlled for clear coat. It may temporarily reduce very fine haze while creating uneven gloss or residue. A purpose-made automotive polish provides a known cut level and is safer for paint correction.
Will a Car Wash Remove Paint Scratches?
A car wash can remove dirt and some superficial transfer, but it cannot replace missing clear coat, color, primer, or metal protection. Brush systems may create additional micro-scratches when trapped grit contacts the finish. Wash the vehicle before diagnosis, then use polishing or touch-up based on the damaged layer.
How Long Can Bare Metal Stay Unrepaired?
Bare steel should be protected as soon as practical, preferably the same day or within a few days in wet, salty, or humid conditions. Rust development depends on exposure, temperature, contamination, and climate. Temporary cleaning and touch-up can limit deterioration, but permanent repair still requires proper preparation.
Is a Paint Pen Better Than Professional Repair?
A paint pen is better for protecting a small isolated chip or scratch at low cost, not for producing an invisible finish. Professional repair is better when color matching, blending, corrosion removal, dents, body lines, or multiple panels are involved. Paint pens work best on small flat areas with an exact OEM color code.
Does a Plastic Bumper Scratch Need Rust Protection?
A plastic bumper cannot develop steel rust, so rust treatment is unnecessary when only plastic is exposed. The area should still be cleaned and sealed because exposed plastic can collect contamination and create adhesion problems during later refinishing. Deep bumper damage may also involve broken tabs, sensor mounts, or underlying deformation.
Conclusion: Classify the Layer Before Choosing a Repair
The different types of car paint scratches are identified by the deepest layer they reach: clear coat, base coat, primer, or metal or plastic substrate. Polish clear-coat damage, use matched touch-up paint for limited color loss, and protect exposed metal promptly. When the scratch crosses edges, includes rust or dents, or demands a factory-quality result, choose a qualified body shop.


