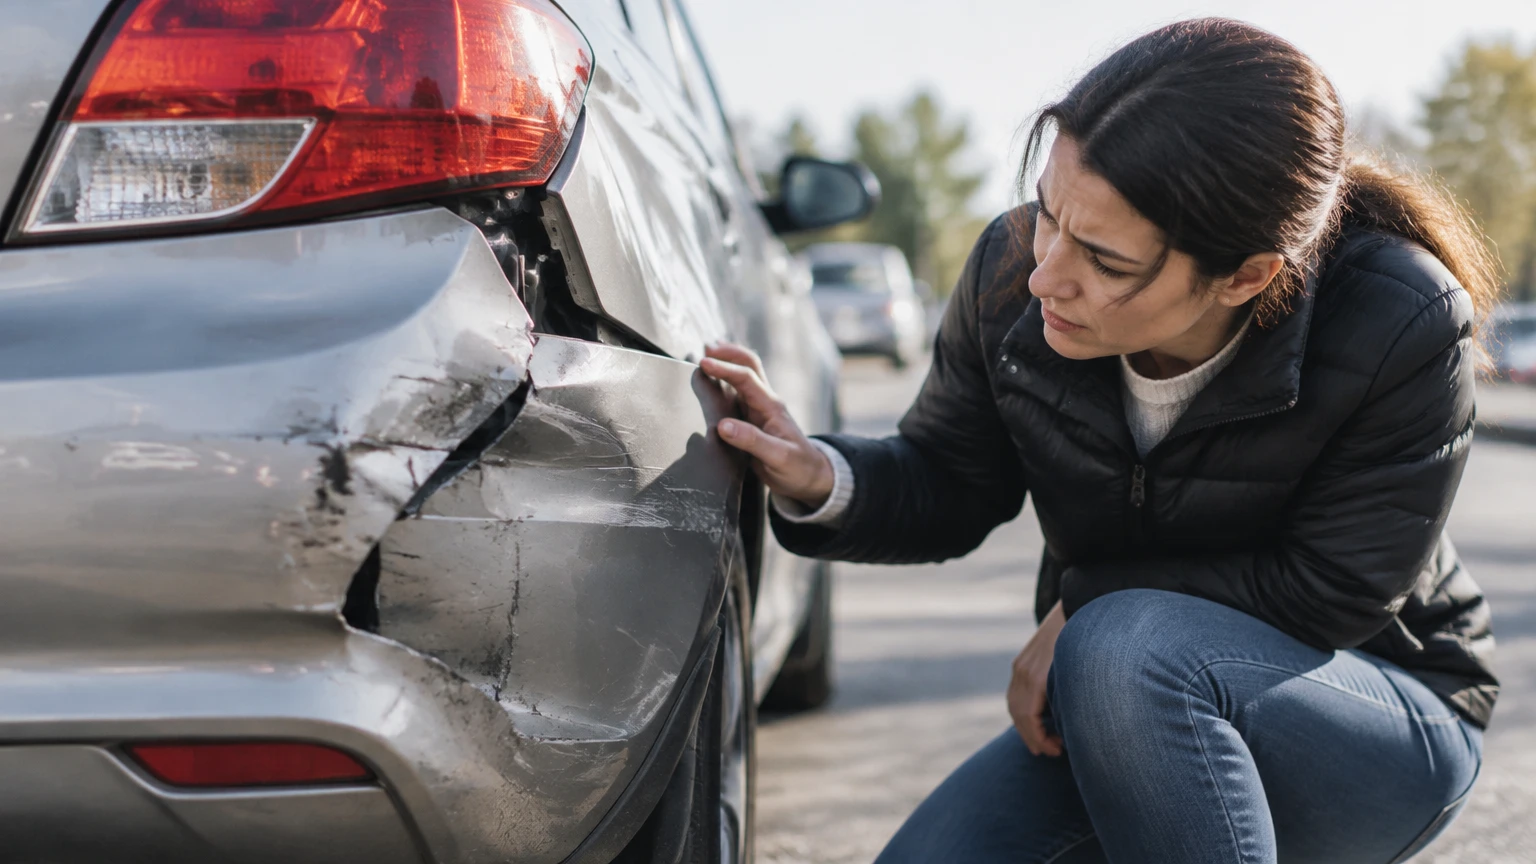
Is It Safe to Drive With a Damaged Bumper? Usually, only when the damage is cosmetic and the bumper remains firmly attached, clear of the tires, lights, and road surface. A loose, hanging, sharply broken, sensor-affected, or structurally damaged bumper should not be driven normally because it can detach, interfere with steering, or reduce protection in another collision.
Key Facts at a Glance
- A bumper system includes the outer cover, energy absorber, reinforcement beam, mounting hardware, and sometimes driver-assistance sensors.
- Small paint scuffs and shallow scratches usually do not affect drivability when no mounting point, light, sensor, or internal component is damaged.
- A bumper that touches a tire, drags on pavement, obscures a lamp, or moves freely requires towing or immediate professional securing.
- A dashboard warning for an airbag, radar, collision-warning, or blind-spot system requires diagnosis before normal driving.
- A visible bumper cover can look acceptable while a crushed absorber, bent reinforcement beam, or displaced sensor remains hidden.
- Typical body-shop pricing ranges from about $150-$450 for cosmetic work to $1,200-$3,500 or more for structural and sensor-related repairs.
What Does a Bumper Actually Do?
A modern bumper is a layered impact-management system, not merely a painted plastic panel. The visible fascia controls appearance and airflow, the energy absorber reduces low-speed impact energy, and the reinforcement beam transfers larger loads into the vehicle structure.
The bumper cover is commonly made from thermoplastic olefin or another flexible polymer. It protects components from water and debris, supports trim and lamps, and may provide the mounting surface for ultrasonic parking sensors. The cover itself is often replaceable, but its condition does not prove that the parts behind it are sound.
The energy absorber sits behind the fascia. Common designs use expanded polypropylene foam or molded plastic structures that deform during a low-speed collision. Once crushed, an absorber may not provide the same protection during a later impact, even if the exterior panel is clipped back into position.
The reinforcement beam, sometimes called the rebar, is a steel or aluminum member attached to crash-management brackets or the body structure. A bent beam can indicate more serious impact loading. Do not straighten or reuse a reinforcement component without following the vehicle manufacturer’s repair procedure.
Which bumper components can be damaged?
| Component | Typical location | Visible symptom | Main concern |
|---|---|---|---|
| Fascia or cover | Exterior surface | Crack, scuff, dent, missing section | Detachment, sharp edges, water exposure |
| Energy absorber | Behind fascia | Often invisible | Reduced performance in another impact |
| Reinforcement beam | Behind absorber | Usually invisible | Altered crash-load management |
| Mounting bracket | Fender, body, or bumper edge | Sagging corner, uneven gap | Fascia separation or tire contact |
| Sensor and wiring | Behind or inside fascia | Warning light, false alerts | Incorrect detection or calibration |
Is It Safe to Drive With a Scratched or Scuffed Bumper?
A scratched, scuffed, or lightly dented bumper is generally safe to drive when the cover is secure and no other vehicle system is affected. Cosmetic damage should still be checked for broken clips, exposed sharp plastic, displaced lamps, and sensor damage before the vehicle returns to normal use.
A paint transfer mark usually affects appearance rather than structural performance. A shallow dent in flexible plastic can also be harmless if the panel has returned to its mounting points and does not interfere with radar, parking sensors, lamps, or the wheel opening.
The important distinction is between surface damage and attachment damage. A crack that passes through the entire cover can spread through vibration and wind pressure. A seemingly small impact can also break a hidden bracket or move a sensor by a few millimeters.
| Damage type | Typical drivability | Typical repair | Typical cost |
|---|---|---|---|
| Paint scuff under 10 cm | Usually normal driving | Cleaning, polishing, touch-up | $50-$250 |
| Shallow plastic dent | Usually normal if secure | Heat repair or replacement | $150-$600 |
| Through-crack under 15 cm | Short local trip only after inspection | Plastic repair or cover replacement | $300-$900 |
| Broken mounting tab | Avoid highway driving | Tab, bracket, or cover repair | $200-$800 |
| Crushed absorber or bent beam | Do not drive normally | Structural inspection and replacement | $1,000-$3,500+ |
Prices are typical United States body-shop ranges, not fixed estimates. Paint color, vehicle model, labor rates, parts availability, and sensor calibration can change the total substantially.
Can You Drive With a Cracked Bumper?
A cracked bumper may permit a short, slow trip only when the crack is stable, the panel is firmly attached, and the crack cannot reach a tire, lamp, or pedestrian contact area. A spreading crack, missing section, exposed sharp edge, or loose corner makes towing the safer choice.
A crack becomes more hazardous when it reaches a mounting hole, wheel arch, lower lip, or sensor opening. Those areas experience repeated vibration and movement. Highway air pressure can pull a loose edge outward, while road debris can turn a partial split into complete panel separation.
Do not judge a crack solely by its length. A 5-centimeter crack through an attachment point can be more urgent than a 20-centimeter crack in an isolated flat section. Pressing the panel lightly should not produce substantial movement or a clicking sound from broken clips.
For a necessary trip to a nearby repair facility, use only manufacturer-compatible temporary fastening and keep speed low. Temporary tape is not a structural repair. Avoid highways, heavy rain, darkness, and traffic speeds that could cause the panel to detach.
Can You Drive With a Loose or Hanging Bumper?
A loose or hanging bumper should not be driven in ordinary traffic. The panel can fall onto the road, rub against a tire, obscure a lamp, strike another vehicle, or create a sharp projection for a cyclist or pedestrian.
A sagging corner usually indicates broken clips, brackets, fasteners, or body-side mounting points. The damage may also extend behind the visible cover. Zip ties can sometimes hold a small trim edge temporarily, but they are not a reliable repair for highway loads or a damaged bracket.
Stop driving immediately if any of these conditions exists:
- The bumper touches a tire during full-left or full-right steering.
- The bumper hangs below its normal position or drags on the road.
- The panel moves several centimeters when gently pressed.
- A crack exposes a sharp, jagged, or pointed edge.
- The bumper blocks a headlamp, tail lamp, turn signal, or license plate.
- Wiring, radar units, or sensor connectors are loose or exposed.
- The vehicle has an airbag, restraint, collision-warning, or blind-spot warning.
A tow is cheaper than repairing a tire damaged by plastic contact or recovering a bumper that has detached into traffic.
How Can You Inspect a Damaged Bumper Before Driving?
A parked inspection takes about 5-10 minutes and can identify obvious no-drive conditions, but it cannot certify hidden structural integrity. Inspect the vehicle in daylight on level ground, with the engine off initially and the wheels turned only when safe.
Step 1: Check the bumper’s attachment
Compare the damaged side with the undamaged side. Look for uneven gaps at the fender, grille, trunk, headlamp, or tail lamp. Gently press the outer edge with an open hand; the panel should not swing, click, or pull away from the body.
Success checkpoint: The bumper remains aligned and moves only slightly with firm hand pressure.
Common mistake: Pushing hard enough to break an already damaged clip.
Step 2: Check tire and wheel clearance
Turn the steering wheel fully left and fully right while the vehicle is stationary. Inspect the gap between the bumper, wheel-arch liner, tire, and suspension area. A rear bumper should also be checked near the tire edges and exhaust outlet.
Success checkpoint: No plastic, liner, bracket, or wiring touches the tire in either direction.
Common mistake: Checking only with the wheels straight.
Step 3: Check lights, plate, and sharp edges
Confirm that headlights, tail lamps, turn signals, reflectors, and the license plate remain visible and correctly mounted. Cover or remove nothing with tape that a road user needs to see. Sharp broken plastic should not remain exposed.
Success checkpoint: Lighting and identification equipment are unobstructed and secure.
Common mistake: Assuming a lamp works because its lens is unbroken, without testing the turn signal, brake light, and reverse light.
Step 4: Scan dashboard warnings
Start the vehicle and allow the normal warning-light check to finish. Pay attention to SRS or airbag, adaptive-cruise, forward-collision, parking-sensor, blind-spot, and lane-support warnings.
Success checkpoint: No new safety-system warning remains illuminated.
Common mistake: Clearing a warning with a code reader without repairing or calibrating the cause.
Step 5: Look underneath
Use a flashlight without placing your body under an unsupported vehicle. Check for hanging undertrays, fluid leaks, crushed foam, bent metal, exposed wiring, and exhaust damage. A rear impact can push the bumper into the exhaust system or trunk floor.
Success checkpoint: No leak, loose wiring, dragging panel, or visibly bent structural component appears.
Common mistake: Treating a dry exterior cover as proof that internal parts are undamaged.
When Does Bumper Damage Require Towing?
Bumper damage requires towing when the vehicle cannot maintain safe tire clearance, lighting, steering, sensor function, or structural integrity. Towing is also appropriate when the damage resulted from a collision strong enough to trigger airbags, move body panels, leak fluids, or alter wheel alignment.
| Condition | Drive to a shop? | Recommended action |
|---|---|---|
| Paint scuff, secure cover, no warning | Yes | Schedule cosmetic repair |
| Stable crack away from tire and lamps | Possibly, local only | Avoid highway speeds and arrange repair |
| Loose corner with no tire contact | Only if professionally secured | Use a nearby shop or mobile repairer |
| Hanging fascia, sharp edge, or dragging panel | No | Tow or obtain roadside securing |
| Airbag, SRS, radar, or collision warning | No normal driving | Diagnostic inspection and calibration assessment |
| Bent beam, crushed absorber, fluid leak, or alignment issue | No | Tow for collision inspection |
A professional inspection is especially important after a hit at a parking-lot speed because modern bumpers can hide damaged brackets, absorbers, and sensor mounts. The absence of an airbag deployment does not prove that the bumper system is undamaged.
Can Bumper Damage Affect Airbags or ADAS?
Bumper damage can affect advanced driver-assistance systems, but a damaged bumper does not automatically prevent airbags from deploying. Airbag deployment depends on crash sensors, restraint-control software, impact direction, severity, and vehicle-specific thresholds, while bumper-mounted radar and ultrasonic sensors have separate diagnostic and calibration requirements.
Front bumpers may contain or sit near radar units, parking sensors, external temperature sensors, cameras, and wiring harnesses. Rear bumpers commonly contain parking sensors and blind-spot monitoring radar. A displaced bracket can change sensor angle even when the fascia looks nearly normal.
A warning light is one sign of a problem, but no warning light is not conclusive. Some systems can remain within a broad self-check range while providing degraded detection. A repair facility should consult the manufacturer’s service information to determine whether calibration, aiming, a diagnostic scan, or a road test is required.
Sensor calibration may be required after bumper replacement, radar removal, bracket damage, wheel-alignment changes, or an impact near the sensor. Calibration methods vary. Some use a fixed target at a measured distance; others require a specified road test or both.
How Much Does Damaged Bumper Repair Cost?
Damaged bumper repair typically costs $150-$450 for minor cosmetic work, $300-$900 for plastic or mounting repairs, and $1,200-$3,500 or more when structural components, replacement parts, paint, and sensor calibration are involved.
| Repair pathway | Typical labor time | Typical United States cost | Often includes |
|---|---|---|---|
| Polish and touch-up | 2-5 hours | $50-$250 | Cleaning, sanding, paint correction |
| Plastic welding | 4-12 hours | $300-$800 | Crack repair, reinforcement, refinishing |
| Bumper-cover replacement | 1-3 days | $700-$1,800 | Cover, paint, clips, installation |
| Absorber or beam replacement | 2-5 days | $1,200-$3,500+ | Structural parts and collision inspection |
| ADAS diagnosis and calibration | 2-8 hours | $250-$1,200 | Scan, aiming, calibration, road test |
A replacement cover may cost less than extensive plastic repair when labor, repainting, and hidden broken tabs are included. A recycled part can reduce the estimate, but color matching, sensor openings, and mounting accuracy must be checked.
Insurance coverage depends on the policy, deductible, fault, and collision circumstances. Photograph the vehicle before temporary repairs, retain police or incident documentation where applicable, and ask the insurer whether an approved inspection is required.
Is It Legal to Drive With a Damaged Bumper?
Whether driving with a damaged bumper is legal depends on the jurisdiction and the exact equipment affected. Many regions require secure body components, functioning lights, visible license plates, and no dangerous projection, but a cosmetic scuff alone is rarely treated like a safety defect.
Road rules differ between states, provinces, and countries. Some inspection programs specifically assess bumper height, attachment, sharp edges, lamps, and structural condition. A vehicle can be mechanically drivable yet fail a safety inspection or receive a citation if the damage creates a hazard.
Do not rely on legality as a substitute for safety. A legal cosmetic defect can still conceal a crushed energy absorber or misaligned sensor. Contact the local motor-vehicle authority or inspection station for the controlling rule in your location.
What Should You Do After a Minor Bumper Collision?
After a minor collision, document the scene, inspect the vehicle, and arrange a professional assessment before assuming the damage is cosmetic. Photograph all gaps, cracks, lamps, dashboard warnings, license plates, and the area behind the bumper if accessible without disassembly.
Use this sequence:
- Move to a safe location if the vehicle remains controllable.
- Check occupants for injury and follow local collision-reporting requirements.
- Photograph the exterior from several angles.
- Record warning lights and sensor messages.
- Check tire clearance, lights, leaks, and loose parts.
- Avoid washing away paint transfer or discarding broken pieces before documentation.
- Ask a collision repairer whether calibration and structural inspection are required.
- Tow the vehicle if any no-drive condition is present.
A low-speed impact can damage parking sensors without affecting handling. Conversely, a large cosmetic crack can sometimes remain safely attached. The inspection must follow the actual failure mode, not merely the apparent size of the mark.
Common Mistakes With Damaged Bumpers
Driving on the highway with tape
Duct tape may hold a light trim edge during a very short local trip, but heat, rain, dirt, and aerodynamic load reduce adhesion. Tape cannot restore a broken bracket or guarantee tire clearance.
Clearing warning lights
Erasing a diagnostic code removes information, not the fault. A body shop should identify why the warning appeared and confirm system status after repair.
Assuming airbags are fine
No airbag deployment does not certify the bumper absorber or reinforcement beam. Airbag operation and bumper condition are related to the same collision but are not interchangeable tests.
Using generic replacement parts without sensor checks
A replacement fascia may have incorrect sensor apertures, bracket geometry, or material thickness. Sensor mounting accuracy matters more than visual similarity.
Waiting because the car still drives normally
Handling can remain normal while a bumper edge progressively loosens. Vibration and weather often turn a manageable defect into a road hazard.
When Is a Mobile Repairer Appropriate?
A mobile repairer is appropriate for a secure cosmetic defect, a small plastic crack, or a broken nonstructural trim mount when no warning light, tire interference, or hidden collision concern exists. A conventional collision shop is preferable when the impact affected a beam, absorber, body mount, lighting assembly, or ADAS sensor.
Mobile plastic welding can reduce towing and labor costs, but the service is not suitable for a bent reinforcement beam, crushed absorber, damaged radar bracket, or uncertain post-collision structure. Ask whether the technician will inspect mounting points and document sensor requirements rather than merely make the panel look aligned.
The Bottom Line
Is It Safe to Drive With a Damaged Bumper? Drive normally only when the damage is cosmetic, the bumper is firmly attached, tire and road clearance are intact, all lights and plates remain visible, and no safety-system warning appears. Do not drive a loose, hanging, sharp, dragging, structurally damaged, or sensor-affected bumper; arrange professional securing or tow the vehicle instead.
Frequently Asked Questions
Can I drive without a front bumper?
Driving without a front bumper may be illegal and can expose wiring, cooling components, lamps, and sensor hardware. The vehicle may also have sharp edges or an unsecured license plate. If the bumper detached after a collision, inspect the reinforcement, absorber, lamps, and ADAS components before deciding whether towing is necessary.
How far can I drive with a damaged bumper?
There is no universal safe distance. A secure cosmetic scuff may be driven normally, while a loose panel should travel only as far as necessary to reach a safe stopping point or nearby repair facility. Any tire contact, dragging part, warning light, or structural concern changes the recommendation to towing.
Can a cracked bumper be repaired instead of replaced?
A cracked thermoplastic cover can often be plastic-welded when the material is repairable and the mounting points remain sound. Replacement is usually preferable when the crack reaches several attachment points, the cover is badly deformed, tabs are missing, or sensor apertures and brackets no longer align.
Does bumper damage affect wheel alignment?
Bumper damage does not automatically change wheel alignment, but a substantial impact can damage suspension, steering, wheel, or body mounting points at the same time. Uneven steering, vehicle pull, a new vibration, or an altered wheel position requires an alignment and collision inspection.
Will insurance pay for a damaged bumper?
Insurance may pay when the loss is covered by collision, comprehensive, or another applicable policy provision, subject to the deductible and claim conditions. Coverage differs by jurisdiction and policy. Photograph the damage before repair and ask the insurer whether an approved inspection is required.
Should I repair a bumper before selling the car?
Repairing a bumper before sale can improve appearance and disclose safety issues, but cosmetic work should not conceal structural or sensor damage. Keep invoices and calibration records. A buyer or inspection station may identify unrepaired mounting, radar, lighting, or reinforcement problems even after repainting.


