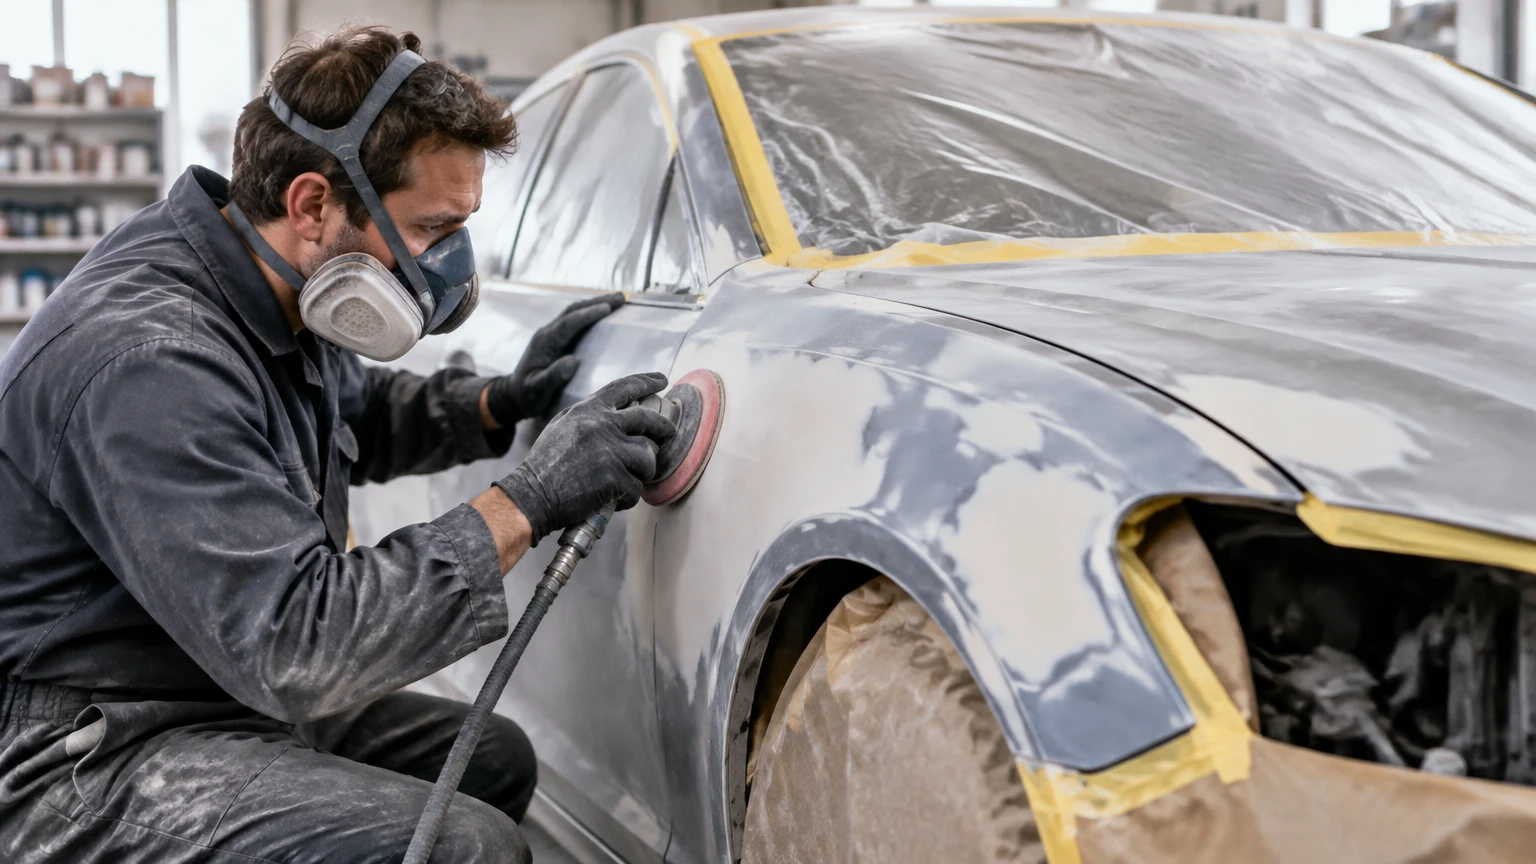
Preparing a car for painting means cleaning, evaluating, repairing, sanding, masking, priming, and inspecting the body before color is sprayed. A complete preparation normally takes 40-60 hours for a DIY full-car project, and surface cleanliness, straightness, and correct primer cure determine more of the final result than paint price.
Key facts at a glance
Stable factory paint usually needs scuffing, not complete removal.
Bare steel should receive compatible epoxy primer promptly to limit moisture-related corrosion.
Body filler belongs on clean, abraded metal or a manufacturer-approved substrate, never on gloss paint.
Typical final sanding is 600 grit for many solid colors and 800 grit for metallic or pearl finishes.
A full DIY preparation commonly costs about $320-$640 before color and clearcoat.
A clean, straight surface matters more than an expensive spray gun.
How Automotive Paint Bonds to a Car
Automotive refinishing depends on mechanical adhesion, chemical compatibility, and contaminant control. Sandpaper creates microscopic scratches that give primer or paint a physical key, while primer resins bond to the prepared substrate and create a consistent surface for the basecoat.
Wax, silicone, oil, and compressed-air moisture interrupt both mechanisms. A tiny contaminant can make a fresh coating retract into a crater, while an invisible coarse scratch can become visible after solvents shrink from the film. Preparation is therefore a controlled substrate process, not merely cosmetic sanding.
What preparation must accomplish
A properly prepared panel has four properties:
- Cleanliness: No wax, grease, silicone, dust, sanding slurry, or moisture remains.
- Stable substrate: Peeling, cracked, swollen, or poorly bonded material has been removed.
- Uniform profile: Dents, filler edges, and old paint transitions cannot be felt or seen under guide coat.
- Compatible surface: The primer, sealer, basecoat, and clearcoat belong to a compatible coating system.
A useful practitioner rule is that your hand detects broad waves better than your eyes, while a guide coat detects shallow lows better than either. Use both methods.
Before You Start: Time, Tools, and Safety
A full-car preparation typically requires 40-60 active labor hours for an amateur and 20-30 hours in a professional shop with dust extraction, lifts, and curing equipment. The range excludes major panel replacement, extensive rust fabrication, paint spraying, and unexpected rework.
| Requirement | Typical quantity or specification | Why it matters |
|---|---|---|
| DA sander | 5 or 6 inch, variable speed | Removes finish and feathers edges efficiently |
| Sanding blocks | 3-5 lengths, rigid and flexible | Prevents finger-shaped grooves |
| Abrasives | 80, 120, 180, 220, 320, 400, 600, 800 grit | Controls removal and scratch refinement |
| Wax and grease remover | 1-2 gallons for a full car | Removes surface contamination |
| Epoxy primer | 1-2 sprayable gallons, mixed | Seals exposed steel |
| High-build primer | 1-2 sprayable gallons, mixed | Fills controlled sanding texture |
| Respirator | Correctly fitted organic-vapor respirator, or supplied air where required | Reduces solvent and particulate exposure |
| Masking materials | 2-3 rolls tape, paper or paint-rated plastic | Controls overspray and hard edges |
| Compressed air | Clean, dry, oil-free supply | Prevents moisture and compressor contamination |
Two-component polyurethane and other isocyanate-containing coatings can create serious respiratory hazards even when odor seems low. A disposable dust mask is not adequate protection. Follow the product Safety Data Sheet, use ventilation, eye protection, gloves, and a properly selected respirator; many professional refinishing systems require supplied-air protection.
What should you verify before sanding?
Confirm the product technical data sheets, panel temperature, ventilation, and repair history before removing material. Product manufacturers differ on recoat windows, maximum film thickness, compatible substrates, and sanding requirements, so the label takes priority over generic grit charts.
Keep the panel between about 18°C and 27°C, or 65°F and 80°F, with humidity preferably below 60 percent. Measure the metal, not only the room. A cold panel can delay solvent release even when the air feels comfortable.
Step 1: Wash and Decontaminate the Car
Wash the vehicle before sanding with a strong automotive detergent or wax-cutting soap, rinse thoroughly, and dry every seam. Follow with a dedicated wax and grease remover applied using the two-cloth method: one cloth wets the panel, and a second clean cloth removes the dissolved contamination before evaporation.
Do not flood door locks, electrical connectors, weatherstripping, or open seams. Blow water from mirrors, handles, trim channels, and panel gaps, then allow trapped moisture to escape before abrasive work.
Work in small sections. Apply the solvent to the cloth or panel according to its technical sheet, wipe in one direction, and immediately remove the residue with a separate lint-free towel. Reusing the wet towel redistributes contamination.
You will know it worked when: the panel has no oily drag, waxy streak, or beading behavior, and a clean towel remains visually clean after a final wipe.
Common mistake: Using lacquer thinner as a universal cleaner. Lacquer thinner can soften old coatings, attack plastics, and move contaminants rather than safely removing them.
Step 2: Remove Trim and Evaluate the Old Finish
Remove parts that should not receive paint, including lamps, handles, emblems, badges, weatherstrips, rubber moldings, antenna bases, and removable grilles. Removing trim produces cleaner edges and exposes rust that masking would hide.
Inspect the old finish under strong side lighting. Stable factory paint can remain as a foundation, but peeling clearcoat, cracking, lifting edges, severe oxidation, and delamination must be removed until the surrounding material is firmly bonded.
| Existing condition | Recommended action | Typical abrasive or method |
|---|---|---|
| Sound factory paint | Scuff and feather | 320-400 grit |
| Faded but bonded clearcoat | Remove failed clear, retain stable layers | DA 120-180 grit |
| Peeling or delaminated coating | Strip beyond every loose edge | DA 80-120 grit or approved stripper |
| Surface rust | Remove corrosion to clean metal | 80 grit, abrasive disc, or blasting |
| Heavy rust perforation | Cut, weld, and protect repair | Fabrication before filler |
| Intricate restoration shell | Controlled media blasting | Low heat, suitable media |
A common error is stripping every panel to bare steel without a reason. Factory primer can be an excellent, stable substrate, and removing it increases corrosion risk, labor, and the area requiring epoxy primer.
You will know it worked when: a sharp scraper or firm tape pull does not lift adjacent coating, and no visible edge continues to delaminate.
Common mistake: Stopping at the apparent edge of a clearcoat failure. Continue removing material until the remaining film has a firmly bonded edge.
Step 3: Repair Dents, Rust, and Deep Scratches
Repair metal damage before final surfacing. Use a work light at a shallow angle, mark low areas, and correct stretched metal or major dents with metalworking tools before applying filler.
Grind or sand the repair area to clean, abraded metal where the filler manufacturer permits it. Extend the feathered preparation beyond the visible damage, but do not create a broad crater by aggressively grinding thin sheet metal.
Mix polyester body filler on a clean nonporous board using the stated hardener ratio. Excess hardener can cause color staining or cure problems; insufficient hardener leaves a soft, clogging surface. Apply thin layers, generally no thicker than the product specifies, and shape the cured filler with 80 grit on a rigid block.
Refine with 120-180 grit, then use polyester glazing putty for pinholes and shallow scratches. Glazing putty is not a substitute for correcting a deep dent or unstable metal.
You will know it worked when: a long block crosses the repair without rocking, and your fingertips cannot detect a perimeter ridge with your eyes closed.
Common mistake: Applying filler over rust, glossy paint, or damp metal. Filler may look sound initially but can lose adhesion or trap corrosion beneath the repair.
Step 4: Feather-Edge and Sand the Surface
Feather the boundary between bare metal, filler, primer, and old paint so each layer transitions gradually. A typical progression is 180 grit, 220 grit, then 320 grit, although the primer manufacturer may specify a different profile.
Use a rigid or semi-rigid block on broad panels and flexible abrasives only where the panel shape requires them. Sand in overlapping crosshatch passes rather than following one direction, because cross-sanding reveals remaining ridges and prevents long directional grooves.
Do not press paper with bare fingers. Fingers conform to waves and create narrow troughs that later appear as sanding scratches or distorted reflections.
| Task | Starting grit | Refinement grit | Checkpoint |
|---|---|---|---|
| Remove damaged paint | 80-120 | 180 | No loose coating remains |
| Shape body filler | 80 | 120-180 | Repair is level without edges |
| Feather old paint | 180 | 220-320 | Transition cannot be felt |
| Prepare sound finish | 320 | 400 | Uniform dull profile |
| Final primer surface | 320-400 | 600-800 | No shiny islands or deep scratches |
You will know it worked when: the transition is dull and continuous, with no visible shiny strip or tactile step.
Common mistake: Jumping directly from 80 grit to 320 grit. Deep scratches remain beneath the finer abrasive and can print through primer after the coating shrinks.
Step 5: Mask the Vehicle Correctly
Mask windows, tires, jambs, engine bays, suspension components, and adjacent panels with automotive tape and paint-rated paper or plastic. Masking should protect the vehicle without creating a sharp paint ridge that later peels.
Use foam transition tape or back-taping in door, hood, and trunk gaps. Back-taping places the tape edge away from the exposed face, allowing overspray to taper rather than form a hard, thick line.
Avoid ordinary thin plastic drop cloths where possible. Static-charged plastic can attract dust and may allow overspray to flake onto the fresh finish. Paint-rated plastic is designed to retain overspray more effectively.
You will know it worked when: every exposed surface is intentional, tape edges are sealed, and no tape edge lies where a sharp paint buildup would be difficult to polish.
Common mistake: Masking over dirt or sanding dust. Contamination trapped beneath tape can transfer to the edge, while loose paper can release debris into the spray area.
Step 6: Prime and Block-Sand the Panels
Apply epoxy primer to exposed steel according to the product’s mix ratio, induction time, nozzle specification, and recoat window. One or two coats commonly seal bare metal, but film thickness must follow the technical sheet.
Apply two or three coats of compatible 2K high-build primer over repairs or the complete vehicle when broad leveling is needed. Allow the stated flash time, often 10-15 minutes at suitable temperature, between coats. Do not confuse flash time with cure time.
After the primer cures, apply a contrasting dry guide coat or a very light mist of compatible aerosol guide material. Block-sand with 320-400 grit using a long block and overlapping crosshatch passes. Guide coat remaining in a low spot indicates that the panel is not yet level.
| Primer layer | Main function | Typical application | Typical wait |
|---|---|---|---|
| Epoxy primer | Seal bare steel and support adhesion | 1-2 coats | Product-specific recoat window |
| 2K high-build surfacer | Fill controlled texture and minor lows | 2-3 coats | 10-15 minutes between coats |
| Guide coat | Reveal lows and sanding islands | Thin mist | Sand after primer cure |
| Sealer, if specified | Uniform color and absorption | 1-2 coats | Often followed by basecoat window |
Repeat prime, guide coat, and block sanding until the guide coat disappears evenly. Do not keep sanding a low spot until the surrounding panel is thin; re-prime the low area or correct the substrate.
You will know it worked when: the block removes guide coat uniformly and the panel shows no isolated shiny islands, pinholes, or remaining repair outlines.
Common mistake: Blocking primer before it has cured enough. Clogged paper, soft edges, and swelling indicate that the film needs more cure time or that the mix ratio and conditions were wrong.
Step 7: Final-Scuff, Clean, and Inspect
Finish-sand the cured surface using the coating manufacturer’s specified grit. As a common practice, 600 grit suits many solid-color systems, while 800 grit provides a safer final profile for metallic and pearl basecoats that can reveal coarse scratches.
Wet sanding reduces airborne dust and paper loading, but water can conceal defects and enter seams. If wet sanding, use clean water, change it frequently, wipe slurry from panel gaps, and allow the body to dry completely before solvent cleaning or spraying.
Blow dust from seams with clean, dry, oil-free air. Wipe with the approved wax and grease remover, then use a tack rag lightly immediately before spraying. A tack rag cannot remove silicone, grease, or wet residue, and aggressive pressure can deposit its own resin.
You will know it worked when: the panel is uniformly dull, dry, smooth to touch, free of visible scratches, and clean under bright angled light.
Common mistake: Spraying immediately after wet sanding. Water trapped behind moldings or inside seams can emerge during painting and contaminate the surface.
Which Preparation Method Should You Use?
Dry DA sanding is the fastest choice for material removal and feathering, while wet sanding is better for controlled final finishing. Chemical stripping and media blasting suit specific restoration conditions, not every ordinary repaint.
| Method | Best use | Typical advantage | Main limitation |
|---|---|---|---|
| Dry DA sanding | Old paint removal and feathering | Fast coverage over large panels | Dust requires extraction and respiratory control |
| Hand wet sanding | Final 600-800 grit finish | Low airborne dust and reduced paper clogging | Water hides defects and must dry fully |
| Chemical stripping | Large compatible steel sections | Removes thick coatings without abrasive labor | Can damage plastics, seams, and fiberglass |
| Media blasting | Rust, complex shapes, restoration shells | Reaches crevices and removes corrosion | Heat can warp thin panels; cleanup is extensive |
Aircraft-grade chemical stripper is not automatically safe for automotive substrates. Test an inconspicuous area and confirm compatibility with aluminum, plastics, filler, seam sealer, and adhesives.
Media blasting is also not a universal shortcut. Thin hood skins, roof panels, and door skins can warp if heat and impact are poorly controlled. A restoration shop should select pressure, media, and panel support.
Timing, Temperature, and Cost
Typical DIY preparation costs $320-$640 before color, clearcoat, major body parts, and spray equipment. Primer and safety equipment create the largest cost variation, while existing rust and the decision to strip stable factory paint determine labor.
| Cost category | Typical DIY range | Main variable |
|---|---|---|
| Sandpaper and blocks | $50-$100 | Panel size and rework |
| Filler and glazing putty | $40-$80 | Dent count and repair depth |
| Tape, paper, and plastic | $30-$60 | Full-car versus panel repair |
| Epoxy and high-build primer | $150-$300 | Brand, activator, and coverage |
| Respirator and protective gear | $50-$100 | Disposable versus reusable equipment |
| Total preparation supplies | $320-$640 | Rust, rework, and product system |
| Activity | Typical active labor | Typical waiting time |
|---|---|---|
| Washing and disassembly | 4-8 hours | 2-12 hours drying |
| Stripping and sanding | 12-24 hours | None to 1 day |
| Dent and filler repair | 6-16 hours | 20-30 minutes per filler cure |
| Priming and blocking | 12-24 hours | 3-24 hours before blocking |
| Final cleaning and masking | 4-8 hours | 1-4 hours before spraying |
| Full DIY preparation | 40-60 hours | 2-7 calendar days |
Humidity above 60 percent can slow evaporation and increase blush or corrosion risk, especially on bare steel. Low temperature slows primer cure, while excessive heat shortens flash time and can trap solvent if the painter follows room-temperature assumptions.
Common Paint-Preparation Failures and Repairs
Fish eyes
Fish eyes are small circular craters caused commonly by silicone, oil, wax, aerosol polish, or contaminated air lines. Stop spraying, allow the coating to cure, identify the contamination source, sand the affected area flat, clean with the approved system cleaner, and repair according to the coating manufacturer’s instructions.
An inline moisture separator does not remove every oil or silicone source. Compressor oil carryover, contaminated hoses, hand lotion, tire dressing, and nearby detailing products can all create the defect.
Sand scratches that swell or reappear
Deep 80-grit scratches can become visible after primer or paint solvents shrink from the film. Sand back with a block using intermediate grits, apply additional compatible surfacer, guide-coat the area, and refine through the required final grit.
Primer clogs the abrasive
Clogging usually means insufficient cure, excessive film build, wrong reducer or activator, incorrect mix ratio, or a panel that is too cold. Waiting longer is safer than adding heat lamps without confirming the product’s curing limits.
Solvent popping
Solvent popping creates pinholes or small bubbles when a fast-drying outer skin traps evaporating solvent below it. Excessive film thickness, short flash time, high temperature, and poor ventilation increase risk. Let the coating cure, sand the defect flat, and reapply within the system’s repair instructions.
Rust returns beneath the repair
Recurring rust usually means corrosion remains in a seam, pinch weld, backside, or porous repair. Cut out perforated steel where necessary, remove corrosion mechanically, apply compatible epoxy to clean metal, and seal exposed edges before filler or surfacer.
Variations for Different Projects
Budget DIY garage repaint
Retain stable factory paint, repair only genuine defects, and use a DA sander with dust extraction. Final hand sanding can reduce airborne dust, but an unsealed garage still needs ventilation, floor cleaning, lighting, and a controlled way to keep insects and household contamination away.
A garage is not automatically suitable for spraying 2K products. If the space lacks safe ventilation and respiratory protection, perform preparation there and use a compliant professional booth for color and clearcoat.
Classic car bare-metal restoration
Strip systematically, document panel condition, and epoxy-prime clean steel promptly. Apply guide coat through several blocking cycles, because show-quality reflections expose shallow waves that a quick scuff-and-shoot repair will hide only temporarily.
Do not leave blasted or chemically stripped steel overnight in humid air. Flash rust can form before the next work session.
Preparing a car for a paint shop
Tell the shop the substrate history, products used, grit sequence, filler locations, and cure times. The safest handoff is often a clean, repaired, epoxy-primed vehicle with the shop’s approval, rather than a final surface covered in an incompatible primer.
Ask the shop whether it wants bare metal, epoxy, high-build primer, or only disassembled and washed panels. Paint systems differ, and a shop may reject unknown coatings to protect its warranty and finish quality.
FAQ
Can I paint over a car’s original paint?
Yes, if the original coating is firmly bonded, compatible, and thoroughly scuffed. Remove peeling clearcoat, cracking, swollen areas, and corrosion rather than burying them. A stable factory finish can reduce labor and preserve a proven substrate, but every edge must be feathered until it cannot be felt.
Do I need epoxy primer on the entire car?
No. Epoxy primer is most important on exposed steel and other substrates that require corrosion sealing. A compatible high-build surfacer may cover repaired or previously primed areas, but follow the product system because some primers require epoxy beneath them and others do not.
What grit should I use before painting a car?
Use the grit specified by the primer and basecoat system. Typical preparation moves from 80 grit for removal and filler shaping, through 180-320 grit for feathering, then 400 grit for primer blocking. Many final systems use 600 grit for solid colors and 800 grit for metallic or pearl colors.
Can body filler go directly over old paint?
Body filler should not be applied over glossy, contaminated, loose, or unknown paint. It may be approved over a properly abraded, sound coating, but clean metal is often the more predictable substrate. The filler manufacturer’s technical sheet controls the acceptable surface and maximum thickness.
Is wet sanding better than dry sanding?
Wet sanding is better for low-dust final finishing, while dry sanding is generally faster for stripping, feathering, and identifying surface defects. Wet sanding is not automatically safer because water can hide lows and remain in seams. Dry sanding requires dust extraction and stronger contamination control.
How long can a car stay in primer before painting?
The allowable interval depends on the primer’s recoat window, cure chemistry, and storage conditions. Some systems permit sanding and topcoating after a defined window, while others require scuffing after extended exposure. Check the technical data sheet rather than relying on a universal number.
The Bottom Line
How to Prepare a Car for Painting is best understood as a sequence of substrate decisions: retain stable coatings, remove failed material, repair metal, feather every transition, prime compatible surfaces, block with guide coat, and finish with the grit required by the paint system. Cleanliness, cure time, and straight panels determine whether the new finish lasts.


