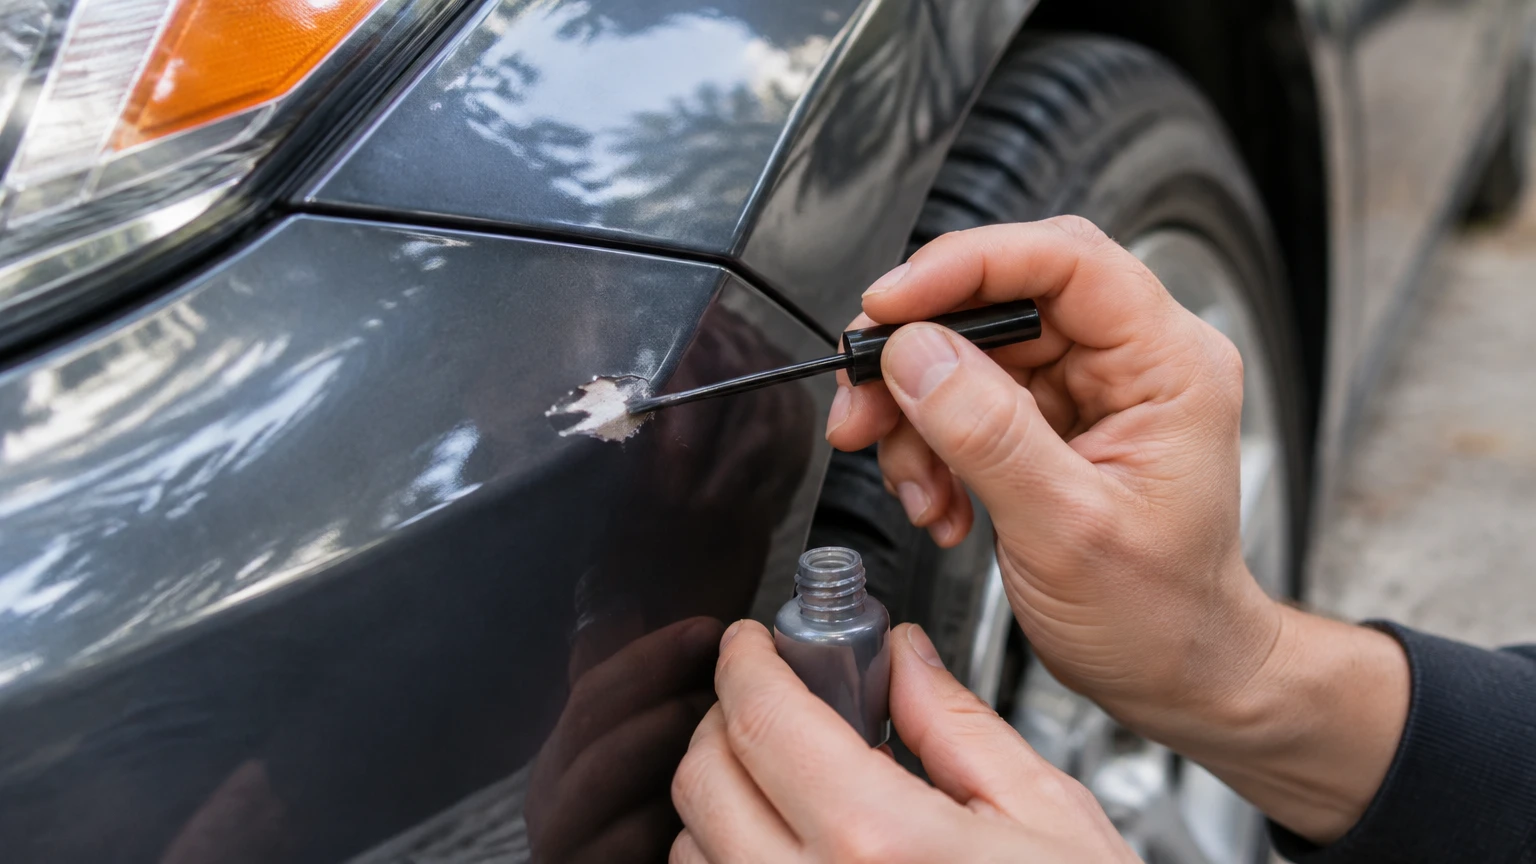
To fix paint chips on a car, clean and degrease the impact crater, remove loose paint and rust, apply primer to exposed metal, build color in thin layers, add clear coat, then level and polish only after full curing. A small chip usually takes 30-60 minutes of hands-on work, but the repair may need 24-72 hours before sanding.
Key facts at a glance
Automotive paint chips expose one or more layers: clear coat, base coat, primer, or body material.
Bare steel needs corrosion protection before color paint; aluminum and plastic require compatible primers.
OEM paint code matters more than a color name such as “silver metallic.”
Thin layers adhere and cure more reliably than one thick brush-loaded blob.
A single small chip costs about $15-$50 to repair with DIY materials.
Do not wet-sand fresh touch-up paint until the manufacturer’s stated cure window has passed.
What a Paint Chip Is
A car paint chip is a small impact crater where road stone, gravel, or another hard object has fractured and removed part of the finish. A chip has a defined void with jagged edges, while a scratch usually leaves paint in place and creates a linear groove.
The visible damage may stop at the clear coat, cut through the color coat, expose primer, or reach bare steel, aluminum, or plastic. The repair method depends on the deepest exposed layer, not simply on the chip’s diameter.
A chip on a hood or front bumper is often caused by road debris. Door-edge chips more commonly result from contact with walls, neighboring doors, or dropped objects. Inspect the damage under bright, indirect light after washing, because dirt can make a shallow chip appear deeper than it is.
How Automotive Paint Is Layered
Automotive finishes generally use four functional layers:
| Layer | Purpose | What damage looks like | Required repair |
|---|---|---|---|
| Clear coat | UV and chemical protection | Dull crater with color underneath | Clear-coat touch-up or polish |
| Base coat | Vehicle color, metallic, or pearl pigment | Colored void or contrasting spot | Color-matched base coat |
| Primer | Adhesion and corrosion control | Gray, beige, or red-brown surface | Compatible primer |
| Substrate | Steel, aluminum, or plastic body panel | Silver metal, white plastic, or black plastic | Corrosion or adhesion preparation |
A paint chip reaching bare metal deserves prompt sealing, even when the cosmetic defect is tiny. Moisture can enter the exposed area, and corrosion can expand beneath intact paint.
Which Repair Method Fits the Damage?
The best repair method depends on chip size, quantity, depth, panel material, and the required finish. A touch-up pen suits isolated chips smaller than a dime, while widespread road rash or lifting clear coat usually requires a smear kit, mobile spot repair, or panel respray.
| Damage pattern | Suitable method | Typical material cost | Typical time | Finish expectation |
|---|---|---|---|---|
| One to five chips under 6 mm | Micro-brush or OEM paint pen | $15-$40 | 30-60 minutes plus curing | Visible at close range |
| Ten or more shallow chips | Paint-smear kit | $35-$80 | 1-2 hours | Uniform from normal distance |
| Chip cluster under 25 mm | Local spot repair | $100-$250 | 3-6 hours | Good cosmetic blend |
| Deep chip with rust | Professional corrosion repair | $150-$400 | 1-3 days | Depends on corrosion depth |
| Peeling clear coat or large gouge | Panel respray | $300-$800 or more | 2-5 days | Closest to factory appearance |
A touch-up pen is not a substitute for repairing peeling paint. If the surrounding clear coat lifts when lightly tested with a wooden toothpick, the stable repair boundary extends beyond the original chip.
When Should You Avoid DIY Repair?
Choose a professional body shop when rust extends under surrounding paint, the panel is visibly dented, the damaged area exceeds roughly 25-30 mm, or the repair lies on a highly visible curved panel. Tri-coat pearl finishes, color-shifting pigments, and heavily faded paint are also difficult to blend accurately at home.
A DIY repair can seal damage without making the spot invisible. That distinction matters on lease returns, collector vehicles, and metallic paint viewed under strong sunlight.
What You Need Before Starting
Gather the materials before opening the paint bottle. A typical small-chip repair needs 45-90 minutes of hands-on work, $15-$50 in supplies, and a dry workspace between 15°C and 30°C (59°F and 86°F).
| Material or tool | Recommended specification | Typical quantity | Purpose |
|---|---|---|---|
| Car shampoo | pH-neutral automotive shampoo | 10-20 mL | Removes road film |
| Isopropyl alcohol | 70% IPA, or automotive panel wipe | 10-20 mL | Removes wax and grease |
| Microfiber towels | Clean, low-lint towels | 2-4 | Drying and wiping |
| Applicator | 0.5-2 mm micro-brush or toothpick | 2-5 | Controlled paint placement |
| Primer | Automotive epoxy or manufacturer-approved primer | 1-2 drops per chip | Seals bare metal |
| Color paint | OEM paint-code match | 1-5 mL | Restores pigment |
| Clear coat | Compatible automotive touch-up clear | 1-3 mL | Restores gloss and protection |
| Sandpaper | 2000-5000 grit wet/dry | 1 small piece each | Optional leveling |
| Compound | Fine automotive polishing compound | 2-5 mL | Removes sanding haze |
Find the paint code on the driver-side door jamb, under the hood, inside the trunk, or in the manufacturer’s service information. VIN lookups can identify the factory code, but a VIN does not always account for later repainting or UV fading.
Do not work on a hot panel, in direct sunlight, during rain, or in a dusty garage. Wear nitrile gloves and provide ventilation because automotive coatings and solvents release vapors.
How to Fix Paint Chips on a Car
The following nine steps repair an isolated chip that reaches primer or bare metal. The procedure is designed for cosmetic sealing and durable improvement, not for a concours-level invisible finish.
Step 1: Wash and Dry the Panel
Wash the complete panel with automotive shampoo, clean water, and a soft mitt. Rinse until no grit remains, then dry with a clean microfiber towel and allow the chip to air-dry for several minutes.
You will know the surface is ready when no visible road film, dust, or water remains inside the crater. Do not rub a dry, gritty panel because trapped particles can scratch the surrounding clear coat.
Common mistake: Using household dish detergent as a routine cleaner. A one-time degreasing wash may remove protection aggressively, but repeated use can leave the panel unnecessarily unprotected.
Step 2: Remove Wax, Grease, and Coating Residue
Moisten a fresh microfiber corner with 70% isopropyl alcohol or automotive panel wipe. Wipe around and inside the chip once, then use a dry section of the towel to remove residue.
A ceramic coating, wax, silicone dressing, or oily fingerprint can prevent touch-up paint from bonding. If liquid beads strongly inside the crater after cleaning, repeat the panel wipe after the surface dries.
Checkpoint: The cleaned crater should wet evenly rather than repel the solvent.
Common mistake: Flooding the area with solvent. Excessive rubbing can soften delicate surrounding paint, especially on older or previously repaired panels.
Step 3: Remove Loose Paint
Use a clean wooden toothpick to test the chip’s perimeter. Lift only paint that is already detached; do not enlarge a stable crater simply to create a smoother outline.
Loose scales must be removed because new paint applied over them inherits their weak bond. Stop when the edge feels firm and no flake moves under light pressure.
Checkpoint: The perimeter should be stable, with no visible paint lifting when examined under a bright lamp.
Common mistake: Using a metal pick or razor blade. Sharp metal can gouge sound clear coat and create a larger repair boundary.
Step 4: Treat Rust or Prepare the Substrate
If the crater shows bright steel, remove loose oxidation with a very small piece of 2000-grit abrasive or a suitable rust-removal product. If corrosion has spread beneath the paint, stop and obtain a professional assessment rather than covering it.
Aluminum needs an aluminum-compatible primer, while plastic bumpers need a plastic adhesion promoter or manufacturer-approved bumper primer. Bare steel needs corrosion-resistant primer; color paint alone is not a reliable substitute.
Checkpoint: Bare metal should be clean and dry, with no loose brown powder or oily residue.
Common mistake: Applying rust converter without checking paint compatibility. Some converters leave a film that prevents primer adhesion.
Step 5: Apply Primer to Bare Material
Apply one microscopic drop of compatible primer with a fine micro-brush or toothpick. Keep primer inside the chip, and follow the product’s recoat time, commonly 30-60 minutes for a thin spot application.
Primer is unnecessary when the chip exposes only intact base coat or clear coat. Excess primer creates a raised mound that later requires more sanding and may remain visible through translucent colors.
Checkpoint: The primer should cover the substrate without overflowing onto healthy paint.
Common mistake: Using household metal primer or universal craft primer. Automotive topcoats may react with non-automotive products or fail to withstand vibration and weather.
Step 6: Apply the Color Coat in Thin Layers
Shake the touch-up bottle for approximately two minutes, then place a tiny amount of paint in the center of the crater. Let capillary action carry the paint outward instead of brushing repeatedly across the surrounding clear coat.
Apply two to four thin layers, allowing roughly 10-20 minutes between coats unless the product instructions specify otherwise. Metallic and pearl paints should be mixed repeatedly because heavier pigment particles settle quickly.
Checkpoint: Each layer should look even and should not form a sag, ridge, or glossy puddle.
Common mistake: Using the bottle’s broad brush for a small chip. A fine applicator gives better control and reduces the thick “nail-polish blob” that commonly shrinks, cracks, or peels.
Step 7: Add Clear Coat
After the color coat has flashed according to the product instructions, apply one or two thin clear-coat layers. Keep clear coat within the repair when possible, because a thick edge around the chip can create a visible halo.
Clear coat improves gloss and weather resistance, but it cannot correct a wrong color match. Allow the repair to cure for at least 24 hours before judging color and approximately 48-72 hours before sanding, unless the product label provides a different window.
Checkpoint: The repaired spot should be sealed, slightly proud of the surrounding finish, and free of solvent bubbles.
Common mistake: Applying clear coat while the color layer remains soft. Solvent interaction can wrinkle or pull the base coat from the crater.
Step 8: Level the Repair Only If Necessary
Wet-sanding is optional for a small chip and should be attempted only after full cure. Use 3000-5000 grit abrasive on a small rigid block, lubricated with clean water containing a small amount of car shampoo, and use almost no pressure.
Sand the raised repair with short, controlled strokes. Stop as soon as the bump disappears. Do not sand until the spot blends visually by itself, because removing surrounding factory clear coat can create a larger dull patch.
Checkpoint: A fingertip should pass across the repair without detecting a sharp dome, while surrounding paint remains glossy outside the sanding area.
Common mistake: Wrapping abrasive around a fingertip. Finger pressure creates a depression and removes more clear coat around the chip than on its center.
Step 9: Polish and Protect the Panel
Use a fine automotive compound by hand or with a dual-action polisher at a low setting. Work a small area until the 3000-5000 grit haze disappears, then wipe clean and inspect under several angles of light.
Avoid wax, sealant, or ceramic coating until the touch-up product’s solvent-release period has ended. A conservative protection interval is 30 days for solvent-based touch-up paint, although water-based systems may permit earlier protection according to their manufacturer.
Checkpoint: The repair should have uniform gloss, no sanding haze, and no exposed substrate.
Common mistake: Applying a ceramic coating immediately after painting. Occluding solvents can slow curing and may trap defects beneath the coating.
How Long Does a Paint-Chip Repair Take?
A small DIY repair takes 30-60 minutes of active work, but the complete process spans one to three days because primer, color, and clear coat need separate cure periods. A professional spot repair commonly takes several hours, while a panel respray usually requires two to five days.
| Stage | Typical wait | What the interval accomplishes |
|---|---|---|
| Panel wipe to primer | 5-10 minutes | Solvent evaporation |
| Primer to color | 30-60 minutes | Primer recoat readiness |
| Color between coats | 10-20 minutes | Solvent flash-off |
| Final color to leveling | 24-48 hours | Film hardening |
| Clear coat to sanding | 48-72 hours | Mechanical resistance |
| Paint to wax or coating | Up to 30 days | Solvent release and cure |
Cool temperatures, high humidity, heavy coats, and poor ventilation extend these times. “Dry to touch” means the surface no longer feels wet; it does not mean the coating has reached full hardness.
How Much Does Paint-Chip Repair Cost?
DIY paint-chip repair typically costs $15-$50 for a paint-code-matched kit, primer, clear coat, abrasives, and cleaning materials. Mobile spot repair commonly costs $100-$250 per affected area, while a professional panel respray often starts around $300 and rises above $800 for complex finishes.
| Repair route | Typical US price | Typical duration | Best financial use |
|---|---|---|---|
| OEM touch-up pen | $15-$30 | 1-3 days including cure | One to five small chips |
| Multi-stage DIY kit | $30-$75 | 1-3 days | Deeper chips needing primer and clear |
| Paint-smear kit | $35-$80 | 1-2 hours | Many shallow stone chips |
| Mobile technician | $100-$250 | 3-6 hours | Visible localized damage |
| Body-shop panel repair | $300-$800+ | 2-5 days | Large damage or demanding color match |
Quotes vary with panel accessibility, substrate corrosion, paint type, blending requirements, and local labor rates. A low quote may exclude corrosion removal, clear-coat blending, or panel disassembly.
What Changes for Plastic Bumpers and Aluminum Panels?
Plastic bumper chips require adhesion preparation rather than rust treatment, while aluminum panels require products designed for aluminum corrosion control. The same color paint can be used only after the substrate has received the correct foundation coating.
Plastic often flexes under impact, so brittle or overly thick touch-up material can crack. Aluminum can develop oxidation that is less visibly dramatic than steel rust but still interferes with adhesion. Follow the paint manufacturer’s substrate instructions instead of assuming one primer works everywhere.
How Do You Repair Many Rock Chips?
Use a paint-smear system or professional spot repair when a hood or bumper has dozens of small, shallow chips. Individual touch-up dots can produce a patchy finish and consume several hours without creating a uniform blend.
Smear products are designed to fill multiple defects, after which a blending solution removes excess material from intact paint. They are unsuitable for deep gouges, active rust, exposed large metal areas, or peeling clear coat.
Common Mistakes and How to Fix Them
| Symptom | Likely cause | Recovery |
|---|---|---|
| Paint peels after washing | Wax, grease, or coating remained | Remove failed paint, degrease, and restart |
| Repair is a raised blob | Too much paint applied at once | Cure fully, then level with 3000-5000 grit |
| Color looks too dark | Wrong code, thick film, or faded surrounding paint | Verify code and compare after full cure |
| White haze appears | Sanding marks or polish residue | Refine with finer abrasive and compound |
| Bubbles or wrinkles form | Heavy coat or recoated too soon | Let cure, remove unstable film, restart thinly |
| Brown staining returns | Active corrosion remained underneath | Remove corrosion professionally before repainting |
The most common professional rule is simple: preparation determines adhesion, and application thickness determines appearance. A perfect paint-code match still fails when the crater contains wax or when the repair is applied as one thick drop.
A second useful rule is to protect the substrate first and chase invisibility second. A slightly visible sealed chip is safer than an attractive repair that leaves bare steel or active rust underneath.
How Do You Prevent New Paint Chips?
Paint Protection Film (PPF) provides the strongest targeted protection for high-impact areas such as the leading hood edge, bumper, mirror caps, and rocker panels. A quality film installation costs more than touch-up paint but prevents repeated impact damage in those zones.
Reduce exposure by leaving more following distance behind trucks, avoiding loose gravel, and washing with a pressure nozzle that does not force water directly into fresh repairs. Inspect the front-facing panels every few months, especially after winter road treatment or gravel-road driving.
Do not use wax or ceramic coating as a substitute for impact protection. Those products can reduce contamination and cleaning friction, but their thin films generally do not absorb the energy of a high-speed stone.
Frequently Asked Questions
Can I Fix a Paint Chip Without Sanding?
Yes. A small chip can be cleaned, primed, filled with color, and sealed without sanding if the goal is corrosion prevention rather than a flush cosmetic finish. Avoiding sanding is often safer for beginners because factory clear coat remains intact, but the repair may feel slightly raised.
Do I Need Clear Coat Over Touch-Up Paint?
Clear coat is recommended when the product system specifies it, particularly for metallic and pearl colors exposed to sunlight. Clear coat protects the pigment and supplies gloss, but it cannot make an incorrectly matched base color disappear.
Can I Use Nail Polish on a Car Paint Chip?
Nail polish can provide a temporary seal on a very small emergency chip, but it is not a durable automotive repair. Its resin, color stability, flexibility, and solvent behavior differ from automotive coatings, so peeling or visible color change is more likely.
Will a Paint Pen Match My Faded Car?
A paint pen matches the factory paint code, not necessarily the vehicle’s current aged color. UV exposure, polishing, previous repairs, and panel orientation can change the surrounding finish, so a professional may need to blend adjacent paint for a less noticeable result.
Is It Safe to Paint Over a Rusty Chip?
No. Painting over active rust traps corrosion beneath the new film and allows the defect to spread. Remove surface oxidation completely when practical; if rust extends beneath surrounding paint or causes bubbling, obtain professional body repair before applying color.
Should I Repair Chips Before Selling or Returning a Leased Car?
Repair exposed metal before sale or lease return because corrosion and obvious damage can increase deductions. For a lease inspection, an accurately matched touch-up pen may be sufficient, while a full respray is justified only when the damage exceeds normal wear or affects a large visible area.
The Bottom Line
To fix paint chips on a car reliably, identify the deepest damaged layer, clean away every contaminant, prime exposed substrate, build color with thin coats, and allow adequate curing before leveling. Use a touch-up pen for a few small chips, a smear kit for widespread shallow road rash, and professional spot or panel repair when rust, peeling clear coat, large damage, or complex paint makes a DIY result unreliable.


