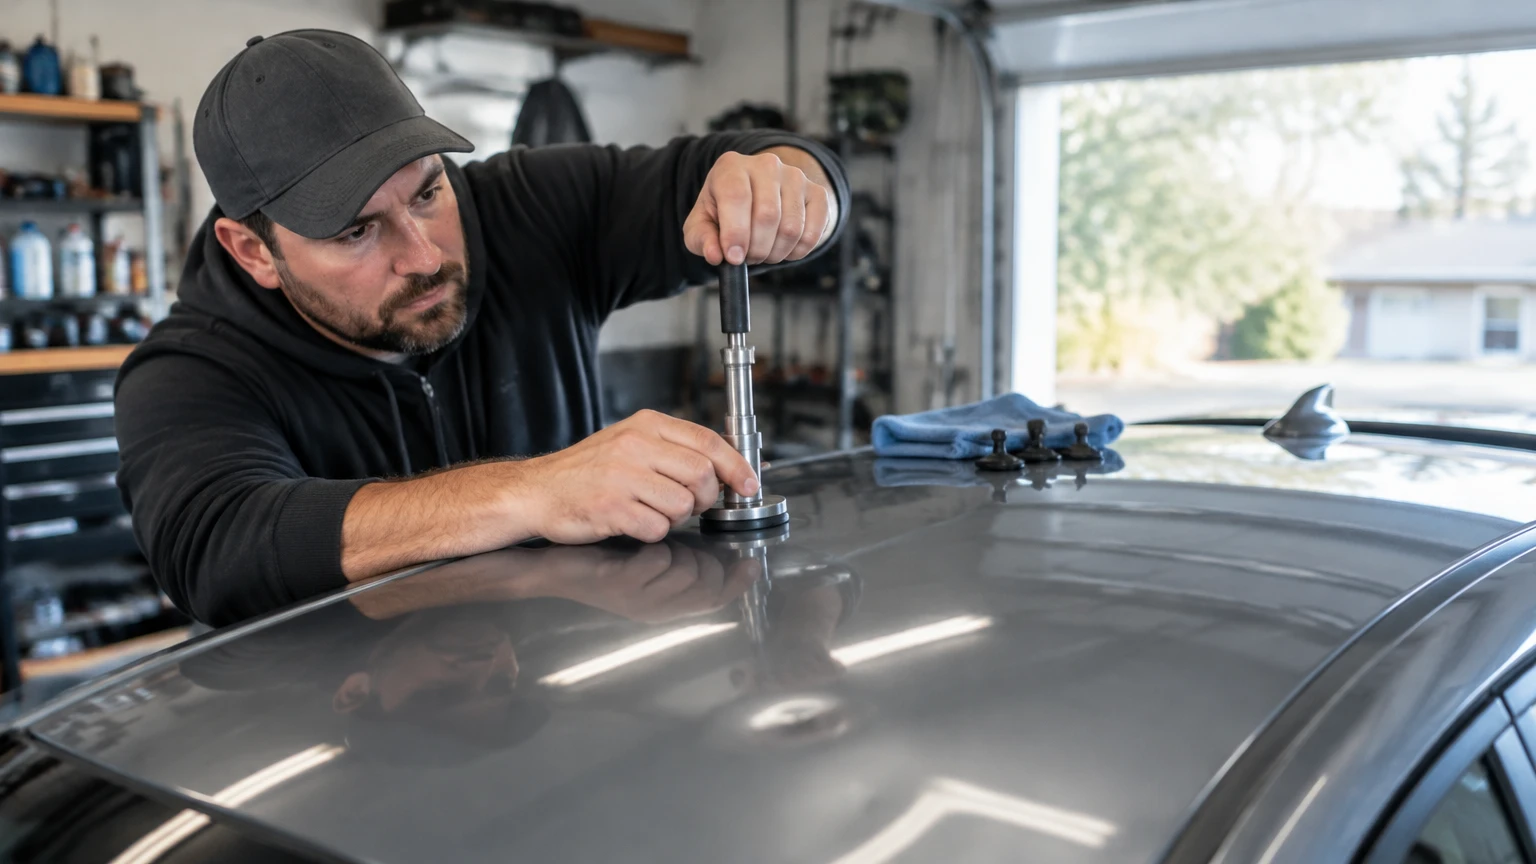
Paintless Dent Repair is usually the best way to fix hail dents on a car roof when the factory paint is intact and the metal is not torn or severely stretched. A trained technician accesses the panel from below, uses a reflected-line light to locate each low spot, and restores the roof gradually without filler or repainting.
Key facts at a glance
Professional PDR commonly preserves the original factory paint and clear coat.
A typical roof hail repair takes 1-3 business days once the vehicle reaches the technician.
Typical roof repair costs range from about $1,000 for light damage to more than $4,000 for widespread or severe damage.
Cracked paint, sharply creased metal, torn seams, and structural roof damage can require conventional body repair or panel replacement.
A heat gun, dry ice, suction cup, or aggressive home glue-pulling attempt can permanently worsen a thin roof panel.
Modern aluminum roofs, panoramic glass roofs, curtain airbags, and roof-mounted electronics require an experienced repairer.
What Is Roof Hail Damage?
Hail damage on a car roof is a pattern of shallow depressions and raised crowns created when frozen precipitation strikes the roof skin. The impact bends the sheet metal, concentrates stress around the depression, and may stretch the panel if the hailstone is large or the impact occurs near a brace, roof rail, or edge.
Most hail dents are cosmetic rather than structural. A roof can have dozens of visible dimples while retaining its strength, but a deep crease, separated seam, cracked glass, displaced roof molding, or damaged roof rail needs a safety inspection before cosmetic repair begins.
The roof is difficult to repair invisibly because its broad, horizontal surface mirrors the sky and surrounding objects. A repair that looks acceptable under diffuse garage lighting can still show waves under a line board or bright overcast daylight.
How does a hail dent form?
A hailstone creates a low center and often a raised perimeter, sometimes called a crown. PDR technicians reduce the tension around that crown and lift the low area with controlled pressure rather than forcing the entire depression upward at once.
The practical objective is not simply to make the dent disappear from one viewing angle. The objective is to restore the original contour across the surrounding panel, including the faint transition between repaired and untouched metal.
How Should You Inspect a Hail-Damaged Roof?
Inspect the roof after washing it, then view the surface from several angles under a bright reflected-line light or angled daylight. Photograph every panel before repair, including the hood, trunk, roof rails, glass, trim, windshield, and side panels.
Use this sequence:
- Wash away dirt and dried residue without scrubbing damaged paint.
- Look for chipped clear coat, exposed metal, cracks, scratches, and paint transfer.
- Check roof seams, drip rails, moldings, antenna bases, and the perimeter of panoramic glass.
- Inspect the headliner and pillars for water stains or displaced trim.
- Confirm that doors, hatchbacks, and the sunroof still open and close normally.
- Photograph the damage with a ruler or coin for scale and record the date.
- Avoid pressing the dents with a thumb or tool, because pressure can create new high spots.
A roof with intact paint and round, shallow depressions is a strong PDR candidate. A roof with sharp folds, paint separation, exposed steel, torn seams, or movement around the windshield needs a collision or body-repair assessment.
How Is Professional PDR Performed?
Professional PDR restores hail dents through controlled access, visual measurement, gradual metal movement, and repeated quality checks. The technician normally works from the underside, although glue pulling may be used where braces or roof construction prevent safe tool access.
Step 1: Document and clean the vehicle
The shop records existing damage and washes the roof before inspection. Technicians may use an appropriate panel cleaner or isopropyl alcohol on a small area, but the product must be compatible with the vehicle’s finish and any adhesive system being used.
Success checkpoint: Dirt, wax, and loose contamination no longer obscure the dent edges.
Common mistake: Using abrasive compound before the technician maps the original damage.
Step 2: Remove interior access components
For underside access, the technician may remove or lower the headliner, dome light, grab handles, roof consoles, pillar trim, and selected weather seals. Removal and installation labor is often called R&I.
Curtain airbags can sit behind the headliner and upper pillars. The battery, restraint-system precautions, and manufacturer procedures may matter, especially on newer vehicles.
Success checkpoint: The technician can reach the roof skin without forcing a rod through wiring, airbags, adhesive, or glass.
Common mistake: Treating headliner removal as harmless trim work.
Step 3: Map the dents with a line board
A reflected LED line board projects parallel lines across the roof. Straight lines indicate a consistent surface; curves and interruptions show the location and boundary of low and high areas.
The technician marks or mentally maps the repair sequence, usually working from stronger edges and braces toward the open panel. Ordinary ceiling light cannot reveal the same subtle distortion.
Success checkpoint: Each dent has a defined center, crown, depth, and access path.
Common mistake: Repairing only the darkest visible point while leaving the surrounding tension untouched.
Step 4: Push the low spots gradually
The technician selects rods, whale tails, picks, or other PDR tools according to the brace layout and panel material. Small pushes near the dent’s center and perimeter gradually move the metal while the line board shows whether the crown is relaxing.
One large push is rarely better than many small pushes. Excessive localized pressure can create a sharp pimple, stretch the metal, or make the repair more difficult than the original dent.
Success checkpoint: Reflected lines become progressively straighter without a new high point.
Common mistake: Using a roof brace as a fulcrum without controlling the tool tip and contact pressure.
Step 5: Glue-pull blocked areas when appropriate
A technician can bond a correctly sized tab to the exterior of a shallow dent and lift it with a mini-lifter or controlled pulling tool. Glue pulling is useful over double-layer areas, braces, roof rails, or places where a rod cannot reach.
Glue pulling does not preserve every finish automatically. A weak aftermarket repaint, poor touch-up, failing clear coat, or contaminated surface can release paint with the tab.
Success checkpoint: The panel rises in a broad, controlled movement and the paint remains bonded.
Common mistake: Starting with a high-strength tab on a repainted roof without testing adhesion.
Step 6: Knock down raised metal
If the crown becomes slightly high, the technician uses a nylon, plastic, or suitable metal knockdown tool with controlled taps. The purpose is to lower the raised area without marking the finish or creating a larger stretched zone.
Success checkpoint: Reflected lines pass smoothly over the former dent from multiple directions.
Common mistake: Striking directly on the lowest visible point instead of reducing the surrounding high area.
Step 7: Reassemble and inspect
The technician reinstalls the headliner and trim, checks clips and seals, and inspects the repaired roof under the line board. A final check should include the glass perimeter, roof molding, interior lighting, airbags, and any water-management components disturbed during access.
Success checkpoint: The roof has a consistent reflection and the interior has no loose trim, wrinkles, rattles, or warning lights.
Common mistake: Accepting a repair before viewing it in changing light and from both sides of the vehicle.
Which Roof Hail Repair Method Should You Choose?
PDR is the preferred method for intact paint and repairable metal. Conventional refinishing is necessary when the coating or panel has exceeded PDR’s limits, while roof replacement is reserved for structural or extensively compromised damage.
| Method | Best candidate | Typical timeframe | Paint result | Main limitation |
|---|---|---|---|---|
| PDR pushing | Shallow dents with intact factory paint | 1-3 days | Original paint retained | Requires underside access |
| PDR glue pulling | Blocked areas and roof rails | 1-3 days | Original paint may remain | Risky on repainted panels |
| Filler and repainting | Cracked paint, gouges, severe stretching | 5-14 days | New primer and paint | Color-match and resale concerns |
| Roof skin replacement | Torn, folded, or structurally compromised skin | 1-3 weeks or longer | Replacement panel painted | Welding, bonding, glass, and trim work |
Why is PDR usually preferable?
PDR avoids filler, sanding, primer, and paint blending, so it retains the factory coating and eliminates a new color-match boundary. Original paint also gives the roof its existing corrosion protection, provided the coating has not been breached.
PDR is not a universal solution. It is a poor choice for a deeply folded roof edge, torn metal, cracked coating, badly stretched panel, or damage that has already fractured the metal around a seam.
When is conventional body repair necessary?
Traditional body repair becomes appropriate when the paint is cracked or missing, the metal has a sharp crease, the panel has stretched beyond practical correction, or corrosion has begun beneath a chip. The repair may involve metal shaping, controlled filler, epoxy or primer, color coat, clear coat, and blending into adjacent areas.
A repainted roof is not automatically unsafe or defective. The risk comes from poor preparation, incorrect corrosion protection, visible texture differences, or a repair that conceals structural damage.
When does a roof need replacement?
Roof-panel replacement is uncommon for ordinary hail dimples. It becomes a consideration when the roof skin is torn, folded across major structural points, detached from its bonded or welded locations, or too stretched for reliable shaping.
Replacement can affect the windshield, sunroof, roof rails, headliner, curtain airbags, wiring, and water sealing. An estimate should identify whether the shop will weld, bond, or use the manufacturer’s specified joining procedure.
How Much Does It Cost to Repair Roof Hail Damage?
Typical professional roof hail repair costs range from about $1,000 to $2,000 for light damage, $2,000 to $4,000 for moderate damage, and $4,000 to $10,000 or more for severe damage. Local labor rates, access, vehicle construction, dent count, and paint condition create wide variation.
| Damage pattern | Typical dent count | Typical out-of-pocket range | Typical labor time |
|---|---|---|---|
| Light | 10-25 small dents | $1,000-$2,000 | 1-2 days |
| Moderate | 25-75 dents | $2,000-$4,000 | 2-4 days |
| Severe | 75 or more dents | $4,000-$10,000+ | 3-7 days |
| Conventional refinishing | Any count with damaged paint | $2,500-$8,000+ | 5-14 days |
Per-dent pricing is sometimes quoted around $30-$45 for standard shallow dents, but a roof estimate rarely equals dent count multiplied by one flat rate. Large dents, sharp crowns, edge damage, aluminum, difficult access, and extensive R&I can change the matrix substantially.
| Cost variable | Typical effect | Why it changes the estimate |
|---|---|---|
| Headliner R&I | $200-$400 base labor | Creates safe underside access |
| Aluminum roof | About 25% premium, typical | Requires different force control and more labor |
| Large dent | $40-$50 additional, typical | Needs more correction and blending |
| Panoramic roof | $300-$1,500 additional, typical | Adds glass, trim, seal, and access complexity |
| Repainted panel | Inspection or repair surcharge | Adhesion and color-match risks increase |
These figures are planning ranges, not guaranteed prices. A written estimate should state whether it includes trim removal, interior protection, sales tax, supplements, glass removal, rental transportation, and final quality inspection.
Will Insurance Pay for Hail Damage?
Comprehensive auto insurance commonly covers hail because hail is generally treated as a weather event rather than a collision. Coverage, deductible, claim rules, and whether a claim affects future rates depend on the policy and jurisdiction.
Before authorizing work:
- Photograph the vehicle before washing away evidence.
- Ask the insurer about the comprehensive deductible and claim procedure.
- Obtain a written estimate from a reputable PDR or collision shop.
- Confirm whether the insurer requires an inspection or approved estimate.
- Ask how supplements are handled if hidden damage appears.
- Verify the shop’s warranty and whether the warranty covers future paint failure.
- Keep receipts, photographs, and the final repair documentation.
A low estimate is not always a good estimate. It may omit headliner access, trim replacement, glass, rental time, or damage to adjacent panels.
Can You Fix Car-Roof Hail Dents Yourself?
A homeowner can sometimes improve one or two shallow dents with an exterior glue-pulling kit, but DIY roof repair has a narrow margin for error. Do not attempt to remove the headliner or use push rods near curtain airbags, wiring, roof glass, or delicate trim without the correct repair information and training.
DIY may be reasonable when
- The vehicle is older and cosmetic perfection is not required.
- There are only one or two shallow, coin-sized dents.
- The factory paint is intact and firmly bonded.
- The dent is away from an edge, brace, molding, or panoramic roof.
- You accept that a failed attempt may require filler and repainting.
Avoid DIY when
- Paint or clear coat is cracked, chipped, bubbling, or previously repaired.
- The roof is aluminum, high-strength steel, or a complex multi-layer construction.
- The roof has curtain airbags, a panoramic glass panel, or sensitive electronics.
- The dent has a sharp crease, stretched metal, or a visible high spot.
- Insurance documentation or resale condition matters.
Do not use a heat gun, dry ice, boiling water, suction cup, or compressed-air shock treatment on a steel roof. Uneven heating can warp the surrounding panel, damage clear coat, or create oil-canning that is more expensive to correct.
What Problems Can Occur During Repair?
The most expensive PDR mistakes are usually caused by excessive force, poor lighting, incorrect glue selection, or an inaccurate assumption about panel construction.
| Failure mode | Visible symptom | Likely consequence | Correct response |
|---|---|---|---|
| Over-pushing | Sharp raised pimple | Stretched metal and visible distortion | Stop and have a PDR specialist assess it |
| Poor lighting | Wavy reflection after repair | Hidden lows remain | Reinspect with a reflected-line board |
| Glue on weak paint | Paint lifts with tab | Exposed metal and refinishing required | Stop pulling and document the coating failure |
| Rod contacts trim or wiring | Interior damage or warning light | Additional electrical or trim repairs | Stop, restore access, and inspect systems |
| Heat shock | Blistered or warped finish | Panel and coating damage | Avoid further heating; obtain a body-shop estimate |
An important practitioner rule is to stop when the metal stops responding predictably. Repeated force does not overcome a stretched panel; it usually enlarges the damaged area.
How Do Aluminum and Modern Roofs Change the Repair?
Aluminum roof panels can receive PDR, but aluminum behaves differently from mild steel. Aluminum work-hardens, has less elastic return, and may require more controlled effort, specialized tools, and heat procedures approved for that vehicle.
Modern vehicles can add further complications:
- Panoramic glass may limit tool access and require trim or glass precautions.
- Curtain airbags may occupy the exact space needed for a rod.
- Roof antennas can contain communication hardware.
- Electric vehicles may have complex harnesses and high-voltage-related service procedures.
- High-strength steel may resist movement and punish imprecise force.
- Adhesively bonded roof skins require manufacturer-specific joining methods.
Tesla, Mercedes-Benz, BMW, Rivian, and other manufacturers use different combinations of aluminum, steel, glass, adhesives, sensors, and trim. Vehicle-specific repair information matters more than the badge alone.
How Do You Choose a Reliable Hail-Repair Shop?
Choose a shop that can explain the repair method, access plan, warranty, and limits before asking for authorization. A trustworthy estimate identifies the affected panels and does not promise that every dent will disappear without inspecting the paint and metal.
Ask these questions:
- How many roof dents did the technician count?
- Is the roof steel, aluminum, multi-layer, or glass-adjacent?
- Will the shop lower the headliner, and how will it protect airbags?
- Does the estimate include R&I, trim clips, glass, tax, and supplements?
- Does the shop use a reflected-line board for final inspection?
- What happens if paint lifts during glue pulling?
- Is the warranty written, transferable, and specific about paint failure?
- Will the shop provide before-and-after photographs?
- Does the technician have experience with this vehicle’s roof construction?
- Who communicates with the insurer, and who owns the repair decision?
Avoid urgent pressure, unexplained assignments of insurance benefits, and temporary storm tents that cannot provide a physical address, written warranty, or documented repair process. Independent shops can be excellent, but credentials and workmanship matter more than a large sign or a claim of guaranteed perfection.
What Should You Do Immediately After a Hailstorm?
Move the vehicle under cover if safe, avoid parking beneath damaged branches, and photograph the roof before attempting cosmetic cleaning. Cover broken glass or a leaking sunroof temporarily with waterproof plastic and tape placed around the opening, not across loose paint.
Do not wash aggressively, polish the roof, press dents, or remove trim before documentation. If water enters the cabin, dry the headliner and seats promptly to prevent odor, staining, and electrical problems.
Frequently Asked Questions
Can hail dents rust if the paint looks intact?
A shallow dent with an intact factory coating normally does not rust because the steel remains isolated from moisture and oxygen. Rust risk rises when hail chips the clear coat and color layer through to bare metal, especially at roof edges, seams, and damaged moldings. Photograph and seal exposed metal promptly through a qualified repairer.
Does PDR reduce a car’s resale value?
PDR generally protects resale value better than repainting because the factory paint remains documented and visible. A repair history is not automatically negative, but a poorly blended roof, overspray, filler, or unresolved structural issue can affect inspection results. Keep the invoice and before-and-after photographs with the vehicle records.
How long should I wait before repairing hail damage?
Arrange inspection as soon as practical, particularly when paint is chipped, the cabin is wet, or the roof glass is damaged. Waiting several weeks may not worsen a purely cosmetic dent, but exposed steel can corrode and insurance documentation becomes harder when new damage occurs.
Can a suction cup remove a roof hail dent?
A suction cup rarely corrects a hail dent because hail damage usually includes a stressed crown rather than a simple free-moving depression. Suction can pull the center upward while leaving the perimeter low or creating a high spot. Professional PDR tools control both the low area and surrounding tension.
Does hail damage affect a sunroof or windshield?
Hail can chip or crack laminated windshield glass, break tempered sunroof glass, damage seals, and bend surrounding roof metal. Glass damage should be assessed before dent repair because removing or replacing glass may change access, water sealing, and the repair sequence.
The Bottom Line
The safest way to fix hail dents on a car roof is professional PDR when the paint is intact, the metal is not sharply creased, and the roof has no structural or glass damage. Conventional refinishing handles cracked coatings and severely stretched metal, while roof replacement is reserved for major structural compromise. Document the vehicle first, compare a written estimate with your comprehensive deductible, and choose a shop that can explain access, airbag precautions, inspection lighting, warranty coverage, and the limits of the proposed repair.


