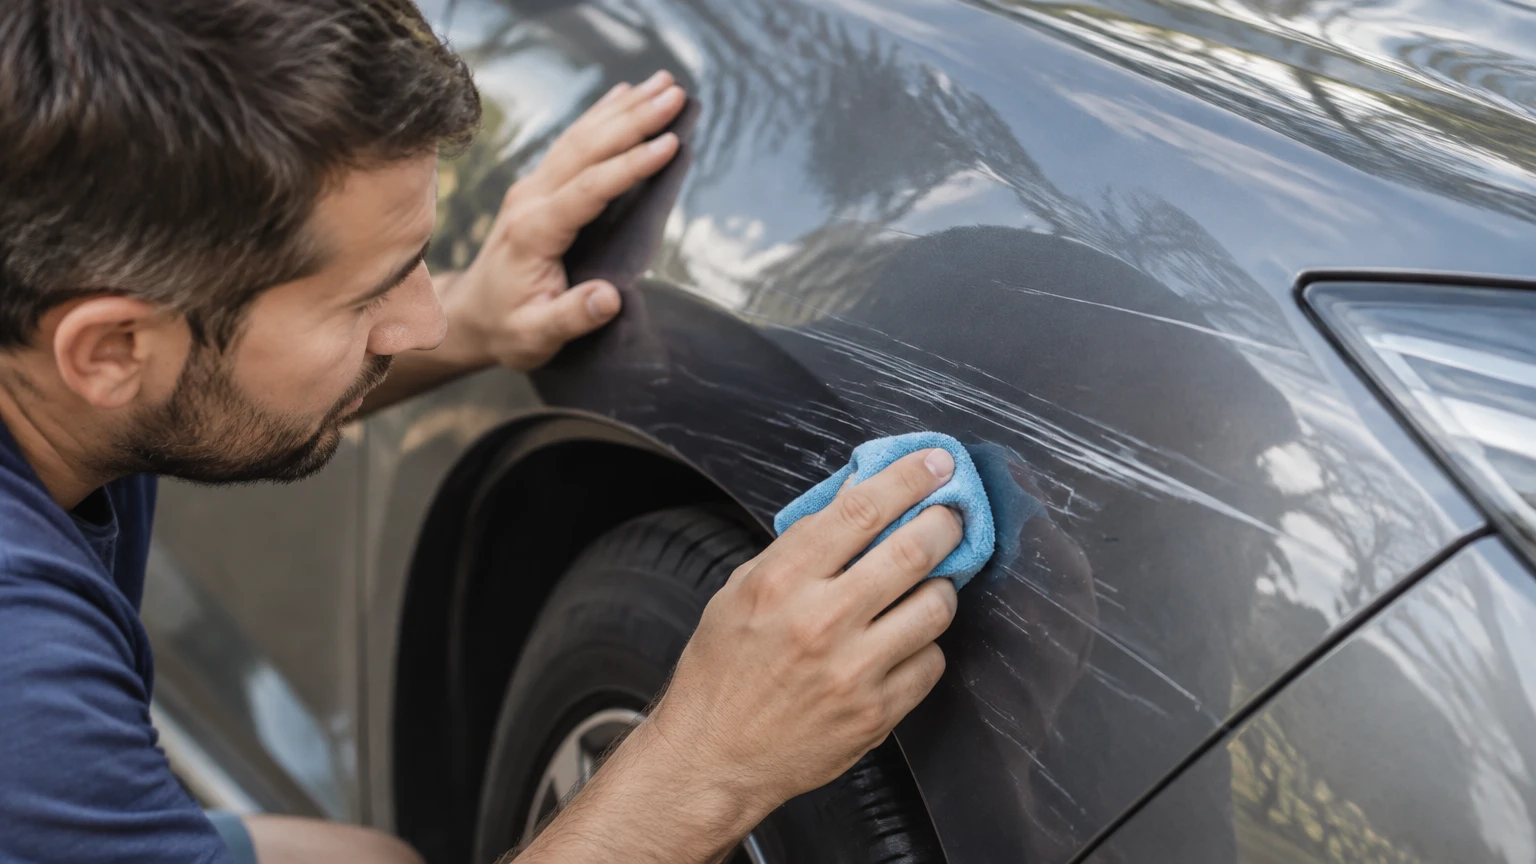
Deep scratches on a car must be repaired by rebuilding the damaged paint layers, not by polishing alone. Clean the panel, identify whether primer, metal, or plastic is exposed, apply compatible primer and factory-matched paint in thin layers, add clear coat, then level and polish the repair after it cures.
Key Facts at a Glance
- A scratch that catches a fingernail or shows a contrasting color usually extends below the clear coat.
- Polishing removes a small amount of surrounding clear coat; it cannot replace missing primer or color paint.
- Typical DIY materials cost $25-$75, while professional repairs commonly cost $150-$1,500 depending on area and finish.
- Automotive touch-up paint should be applied in several thin coats rather than one thick blob.
- Fresh touch-up paint commonly needs 24-48 hours before wet sanding and about 30 days before waxing or ceramic coating.
- Bare steel can begin corroding after exposure to moisture, so rust prevention should come before cosmetic perfection.
How Deep Is the Scratch?
Scratch depth determines the repair method. A clear-coat scratch appears as a dull or whitish line but does not reveal another layer; a base-coat scratch exposes primer or panel color, while a metal scratch may show silver, orange corrosion, or the dark substrate beneath the paint.
Run a clean fingernail across the mark after washing the panel. A fingernail that passes smoothly suggests a superficial defect, although this test is not precise enough to replace visual inspection. A fingernail that drops into a defined groove indicates material loss.
Scratch-depth diagnosis
| Visible condition | Likely damaged layer | Suitable repair |
|---|---|---|
| Light haze, no color change | Clear coat only | Compound and finishing polish |
| White, gray, or black line | Clear coat and base coat | Primer or color touch-up, then clear coat |
| Silver metal or orange corrosion | Paint layers and steel | Rust treatment, primer, color, and clear coat |
| Black or textured substrate on bumper | Paint over plastic | Plastic-compatible primer and paint |
| Wide scrape across a body line | Multiple layers and panel shape | Professional spot repair or panel refinish |
A white scratch is not automatically clear-coat damage. White primer, plastic, transferred paint, and dried residue can look similar, so clean the area and inspect it under direct daylight before sanding.
Can Polishing Fix a Deep Scratch?
Polishing can improve a scratch only when the defect remains within the clear coat. Deep scratches require new primer, base color, and clear coat because polishing removes surrounding material rather than filling the missing layers.
Use a small amount of automotive polish on a microfiber towel in an inconspicuous area. If the line becomes less visible after several controlled passes, the defect may be superficial. If the original color remains absent, stop polishing and prepare for touch-up repair.
Do not use aggressive compound repeatedly on a deep groove. A dual-action polisher can remove clear coat around the damage while leaving the groove unchanged, producing a larger dull patch. The goal is to preserve the original finish outside the repair zone.
Before You Start
Plan for one to three hours of active work spread across at least two days. A basic repair costs about $25-$75, but the surface must remain dry, clean, and above the paint manufacturer’s minimum application temperature.
Materials and prerequisites
| Item | Typical quantity or specification | Purpose |
|---|---|---|
| Automotive shampoo | 15-30 milliliters per wash bucket | Removes road film safely |
| Isopropyl alcohol | 10-20 milliliters for spot cleaning | Removes wax and silicone residue |
| Wet-or-dry abrasive paper | 1 sheet each of 1,500, 2,000, 3,000, and 5,000 grit | Edge preparation and leveling |
| Small sanding block | 2-3 inches long | Keeps pressure even |
| Automotive primer | 2-5 milliliters for a small scratch | Seals metal or plastic |
| Factory-matched base coat | 5-15 milliliters | Replaces missing color |
| Automotive clear coat | 5-15 milliliters | Restores gloss and protection |
| Micro-applicators | 5-10 pieces | Controls narrow paint placement |
| Compound and polish | 10-20 milliliters each | Removes sanding marks and restores gloss |
Confirm the manufacturer’s paint system before combining products. Some touch-up kits use lacquer, enamel, or waterborne coatings, and incompatible layers can wrinkle, soften, or separate.
Work in shade with low dust and moderate temperature. A panel that is hot from direct sun can flash the solvent too quickly, while cold conditions extend curing and increase the chance of a soft repair.
Step 1: Wash and Decontaminate the Panel
Wash the damaged panel with automotive shampoo, rinse thoroughly, and dry it with a clean microfiber towel. Then apply a small amount of isopropyl alcohol or an approved wax-and-grease remover to the scratch area, because silicone, wax, and road film prevent primer and paint from bonding.
Use separate microfiber towels for washing and solvent wiping. Do not use household glass cleaner, acetone, brake cleaner, or abrasive kitchen products on automotive paint unless the product manufacturer specifically approves that use.
Success checkpoint: The panel feels clean and produces no oily smear when wiped with a fresh towel.
Common mistake: Cleaning only the visible line leaves contamination on the surrounding paint, where sanding and polishing later spread it across the repair.
Step 2: Remove Loose Paint and Feather the Edges
Remove loose flakes with a plastic pick or the edge of a wooden toothpick, then smooth unstable edges with 1,500- or 2,000-grit wet paper on a small block. Sand only enough to remove sharp edges and create a gradual transition; do not enlarge the repair unnecessarily.
Keep the abrasive wet with clean water containing a small amount of car shampoo. Use light pressure and inspect every few strokes. Narrow scratches often need edge smoothing, not broad sanding of the surrounding clear coat.
Success checkpoint: The edge feels smooth when touched with a clean fingertip, and no paint flakes lift when the area is wiped.
Common mistake: Using a fingertip behind loose sandpaper creates a low spot because pressure concentrates on the scratch rather than distributing across the panel.
Step 3: Treat Rust or Prepare Plastic
Treat exposed steel corrosion before applying primer. Remove loose rust with fine abrasive, wipe away residue, and use a compatible phosphoric-acid rust treatment only according to its label; a converter does not repair deep pitting or replace damaged metal.
Plastic bumpers need a different preparation. Clean the substrate, use an adhesion promoter or plastic primer specified for automotive refinishing, and avoid ordinary metal primer unless the product states that it bonds to the plastic type.
Metal and plastic preparation
| Substrate | Preparation | Primer requirement | Main risk |
|---|---|---|---|
| Bare steel | Remove loose corrosion and degrease | Automotive metal primer | Rust returning beneath paint |
| Galvanized steel | Light scuff and approved cleaner | Compatible self-etching or epoxy primer | Poor adhesion from over-sanding |
| ABS bumper plastic | Clean and scuff lightly | Plastic adhesion promoter | Peeling from flexing |
| Textured bumper plastic | Preserve texture where possible | Flexible plastic system | A smooth patch looks obvious |
| Aluminum panel | Use an aluminum-compatible system | Epoxy or specified primer | Adhesion failure and oxidation |
Success checkpoint: The substrate is dry, stable, and free from loose corrosion or glossy untreated plastic.
Common mistake: Applying rust converter over oily contamination traps residue under the primer and weakens the repair.
Step 4: Apply Thin Primer Coats
Apply automotive primer with a fine brush, micro-applicator, or the applicator supplied with the kit. Put primer only on exposed substrate, using thin coats with the product’s stated flash time, commonly 10-30 minutes between coats.
Primer should fill and seal the exposed area without spreading far onto undamaged clear coat. If the scratch reaches only the base coat, adding primer over the entire groove can create unnecessary height and a visible repair line.
Success checkpoint: The substrate is covered, the primer is firm rather than stringy, and the scratch remains slightly below the surrounding paint.
Common mistake: Filling the cavity with one heavy primer application causes solvent entrapment, shrinking, and a soft center.
Step 5: Apply Factory-Matched Base Coat
Locate the vehicle’s paint code on the driver-side door jamb, glove-box area, firewall, or manufacturer documentation. Shake the touch-up paint thoroughly, test the color on a hidden area, and apply several narrow coats rather than one thick application.
Allow approximately 15-30 minutes between coats when the product label permits it. Metallic and pearl colors require particular care because the size and orientation of metallic particles affect the final appearance; a paint pen may match the color code but still look different when applied by brush.
Build the color coat until it is level with, or slightly below, the surrounding factory finish. Do not attempt to create final gloss with the color coat.
Success checkpoint: The repair has consistent color with no exposed primer, pooling, or brush ridge.
Common mistake: Choosing paint by visual color alone ignores variations caused by sun exposure, factory batches, and multi-stage finishes.
Step 6: Apply Clear Coat and Allow It to Cure
Apply clear coat over the repaired color after the base coat has flashed according to the product instructions. Use thin layers and slightly overlap the edge of the color repair, stopping before the clear coat spreads across a large area of original paint.
For a narrow touch-up, the clear coat should finish slightly higher than the surrounding surface. This raised area provides material for later leveling, but it should not form a wide dome.
Allow at least 24-48 hours before wet sanding in typical mild conditions. Follow the product label when its stated cure time differs, especially with two-component aerosol or professional refinishing products.
Success checkpoint: The clear coat feels hard, does not string under a light touch, and shows no fingerprints or solvent-softened areas.
Common mistake: Sanding a soft clear coat pulls it from the groove and creates a crater that requires another application.
Step 7: Level the Cured Repair
Soak 3,000-grit paper in clean water, wrap it around a small hard block, and make short, light passes across the raised clear coat. Keep the repair lubricated and inspect frequently after drying the area.
Use 5,000-grit paper afterward if the compound struggles to remove the sanding haze. Stop as soon as the repair feels flush. The surrounding factory clear coat is usually thinner than the touch-up ridge, so unnecessary sanding can expose the color layer or create a permanent dull ring.
Success checkpoint: A clean fingertip cannot detect a raised edge, and the surface has an even matte haze without a sharp circular burn-through.
Common mistake: Sanding with a soft sponge or bare fingertip rounds the repair and removes more original clear coat around the defect.
Step 8: Compound, Polish, and Protect
Use a small amount of cutting compound by hand or with a dual-action polisher and a microfiber or foam cutting pad. Work a small area, wipe it clean, then follow with finishing polish to restore gloss.
A 3,000-grit haze should disappear after controlled polishing, but heavy pressure and repeated passes are not automatically better. If the haze remains after several attempts, inspect the sanding scratches and use 5,000-grit refinement rather than removing more clear coat.
Avoid wax, paint sealant, or ceramic coating for about 30 days unless the paint manufacturer gives a shorter approved interval. Fresh repair materials release solvents as they cure, and early sealing can interfere with that process.
Success checkpoint: The repaired area matches the surrounding gloss under direct light, with no sanding haze, compound residue, or visible ridge.
Common mistake: Expecting polish to correct poor leveling. Compound restores clarity; it does not flatten a large paint blob.
Which Repair Method Should You Choose?
A factory touch-up bottle is the best low-cost option for narrow scratches and rust prevention, while a professional spot repair is better for wide damage, metallic blends, and high-value vehicles. A panel respray becomes more appropriate when the scratch crosses a body line, reaches a panel edge, or covers a large area.
| Repair method | Typical cost | Active time | Best use | Main limitation |
|---|---|---|---|---|
| OEM touch-up pen | $15-$30 | 30-90 minutes | Chips and scratches under 2 inches | Visible close-up ridge |
| DIY layered repair | $25-$75 | 1-3 hours over 2 days | Narrow exposed-metal damage | Requires careful sanding |
| Mobile spot repair | $150-$350 | 3-8 hours | Small visible panel damage | Blend may show under harsh light |
| Body-shop panel refinish | $400-$1,500+ | 2-5 days | Wide or complex damage | Highest cost and vehicle downtime |
| Replacement bumper cover | $500-$1,500+ installed | 1-3 days | Broken, distorted, or deeply gouged bumper | Does not preserve the original panel |
When is professional repair the safer choice?
Choose a professional body shop when the panel has deep corrosion, denting, torn metal, a damaged body line, or a scratch wider than a practical touch-up area. Professional refinishing is also preferable for tri-coat pearl, matte, satin, liquid-metallic, and color-shifting finishes.
A leased vehicle deserves special consideration. A visible DIY blob may prevent a charge for paint damage but can also attract a larger charge if the repair is mismatched, poorly blended, or visibly sanded through.
What Changes for Different Situations?
How should bumper scratches be handled?
Bumper scratches require plastic-compatible preparation and flexible paint materials. A bumper corner with missing texture may need texture coating or replacement rather than a smooth touch-up, because a flat painted patch remains visible even when the color matches.
Can you repair a keyed door at home?
A keyed door can receive a DIY touch-up when the damage is narrow and the panel is straight, but a long horizontal key mark usually needs blending. Attempting to brush-paint a long scratch often creates a continuous ridge that is more noticeable than the original line.
What if the scratch crosses a body line?
A body line changes the panel’s shape and catches light from multiple angles. Do not level aggressively across the crease; professional technicians can mask, blend, and preserve the contour more reliably than a small sanding block.
What if the paint does not match?
Stop before clear coating if the color looks wrong after a test application. Confirm the paint code, check whether the vehicle uses a separate ground coat, and compare the dried sample in sunlight and shade. A color mismatch cannot be corrected by additional clear coat.
Common Mistakes and How to Fix Them
| Failure | Likely cause | Recovery |
|---|---|---|
| Paint blob remains high | Excessive wet-film thickness | Let it cure fully, then level with lubricated 3,000-grit paper |
| Repair shrinks into a dip | Solvent loss or insufficient build | Clean, add a thin compatible coat, cure, and re-level |
| Area looks cloudy | Remaining sanding marks | Refine with 5,000-grit paper, then compound and polish |
| Paint wrinkles | Incompatible layers or heavy coat | Stop, remove unstable material after cure, and restart with one system |
| Rust returns | Corrosion remained under primer | Sand back to stable metal and use compatible corrosion protection |
| Clear coat burns through | Excessive pressure or sanding area | Stop immediately; a professional may need to re-clear or refinish |
One practitioner rule matters more than the exact grit number: preserve the original clear coat outside the repair. Touch-up material can be added again, but factory clear coat removed from a panel cannot be restored with polish.
Another counterintuitive point is that a slightly visible but well-sealed touch-up is often better than an ambitious repair sanded through to the color coat. Rust prevention and film stability come before optical perfection.
How Much Time and Money Should You Expect?
A narrow DIY repair typically requires $25-$75 in materials and one to three hours of active labor, but the calendar time is usually 24-48 hours because primer, color, and clear coat need separate curing periods. A mobile technician commonly charges $150-$350 for localized damage, while a body-shop panel refinish often costs $400-$1,500 or more.
| Repair scope | DIY material range | Professional range | Typical calendar time |
|---|---|---|---|
| One small chip | $15-$30 | $100-$200 | Same day to 2 days |
| Scratch under 2 inches | $25-$75 | $150-$350 | 1-3 days |
| Keyed door, narrow area | $50-$100 | $300-$700 | 2-4 days |
| Bumper corner scrape | $50-$125 | $250-$600 | 1-3 days |
| Full panel respray | Not usually practical | $400-$1,500+ | 2-5 days |
Prices vary by city, paint system, vehicle class, corrosion, and whether the shop must repair dents or remove trim.
FAQ
Will toothpaste fix a deep car scratch?
Toothpaste may create a temporary visual change on very light clear-coat haze because it contains mild abrasives, but it cannot replace missing paint layers. Toothpaste can also leave residue or unevenly abrade the finish, so automotive compound is the safer product for superficial defects.
Should I use 1,000-grit or 2,000-grit sandpaper?
Use the least aggressive abrasive that achieves the needed result. A narrow touch-up usually needs 1,500-2,000 grit for edge preparation and 3,000 grit for leveling cured clear coat; 1,000 grit removes material faster and increases burn-through risk.
Can rain damage fresh touch-up paint?
Rain can contaminate or disturb uncured touch-up paint, especially during the first several hours. Keep the vehicle dry for the product’s specified initial cure period, and avoid driving through standing water or washing the panel before the clear coat hardens.
Is a paint pen better than a brush bottle?
A paint pen offers controlled delivery for tiny chips, while a brush bottle gives better control over a long narrow scratch and usually supplies more material. Neither automatically produces an invisible repair; surface preparation, paint code, layer thickness, and leveling determine the finish.
Does car insurance cover a deep scratch?
Collision or comprehensive coverage may cover vandalism or an incident that caused the scratch, subject to the policy and deductible. Cosmetic damage below the deductible is often cheaper to repair directly, but document vandalism with photographs and a police report if required by the insurer.
How do I know when to stop a DIY repair?
Stop when the repair is sealed, stable, and clearly improved without risking the surrounding clear coat. A professional should take over when sanding reaches color, corrosion extends beneath the visible mark, the panel is dented, or the finish is matte, tri-coat, or otherwise difficult to blend.
The Bottom Line
To fix deep scratches on a car, clean the panel, identify the exposed layer, stabilize metal or plastic, apply compatible primer and factory-matched color in thin coats, cover the repair with clear coat, allow it to cure, and level it with lubricated fine abrasive before polishing. DIY repair is practical for narrow damage; wide, corroded, body-line, bumper-texture, and specialty-finish damage belongs with a professional.


