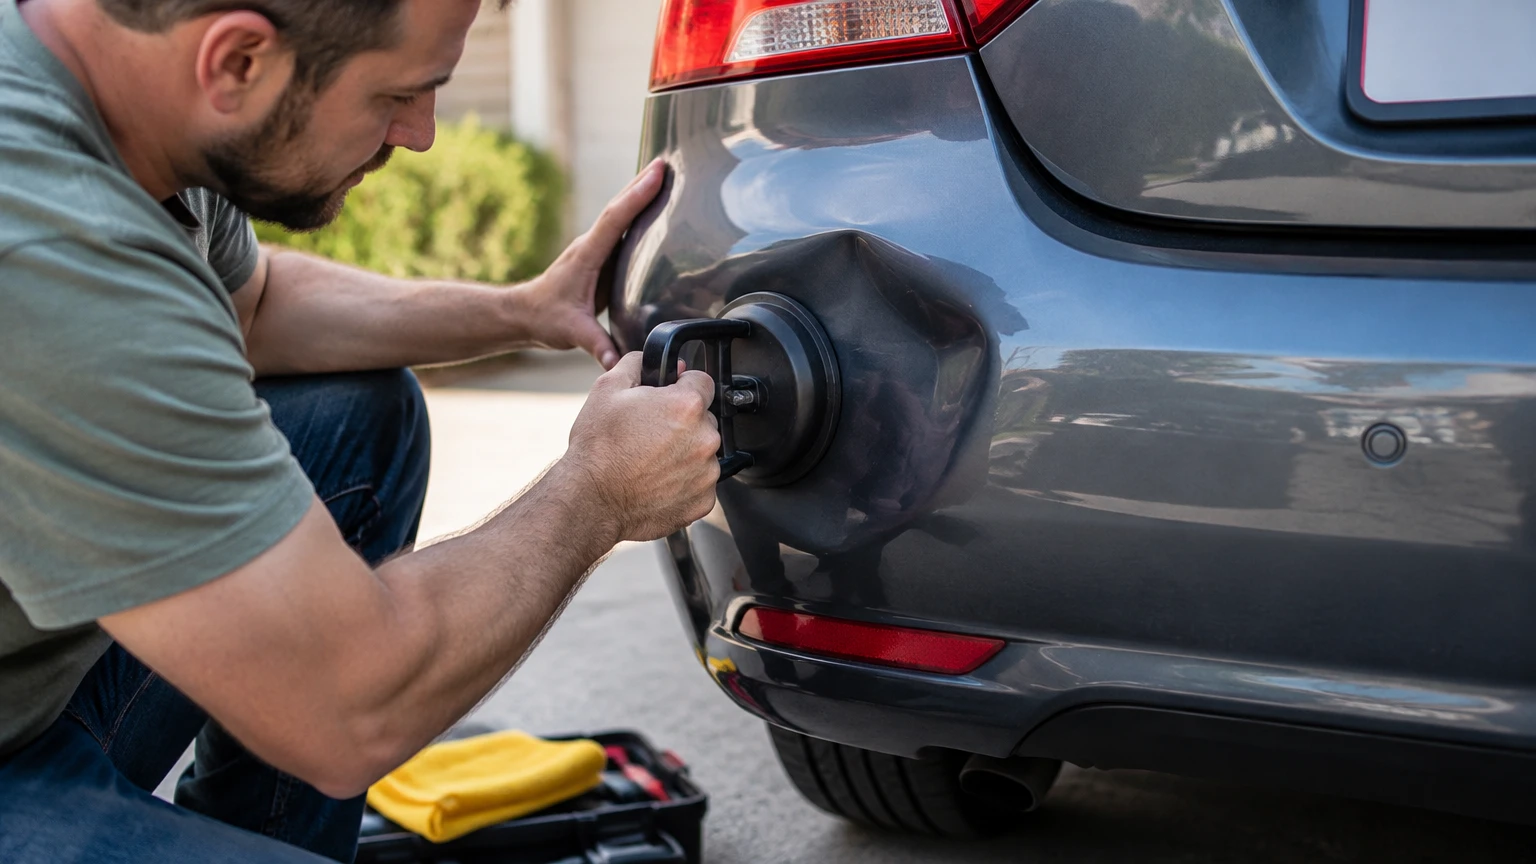
To fix a rear bumper dent, first identify whether the bumper cover is plastic or metal and inspect the paint, edges, mounts, and hidden sensors. Most shallow dents in an intact plastic fascia can be reshaped with controlled heat and gentle pressure in 30-60 minutes. Cracks, torn plastic, sharp creases, displaced sensors, and loose mounting points require professional repair or replacement.
Key Facts
Most modern rear bumper covers use polypropylene or thermoplastic olefin, not structural steel.
Controlled heat softens plastic; heat does not restore stretched metal.
A typical DIY plastic-bumper repair costs $0-$40 and takes 30-60 minutes.
Keep a heat gun moving and hold it approximately 6-8 inches from the surface.
Cracked paint, torn plastic, distorted mounting tabs, and sensor faults are reasons to stop.
The bumper cover is cosmetic and flexible, while the reinforcement beam behind it provides much of the impact structure.
Before You Start: Identify the Damage
A rear bumper dent is usually a depression in the flexible bumper cover, but the same impact can damage the reinforcement beam, absorber foam, parking sensors, blind-spot radar, exhaust trim, or body mounts. Repairing only the visible depression can hide a safety or alignment problem.
Is the bumper plastic or metal?
Most passenger cars, crossovers, and light trucks built in recent decades use a painted plastic bumper fascia over a separate reinforcement beam. Older vehicles, classic cars, and some heavy-duty trucks may use chrome-plated steel or aluminum bumper assemblies.
Look at the back edge, underside, or a chipped area. Black, molded, slightly flexible material usually indicates polypropylene or TPO. A thin, rigid, magnetic panel may be steel, although a magnet test is inconclusive when paint, plastic, or aluminum is present.
Plastic has some molded shape memory. Heating the affected area allows the polymer to soften so pressure can restore the original contour. Metal has no comparable molded memory; a metal dent requires controlled mechanical movement, and excessive stretching may prevent a perfect paintless repair.
Is the damage suitable for DIY repair?
Use heat and hand pressure only when the dent is shallow or moderately deep, the plastic is intact, and the paint remains flexible and attached. A smooth, bowl-shaped depression is a better candidate than a narrow crease that crosses a body line.
Do not begin a home repair if the bumper has a tear, hole, exposed reinforcement, paint flaking, separated seams, detached brackets, or a warning light after the impact. Photograph the damage first, then inspect the opposite side of the vehicle for comparison.
Is a dented rear bumper safe to drive with?
A shallow dent in an intact bumper cover is often driveable, but visual appearance does not prove that the impact structure is undamaged. Do not drive normally if the bumper is loose, rubs the tire, exposes sharp edges, blocks lamps, or has changed the alignment of a parking sensor.
Check for new blind-spot, parking-assist, airbag, or camera warnings. A rear collision can shift a radar module without leaving a dramatic mark on the fascia. Sensor calibration requirements vary by vehicle, so the owner’s manual and manufacturer repair information control the final decision.
Which Repair Method Should You Choose?
Choose thermal reshaping for an intact plastic fascia, professional PDR for suitable metal damage with undamaged paint, and conventional body repair for cracked, gouged, torn, or structurally displaced material. A plunger is a limited option for a broad, shallow depression, not a universal dent tool.
| Method | Suitable material | Typical cost | Typical time | Paint preserved |
|---|---|---|---|---|
| Warm-water or heat-gun reshaping | Polypropylene or TPO plastic | $0-$40 DIY | 30-60 minutes | Usually |
| Cup plunger or suction puller | Broad plastic or metal depression | $5-$50 DIY | 15-45 minutes | Usually |
| Paintless dent repair | Paint-intact metal, selected plastic | $150-$450 professional | 1-3 hours | Yes |
| Glue-pull bridge | Accessible painted metal | $25-$75 DIY kit | 1-2 hours | Usually |
| Filler, primer, and repaint | Gouged or cracked plastic and metal | $70-$1,200 | 1-4 days | No |
| Bumper cover replacement | Torn, badly distorted, or unsafe cover | $200-$2,500 | 1-2 days | No |
When does a plunger work?
A clean cup plunger can help with a large, round, shallow depression on a relatively flat plastic surface. Wet the cup and surrounding surface, create a seal, and pull gradually rather than snapping the handle outward.
A plunger usually fails on textured plastic, sharp creases, curved corners, and dents surrounded by strong body lines. Repeated force can create a high spot around the depression. Stop if the surface begins to whiten, crack, or move unevenly.
Can paintless dent repair fix a plastic bumper?
PDR is highly effective on many steel and aluminum panels when the paint is intact, but plastic bumper fascia repair is more specialized. A technician may use controlled heat and flexible rods, yet access, thickness, texture, and molded memory determine the result.
PDR cannot make cracked paint intact or replace missing material. It also cannot correct a crushed reinforcement beam or broken mounting tab. Ask a technician whether the quote includes sensor inspection and post-repair calibration when the vehicle has radar or parking-assist equipment.
Tools and Materials
A basic plastic-bumper repair needs cleaning supplies, heat, hand protection, and a blunt pressure tool. Do not use a screwdriver, narrow metal rod, knife, or pointed punch because concentrated pressure can permanently create a raised dimple.
| Item | Recommended specification | Quantity | Typical cost |
|---|---|---|---|
| Automotive soap | pH-neutral car wash soap | 1 small bottle | $5-$12 |
| Isopropyl alcohol | 70% or 90% solution | 4-8 fluid ounces | $3-$8 |
| Heat source | 1,500-watt hair dryer or variable heat gun | 1 | $25-$80 |
| Gloves | Heat-resistant, clean, non-textured | 1 pair | $10-$25 |
| Pressure tool | Rounded plastic handle or rubber mallet | 1 | $8-$20 |
| Microfiber towels | Clean, lint-free towels | 2-4 | $5-$15 |
| Jack and stands | Vehicle-rated equipment, if access requires lifting | 1 set | Varies |
A hair dryer is slower but easier to control. A heat gun reaches damaging temperatures quickly, so a variable-temperature model and constant movement are preferable. Boiling water has a natural upper limit near 100°C or 212°F at sea level, but it can still damage sensitive components, loosen trim adhesive, or enter sensor connectors.
How to Fix a Rear Bumper Dent Step by Step
Step 1: Photograph and inspect the bumper
Photograph the dent from straight on, from both sides, and at a low angle. Measure its approximate width and depth, then inspect the bumper’s lower edge, wheel-arch fasteners, reflector, exhaust clearance, parking sensors, and panel gaps.
You will know the inspection is complete when the fascia sits securely, no sensor is pushed inward, and no crack or sharp edge extends beyond the visible dent. The common mistake is starting the repair before finding a broken mounting tab or displaced sensor.
Step 2: Clean and degrease the repair area
Wash the bumper with automotive soap and water, dry it completely, and wipe the dent and a 2-inch perimeter with isopropyl alcohol. Cleaning removes road film, wax, silicone, and grit that can interfere with inspection and make a pressure tool slip.
You will know the surface is ready when a clean microfiber towel leaves no dark residue. Do not use aggressive solvent on unknown paint, matte finishes, wrapped panels, or recently refinished surfaces without testing an inconspicuous area.
Step 3: Gain safe access behind the dent
Reach behind the bumper from underneath only if you can do so without contacting exhaust components, wiring, radar modules, or sharp brackets. If the inner fender liner blocks access, remove only the necessary plastic fasteners and support the vehicle with rated jack stands on a hard, level surface.
You will know access is adequate when a gloved hand can contact the broad rear surface of the dent without crossing a sensor or structural bracket. Never rely on a jack alone while working underneath a vehicle.
Step 4: Protect sensors and nearby components
Locate parking sensors, blind-spot monitoring modules, wiring connectors, cameras, and foam absorbers before applying heat or water. Masking tape can mark the repair boundary, but it does not protect electronics from heat or liquid.
You will know the area is protected when the heating zone excludes every sensor and connector identified in the service information. The common mistake is treating the bumper cover as an empty shell. Many modern rear fascias contain expensive electronics close to the deformation.
Step 5: Warm the plastic gradually
Set a variable heat gun to a low or medium setting, or use a 1,500-watt hair dryer. Keep the heat source moving in slow circles approximately 6-8 inches from the surface, covering the dent and extending about 2 inches beyond its edge.
Warm the area for short intervals, checking the plastic every 20-30 seconds. The surface should become more flexible, not glossy, blistered, smoky, or too hot to approach with a gloved hand. The common mistake is holding a heat gun in one place, which can wrinkle clear coat before the underlying plastic is pliable.
Step 6: Push from the outer edge inward
Place a gloved hand or a rounded plastic tool behind the dent’s outside edge. Apply steady outward pressure while working gradually around the perimeter, then move toward the center in a spiral pattern.
You will know the technique is working when the outer crown relaxes and the depression becomes shallower without a new ridge forming. Do not force the deepest point first. Center-first pressure can move too much material at once and create a permanent high spot.
Step 7: Set the corrected shape
Hold the bumper in its corrected contour while it cools naturally. A damp, cool microfiber towel can speed cooling after the surface has been removed from the heat source, but avoid flooding the cavity behind the fascia.
You will know the shape is stable when light hand pressure no longer causes the panel to spring back. Do not use dry ice directly on paint or plastic. Extreme thermal shock can damage finishes and provides little benefit over controlled cooling.
Step 8: Reassemble and test the vehicle
Reinstall the liner and fasteners, then confirm that the bumper edge aligns with the quarter panel, trunk or hatch, lamps, and exhaust opening. Turn on the ignition and test parking sensors, the rear camera, blind-spot warnings, and any associated dashboard messages.
You will know the repair is complete when the panel gap is even, no fastener is missing, and all driver-assistance functions operate normally. A warning light or failed sensor test requires diagnostic inspection rather than more cosmetic reshaping.
When Heat Is the Wrong Repair
Heat is the wrong repair for cracked paint, torn plastic, deep gouges, exposed reinforcement, crushed corners, and dents that have stretched the fascia beyond its molded contour. Continued pushing can enlarge a tear and make later plastic welding or replacement more expensive.
| Visible condition | Likely underlying issue | Correct next action | DIY limit |
|---|---|---|---|
| Hairline paint crack | Paint film exceeded flexibility | Stop heating and inspect | Cosmetic repair may require refinishing |
| Missing paint or gouge | Material loss and exposed substrate | Sand, adhesion-promote, fill, and repaint | Color match is difficult |
| Plastic tear over 1 inch | Fascia separation | Plastic weld or replace cover | Professional repair preferred |
| Uneven panel gap | Broken tab or shifted mount | Remove cover and inspect hardware | Do not hide with heat |
| Sensor pushed inward | Bracket or module displacement | Scan and inspect calibration | Technician recommended |
| Sharp crease at body line | Localized material stretching | PDR or body-shop assessment | Heat alone usually fails |
Flexible bumper filler is more suitable than rigid filler, but filler does not restore structural strength. A repair may crack again if thick filler bridges a flexible area that continues to move during normal driving.
What Are the Most Common Repair Failures?
Most failed bumper repairs result from excessive heat, concentrated pressure, inadequate access, or an incorrect diagnosis. The safest recovery is to stop early when the surface changes, rather than trying to reverse a new high spot or blister.
- The dent rebounds: Reheat the entire affected zone evenly, then hold the fascia in its corrected position longer as it cools. Rebound often means the plastic was heated unevenly or never moved beyond its relaxed contour.
- A raised crown appears: Stop pushing the center. Warm the crown lightly and apply broad, gentle pressure from the high area toward the surrounding contour.
- The paint cracks: Stop reshaping immediately. The paint layer has lost flexibility, so the repair now requires sanding, compatible primer, color coat, and clear coat.
- The surface turns glossy or hazy: Remove heat and let it cool. Overheating may have altered the texture or clear coat; polishing cannot repair melted or distorted plastic.
- The bumper will not stay attached: Inspect wheel-arch liners, clips, tabs, and the absorber behind the cover. A dent repair cannot replace missing attachment hardware.
- A parking sensor stops working: Do not press around the sensor repeatedly. Check the connector and bracket, then obtain a diagnostic scan and calibration if required by the vehicle maker.
How Much Does Rear Bumper Dent Repair Cost?
Typical DIY plastic reshaping costs $0-$40 when household tools are available. Professional repair usually costs $150-$450 for a suitable dent, while cracked paint, plastic welding, repainting, sensor work, or bumper replacement can raise the total to $500-$2,500 or more.
| Repair outcome | Typical DIY cost | Typical professional cost | Time |
|---|---|---|---|
| Simple heat reshaping | $0-$40 | $150-$300 | 30-60 minutes |
| Suction repair | $5-$50 | $100-$250 | 15-60 minutes |
| Plastic repair and repaint | $70-$180 | $400-$1,200 | 2-4 days |
| Sensor or bracket correction | Not recommended | $150-$600 | 1-4 hours |
| Replacement painted cover | $300-$900 | $800-$2,500 | 1-2 days |
Prices vary by vehicle, paint type, local labor rates, sensor equipment, and whether the replacement cover arrives primed, painted, or ready to install. Metallic, pearl, and three-stage finishes generally require blending into adjacent panels for a close visual match.
How Long Does the Repair Take?
A simple plastic dent takes 30-60 minutes, including cleaning and inspection. A body-shop repair commonly takes 2-4 days because technicians may need to remove the cover, repair plastic, cure primer and paint, blend adjacent panels, and complete sensor checks.
Cold weather slows plastic reshaping because the fascia begins less flexible. A garage temperature near 65-75°F, or 18-24°C, makes controlled warming easier, but the heat source must still move continuously.
A professional technician may finish a suitable paintless repair in 1-3 hours. Waiting time can be longer when parts, paint mixing, calibration equipment, or insurance approval is involved.
Variations for Difficult Situations
How do you repair a dent without removing the bumper?
Repair the dent without removing the bumper when the backside is reachable and no sensor, reinforcement, or wiring blocks the pressure path. Remove only the nearby liner or fasteners, use controlled heat, and work through a broad contact point.
If the absorber or reinforcement sits directly behind the depression, do not force a tool between components. Removing the cover may be safer than blindly applying pressure to hidden hardware.
What should you do in cold weather?
Move the vehicle into a warm garage and allow the fascia to reach room temperature before repair. Do not compensate for cold plastic by placing the heat gun closer or using a higher setting, because the surface can overheat while the deeper material remains rigid.
What should a leased-vehicle owner do?
A leased-vehicle owner should photograph the damage and obtain a professional assessment before attempting a cosmetic repair. A visible high spot, mismatched paint, or damaged sensor can create a larger lease-return charge than the original dent.
When should you replace the bumper cover?
Replace the cover when it is torn through, missing large sections, permanently distorted around mounting points, or cheaper to replace than to repair and refinish. Replacement does not automatically resolve hidden beam, absorber, radar, camera, or exhaust damage, so the impact area still needs inspection.
Choosing a Professional Repairer
Choose a technician who distinguishes bumper-cover repair from structural inspection and explains whether the estimate includes removal, refinishing, clips, sensor testing, and calibration. Ask for the repair method, expected color-blend area, warranty terms, and whether aftermarket or original-equipment parts will be used.
A PDR technician is appropriate for a paint-intact metal dent with sufficient access. A collision repair facility is more appropriate for torn plastic, broken mounts, paint failure, sensor faults, or any impact that changed panel alignment.
Before authorizing work, compare the written estimate with the vehicle’s deductible and current value. A low cosmetic quote may exclude diagnostic scanning, calibration, replacement clips, or paint blending.
FAQ
Can boiling water damage a car bumper?
Boiling water can soften a plastic bumper, but it is not risk-free. Water near parking sensors, radar modules, wiring, lamps, trim adhesive, or open seams can create secondary damage. Use a controlled hair dryer or low heat gun when the component layout is uncertain, and never pour water into the bumper cavity.
Will a heat gun remove every plastic bumper dent?
A heat gun will not remove every plastic bumper dent. Heat works best on a smooth depression in intact polypropylene or TPO. Sharp creases, stretched material, cracked paint, torn plastic, distorted mounts, and dents over internal brackets usually require PDR, plastic repair, refinishing, or replacement.
Can I use a hair dryer instead of a heat gun?
A hair dryer is a slower, lower-risk alternative for minor plastic dents. Hold it several inches from the surface, keep it moving, and expect longer heating than with a variable heat gun. A hair dryer may not soften a cold, thick, heavily reinforced fascia enough for a deep dent.
Should I remove the rear bumper before repairing it?
Remove the rear bumper when the dent is blocked by the reinforcement, absorber, sensor hardware, or inner liner, or when broad backside access is impossible. Leave it installed for a shallow dent only when you can safely reach the fascia without touching wiring or structural components.
Does bumper dent repair affect resale value?
A clean repair that preserves factory paint generally has less effect on resale value than a mismatched repaint, visible filler edge, broken mount, or active sensor warning. Document the repair and retain invoices, especially when the vehicle has driver-assistance equipment.
Is a dented bumper covered by insurance?
Collision coverage may cover an impact-related bumper dent after the deductible, while comprehensive coverage generally applies to non-collision events such as falling objects or vandalism. Coverage rules vary by policy and jurisdiction, so report the incident before authorizing repairs if an insurance claim is likely.
The Bottom Line
To fix a rear bumper dent, confirm that the fascia is intact, protect hidden electronics, warm plastic gradually, and push from the outer edge toward the center using broad pressure. A typical repair takes 30-60 minutes and costs $0-$40 when the paint, mounts, and sensors are undamaged. Stop when the bumper is cracked, torn, loose, sharply creased, or electronically faulty, because those conditions require professional body repair or replacement rather than more heat.


