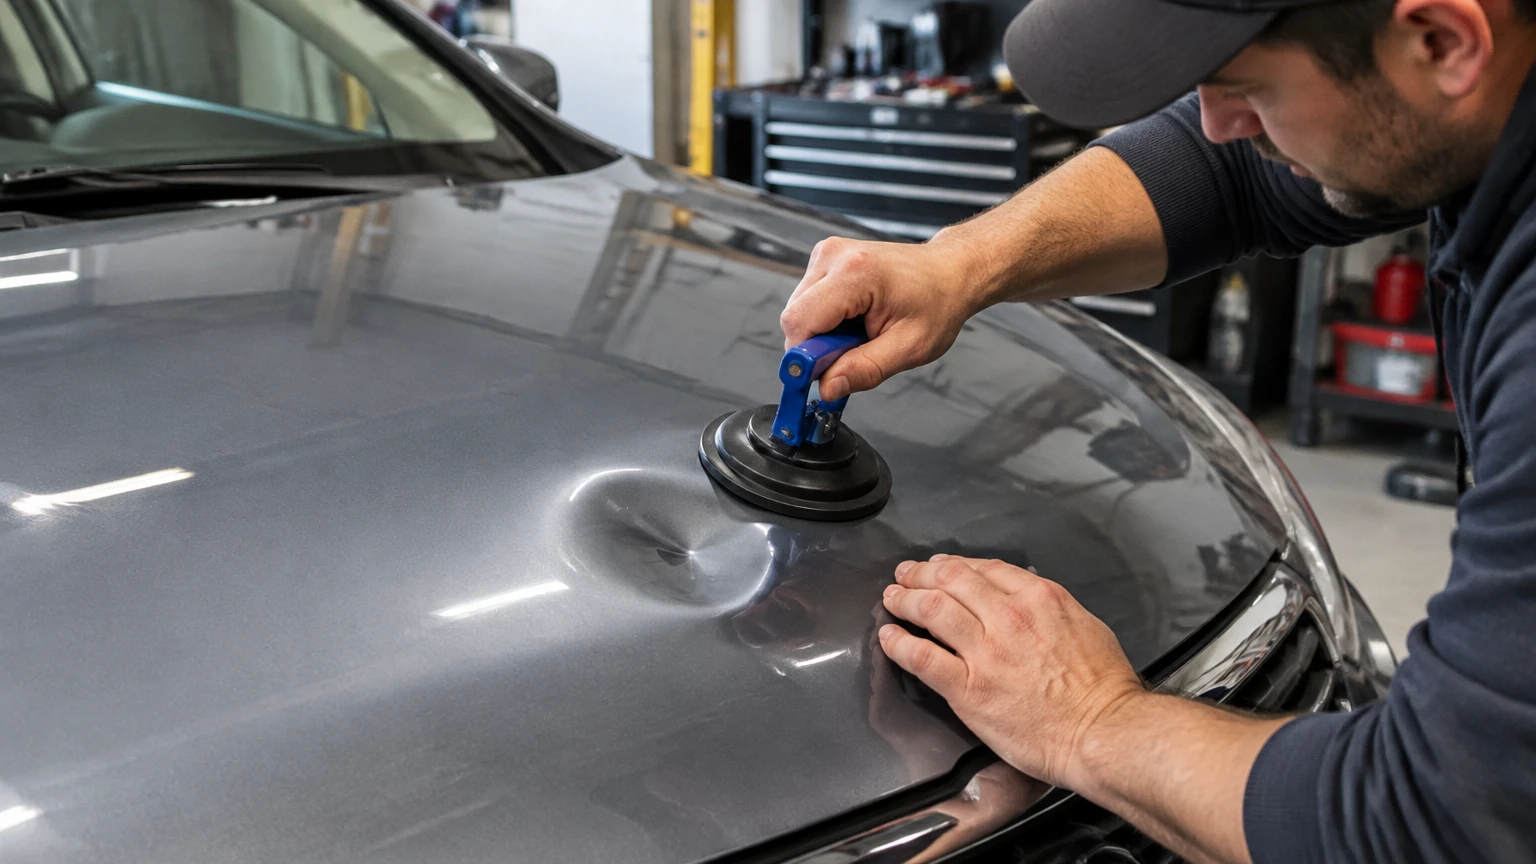
To fix a dent on a car hood, first inspect its depth, paint condition, metal type, and position relative to the hood braces, latch, and hinges. Use paintless dent repair for shallow dents with intact paint, a controlled glue pull only for accessible low-risk damage, and conventional body repair or hood replacement for creases, stretched metal, cracked paint, or damaged safety hardware.
Key Facts at a Glance
- A shallow, rounded dent with intact paint is the best candidate for paintless dent repair.
- A hood dent over an inner brace may be inaccessible from behind and difficult to pull evenly.
- Glue pulling can create a high spot or lift weak paint when excessive force is applied.
- Heat guns, boiling water, dry ice, and inverted compressed-air cans do not reliably restore hood metal.
- Typical repair costs range from $100-$500 for PDR and $500-$1,500 or more for painted body repair.
- A hood that does not latch, sits unevenly, or interferes with hinges should not be driven until inspected.
Is DIY Repair Appropriate for Your Hood Dent?
DIY repair is appropriate only when the dent is shallow, rounded, away from the hood edge and hardware, and surrounded by firmly bonded paint. A dent smaller than approximately 3 inches with no sharp crease is a reasonable glue-pulling candidate, although a professional PDR technician remains more likely to produce a level finish.
Do not begin by pushing, hammering, heating, or drilling. Photograph the hood from several angles, wash it, and inspect the reflection of a straight object across the damaged area. Distorted reflections reveal lows and highs that are easy to miss under diffuse garage lighting.
Use this decision checklist
| Inspection finding | Recommended action | Typical result |
|---|---|---|
| 1-3 inch shallow dent, paint intact, flat area | DIY glue pull or PDR | Repair in 30 minutes to 4 hours |
| Broad shallow depression, no crease, good rear access | Professional PDR | Factory paint retained |
| Sharp fold or crease, paint cracked | Conventional body repair | Sanding, filler, primer, repaint |
| Dent directly over brace, latch, or hinge | PDR inspection first | Access determines feasibility |
| Hood edge folded or latch alignment changed | Body shop assessment | Possible panel replacement |
| Aluminum panel with stretched crown | Specialist PDR or replacement | Higher risk of visible distortion |
Stop if the panel makes a popping or oil-canning sound, the paint begins to whiten, or the hood gap changes. Those signs indicate stretched metal, coating failure, or movement near a structural mounting point.
How Hood Construction Changes the Repair
A car hood contains a thin outer skin bonded or hemmed to an inner reinforcement frame, so a visible dent may be confined to the skin or supported by a brace underneath. The brace changes tool access and can prevent the metal from returning evenly, particularly when the impact crosses a reinforcement channel.
Look beneath the hood before choosing a method. Identify the inner braces, latch, hinges, hood prop or gas struts, washer-fluid components, insulation, and wiring. Never place a hand or tool near a loaded gas strut, and do not remove a hood support unless the hood is independently secured.
A dent between braces may respond to PDR rods inserted through an existing access opening. A dent directly on a brace often needs specialized leverage, glue pulling, or partial interior-panel access. A bridge puller cannot correct a damaged brace, and pulling the outer skin aggressively can separate adhesive bonds.
What does the damage pattern reveal?
A circular depression usually indicates localized impact and retains enough metal shape for PDR. A long crease means the metal has folded and may have stretched beyond its original dimensions. A sharp crown around the dent is a high spot, which must be lowered before the surrounding low area can be corrected.
How Metal Type Affects the Repair
Steel hood panels generally tolerate controlled PDR manipulation better than aluminum panels, while aluminum work-hardens quickly and can retain a visible crown after repeated movement. The metal type is usually identified through the owner’s manual, a body-repair database, a magnet test on an unpainted or known steel area, or manufacturer information.
A magnet that does not stick can indicate aluminum, but plastic, composite, galvanized coatings, and thick paint can make that test inconclusive. Do not rely on heat to make aluminum or steel “remember” its original shape. Thermal expansion is small at safe paint temperatures, and excessive heat can damage clear coat, adhesives, insulation, and nearby components.
| Panel characteristic | Steel hood | Aluminum hood | Composite hood |
|---|---|---|---|
| Typical DIY tolerance | Moderate | Low | Very low |
| Work-hardening risk | Moderate after repeated pulls | High | Cracking or delamination |
| Common repair method | PDR or body repair | Specialist PDR or replacement | Composite repair |
| Heat-gun suitability | Not recommended | Not recommended | Not recommended |
| Typical specialist difficulty | Standard | Advanced | Material-specific |
Which Repair Method Fits the Damage?
Paintless dent repair is the best overall choice when the factory paint is intact and the metal is not sharply creased. Glue pulling is a lower-cost home option for a small, accessible dent, while conventional body repair is necessary when paint, metal shape, or hood alignment has been compromised.
| Method | Best damage | Typical cost | Typical time | Main limitation |
|---|---|---|---|---|
| Professional PDR | Shallow dent, intact paint | $100-$500 | 1-4 hours | Requires access and skill |
| DIY glue pulling | Small rounded dent | $30-$100 | 30-90 minutes | High-spot and paint-lift risk |
| Conventional repair | Crease or damaged paint | $500-$1,500+ | 2-5 days | Requires refinishing |
| Used hood replacement | Severe deformation | $700-$2,000+ | 1-3 days | Color and fitment may vary |
| New painted hood | Unsafe or badly damaged panel | $1,200-$3,000+ | 2-7 days | Highest parts and paint cost |
Prices are typical consumer ranges in the United States and vary with vehicle size, local labor rates, paint system, and whether the hood is aluminum. A luxury vehicle, tri-coat color, or carbon-fiber panel can exceed these figures.
Why professional PDR often beats DIY
A PDR technician uses a reflection board or LED line to identify the exact shape of the low and high areas. Rods, whale tails, and controlled pushing then restore the panel in small movements rather than one large force. The technician can also recognize when the metal has stretched and further correction will worsen the finish.
Before You Start a DIY Glue Pull
Prepare the work area before touching the dent. You need a PDR glue gun, hot-melt PDR adhesive, tabs in several sizes, a mini-lifter or bridge puller, isopropyl alcohol, microfiber cloths, a plastic scraper, nitrile gloves, and a nylon knockdown tool.
| Requirement | Practical specification |
|---|---|
| Working temperature | 65-80°F, or 18-27°C |
| Cleaning solvent | 70% or higher isopropyl alcohol |
| Adhesive cooling time | 4-8 minutes |
| Pull sequence | 3-6 light pulls |
| Inspection lighting | LED line board or bright angled lamp |
| Expected DIY time | 30-90 minutes |
Wash and dry the hood first. Test the alcohol on an inconspicuous painted area, because repainted panels and aftermarket finishes can react differently. Do not use a metal scraper on the clear coat.
Step 1: Map the Dent
Clean the hood and mark the dent’s approximate perimeter with removable masking tape placed on adjacent areas, not across the adhesive zone. View the panel from the front, side, and rear, then identify the deepest point and any raised crown.
You will know the assessment is useful when the dent remains visible as a continuous distortion while you move the light across it. A common mistake is choosing the geometric center of a wide dent even though the actual low point is offset.
Step 2: Select and Clean the Pulling Area
Choose a tab slightly smaller than the deepest low area, not a tab that covers the entire dent. Wipe the attachment area with isopropyl alcohol until the cloth no longer collects wax or residue, then allow the surface to dry completely.
You will know the surface is ready when the adhesive area feels clean and dry without a greasy film. A common mistake is using automotive wax, silicone detailer, or household adhesive, all of which reduce predictable bonding.
Step 3: Apply the PDR Glue Tab
Heat the PDR glue gun according to its instructions and apply a full bead to the tab. Press the tab onto the deepest point without grinding it against the paint, leaving a thin adhesive cushion rather than forcing every drop outward.
Hold the tab stationary for approximately 10-20 seconds, then let the glue cool for 4-8 minutes. You will know it has set when the tab no longer shifts under gentle finger pressure. A common mistake is pulling warm glue, which causes the tab to slide and spreads adhesive across undamaged paint.
Step 4: Make a Controlled Pull
Attach the mini-lifter or bridge puller and apply slow, modest tension. Pull only until the low area rises close to the surrounding surface, then stop and inspect the reflection before making another pull.
You will know the pull worked when the reflection line becomes straighter without a raised ring around the tab. A common mistake is trying to remove the entire dent in one forceful movement. Several light pulls are safer than one aggressive pull because they reduce the chance of creating a crown.
Step 5: Release the Tab and Inspect
Apply isopropyl alcohol around the tab’s edge, wait briefly, and twist the tab away from the panel rather than snapping it upward. Remove adhesive residue with a microfiber cloth and inspect the surface under angled light.
You will know the panel is improving when the low area shrinks while the surrounding reflection remains smooth. If the tab removes clear coat, exposes a different color, or leaves a sharply raised point, stop the process.
Step 6: Lower Any High Spot
Use a nylon knockdown tool and a very light tap from a small hammer to lower a visible high spot. Support the area carefully and make one tap at a time, because the objective is to relax the crown rather than flatten the hood with impact.
You will know the high spot is controlled when the reflection no longer forms a tight circular distortion. A common mistake is striking the high point hard enough to create a new low. If the hood skin is thin, painted, or aluminum, professional correction is safer.
Why Heat-and-Cold Tricks Usually Disappoint
Hairdryers, heat guns, boiling water, dry ice, and inverted compressed-air cans do not provide a reliable hood-dent repair because safe temperature changes are too small to reshape most automotive panels. Extreme temperature can damage clear coat, plastic trim, adhesive bonds, insulation, or skin, while rapid cooling can make coatings brittle.
A hairdryer may warm a dark panel, but it does not create the controlled force required to move a crease. A heat gun can exceed paint-safe temperatures within seconds if held still. Dry ice and liquefied propellant can produce thermal shock without correcting stretched metal, so the method may make the surface look different without restoring its contour.
Do not use boiling water on a hood. The water can enter seams, affect coatings, create a burn hazard, and provide less useful localized force than controlled PDR. Thermal methods are especially poor choices for aluminum, braced areas, sharp creases, and modern multi-layer paint finishes.
When Conventional Body Repair Is Necessary
Conventional body repair is necessary when the paint is cracked, the metal has a sharp crease, the panel edge is folded, or the dent has stretched the hood skin. The repair normally involves controlled metal reshaping, sanding, filler only where needed, epoxy or corrosion-resistant primer, color coat, and clear coat.
A responsible technician removes loose coating and feathers the damaged paint beyond the visible break. Bare steel needs prompt corrosion protection, while aluminum requires compatible preparation because ordinary steel-repair practices can cause adhesion or galvanic problems.
Body filler should not be used as a thick substitute for reshaping metal. Excessive filler can shrink, crack, or reveal an outline as the panel experiences temperature changes. A thin skim over properly corrected metal is more durable than a deep filler plug.
What if the hood will not close correctly?
Do not force a hood that sits high, contacts a fender, misses the latch, or requires unusual pressure to close. A distorted latch support or hinge area can prevent secure closure while driving. A body shop should check hood gaps, latch engagement, hinges, bump stops, and the secondary safety catch before cosmetic work begins.
Common Mistakes and How to Fix Them
Pulling a sharp crease
A sharp crease concentrates stress and may have permanently stretched the metal. Stop glue pulling, mark the damage, and obtain a PDR or body-shop assessment.
Creating a high spot
A high spot forms when the pull exceeds the surrounding metal’s movement or when a rod pushes too aggressively. Stop pulling, lower the crown with controlled knockdown work, and reassess under a reflection line.
Pulling weak paint
Repainted panels, old clear coat, and paint damaged by the original impact can release under adhesive tension. Test a small tab near an inconspicuous edge only if the panel is otherwise a safe DIY candidate.
Ignoring the inner brace
A dent over a brace can resist a centered pull and transfer force into the adhesive bond or reinforcement. Inspect underneath and use a specialist if the damaged zone overlaps structural hardware.
Using the wrong lighting
Diffuse garage lighting hides shallow lows and high spots. Use a straight LED reflection line or a bright lamp at a low angle before declaring the repair complete.
Continuing after improvement stops
Repeated pulls can work-harden aluminum and enlarge a damaged area. If three to six controlled pulls produce no meaningful improvement, the method or access is wrong.
What Does Hood Dent Repair Cost?
Hood dent repair typically costs $100-$500 for professional PDR, $30-$100 for a DIY glue kit, and $500-$1,500 or more for conventional repair and repainting. Hood replacement can cost more once the part, paint blending, alignment, hardware, and labor are included.
| Scenario | Typical labor or parts | Typical total | Usual timeframe |
|---|---|---|---|
| DIY glue kit | $30-$100 | $30-$120 | 1-2 hours |
| Small steel hood dent, PDR | $100-$250 | $100-$300 | 1-2 hours |
| Large or braced dent, PDR | $250-$500 | $250-$600 | 2-4 hours |
| Creased hood, repair and paint | $400-$1,100 | $500-$1,500 | 2-5 days |
| Used replacement hood | $300-$1,200 part | $700-$2,000 | 1-3 days |
| New replacement hood | $700-$2,000 part | $1,200-$3,000+ | 2-7 days |
Ask whether the estimate includes paint blending, corrosion protection, hood alignment, latch inspection, and calibration of any forward-facing camera or radar mounted near the grille. Some vehicles require driver-assistance calibration after front-end work, even when the hood itself appears cosmetic.
Should You Use Insurance for a Hood Dent?
Insurance is usually worth considering only when repair costs substantially exceed the comprehensive deductible or when the dent resulted from hail, vandalism, or another covered event. A $500 repair with a $500 deductible provides little financial benefit, while widespread hail damage may justify a claim.
Check whether the insurer requires an approved repairer, whether an original-equipment hood is specified, and whether a claim affects renewal pricing in your area. Lease and finance agreements may also require factory-like repairs, particularly when paint damage or hood alignment is visible at return.
How Long Should the Repair Take?
A small PDR repair often takes 1-4 hours, while conventional hood repair and refinishing usually takes 2-5 working days. The extra time in a painted repair comes from sanding, primer curing, color matching, clear-coat curing, reassembly, and final alignment rather than from dent shaping alone.
Ask for a written completion time if the vehicle is needed for work or travel. A shop that promises same-day completion for a sharply creased, cracked, and repainted hood may be rushing preparation or curing stages.
When Should You Replace the Hood?
Replace the hood when the outer skin is severely folded, the inner reinforcement or latch structure is damaged, the hood cannot align safely, or repair and paint approach the cost of a suitable replacement panel. Replacement is not automatically better, because used panels can have hidden rust, previous filler, poor fit, or a mismatched color.
A replacement hood still requires gap adjustment, latch testing, paint evaluation, and sometimes blending into the fenders. The final decision should compare the complete installed cost, not the price of the bare panel.
FAQ
Can a suction cup remove a car hood dent?
A suction cup can affect a broad, shallow depression only when the panel is smooth and the cup seals firmly. It cannot reliably correct a crease, a dent near a brace, or stretched metal. A weak seal produces little controlled force and can encourage repeated pulling that leaves a high spot.
Does paintless dent repair work on scratched paint?
PDR can reshape the metal, but it does not restore missing paint or prevent corrosion on exposed steel. A technician may repair the dent first and then recommend touch-up or refinishing. Cracked paint also increases the risk that further manipulation will enlarge the damaged area.
Can a dent over a hood brace be fixed?
A dent over a hood brace can often be repaired, but the result depends on whether the brace is bent, bonded tightly to the outer skin, or blocking tool access. A professional may use an access point, glue pulling, or partial interior removal. DIY centered pulling is especially risky in this location.
How do I know whether my hood is aluminum?
A magnet test can provide a clue, but it is not conclusive because paint, coatings, plastic sections, and composite construction affect the result. Vehicle repair information, manufacturer specifications, or a technician’s inspection provides better confirmation. Aluminum usually requires more controlled, specialized manipulation.
Will a dent come back after PDR?
A properly repaired dent normally does not return when the metal has not been stretched and the panel’s bonded areas remain intact. A dent may reappear if the hood skin was work-hardened, the inner brace is damaged, or the original repair left residual stress. A reflection-board inspection helps identify these conditions.
Can I drive with a dented hood?
Drive only if the hood closes fully, the primary and secondary latches engage, the panel does not obstruct visibility, and the hood cannot lift into the windshield. A hood with altered gaps, loose hardware, damaged hinges, or latch problems should be transported to a repair facility instead.
The Bottom Line
The safest way to fix a dent on a car hood is to match the method to the damage: professional PDR for shallow dents with intact paint, cautious glue pulling for a small accessible dent, and conventional repair or replacement for creases, cracked paint, stretched metal, or latch and brace damage. Avoid thermal shock, boiling water, and aggressive pulling because they add risk without reliable control.


