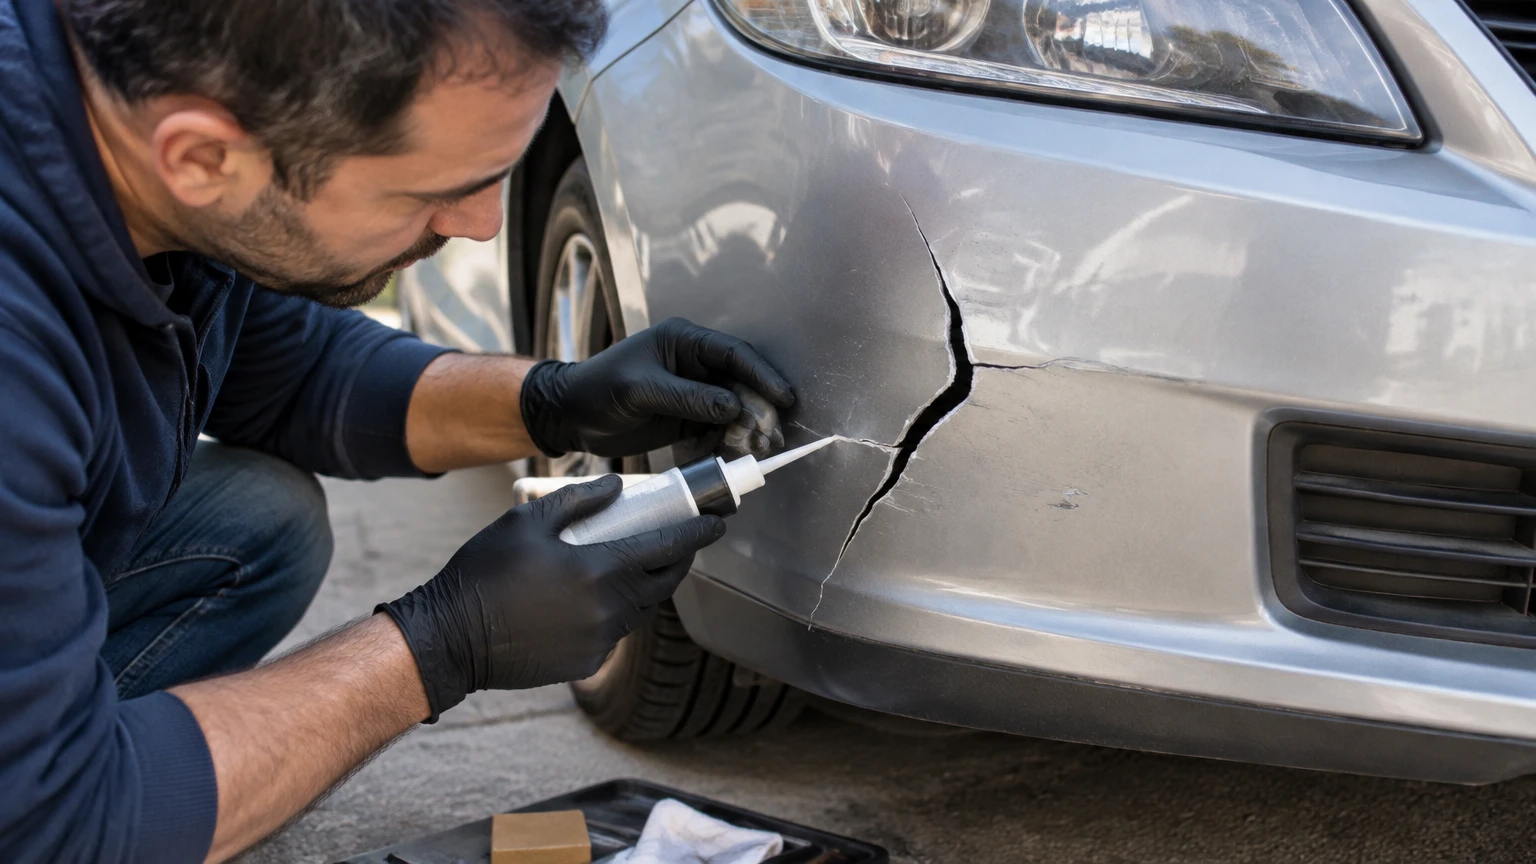
A cracked car bumper is usually repairable when the plastic cover still retains its shape, the crack does not destroy a mounting point, and no radar or parking sensor is damaged. The reliable repair reconnects the bumper substrate from behind, fills the visible groove with flexible repair material, then restores primer, color, and clearcoat. Expect 3-6 hours of hands-on work, plus curing time.
Key Facts at a Glance
- Most modern bumper covers use flexible polypropylene, thermoplastic olefin, or PP/EPDM plastic.
- A backside reinforcement is necessary because front-surface filler alone usually cracks when the bumper flexes.
- Plastic welding requires a filler rod that matches the bumper’s plastic family.
- A cracked mounting tab, torn sensor bracket, or distorted bumper shape often makes replacement safer than repair.
- Typical DIY material cost is $35-$100; professional repair commonly costs $250-$600.
- Paint, filler, adhesive, and clearcoat may need 24-72 hours before normal washing or polishing.
When Can a Cracked Car Bumper Be Repaired?
A cracked car bumper can usually be repaired when the crack is localized, the surrounding panel remains flexible, and the bumper still aligns with the fender, headlamp, grille, and wheel-arch edges. A 2-12 inch split through the smooth cover is a typical DIY candidate if the plastic is not badly stretched or missing.
Repair becomes less dependable when the impact has created a sharp buckle, multiple radiating cracks, a missing section, or a torn mounting flange. A bumper cover is cosmetic and aerodynamic rather than a substitute for the vehicle’s crash structure, so repairing the cover does not restore a damaged reinforcement bar or absorber.
A practical inspection should answer four questions:
- Does the crack continue into a mounting tab?
- Is the bumper shape still correct when loosely refitted?
- Are parking sensors, radar modules, wiring, or brackets involved?
- Is the plastic identified clearly enough to select adhesive or welding rod?
If the crack reaches a sensor opening, professional inspection is the safer choice. A visually acceptable repair can still alter sensor alignment.
Should You Repair or Replace the Bumper?
Repair the bumper cover when the damage is a clean split in otherwise stable plastic. Replace it when the cover has lost its geometry, several mounting points are torn away, or sensor brackets and radar zones are compromised.
| Damage condition | Recommended action | Typical cost | Typical time |
|---|---|---|---|
| Hairline crack under 4 inches | Flexible adhesive and backside reinforcement | $35-$75 DIY | 2-4 hours |
| Split 4-12 inches with aligned edges | Hot staples, welding, or structural adhesive | $50-$120 DIY | 4-7 hours |
| Crack through one mounting tab | Professional tab repair or replacement | $300-$1,200 | 1-2 days |
| Missing plastic or severe deformation | Replacement bumper cover | $800-$2,000+ installed | 1-3 days |
| Damage near parking radar | Professional assessment and calibration | $400-$1,500+ | 1-3 days |
| Multiple cracks after a hard impact | Replacement is usually more predictable | $900-$2,500+ | 1-3 days |
Prices are typical North American ranges and vary with vehicle class, paint complexity, labor rates, and whether the replacement part is OEM, aftermarket, used, or unpainted.
Can You Drive With a Cracked Bumper?
You can often drive a short distance with a stable cosmetic crack, but a loose bumper can detach, contact a tire, expose sharp edges, or hide damaged lighting and wiring. Secure a loose edge temporarily with automotive tape or temporary fasteners, then inspect the vehicle before highway driving.
Do not continue driving normally when the bumper drags, blocks a lamp, exposes a sensor, or has a sharp fragment near pedestrians. Temporary tape is a transport measure, not a structural repair.
What Plastic Is the Bumper Made From?
The plastic marking on the bumper’s inner face determines which repair products can bond or fuse successfully. Common markings include >PP<, >PP/EPDM<, >TPO<, and less frequently ABS or polyurethane designations.
| Marking | Material family | Adhesive behavior | Welding guidance |
|---|---|---|---|
>PP< |
Polypropylene | Requires polyolefin adhesive promoter | Use PP rod |
>PP/EPDM< |
PP rubber blend | Flexible and impact resistant | Use compatible PP/TPO rod |
>TPO< |
Thermoplastic olefin | Low surface energy | Use TPO or approved PP system |
>ABS< |
Acrylonitrile butadiene styrene | Easier to bond than PP | Use ABS-compatible repair plastic |
>PUR< |
Polyurethane | Often thermoset or flexible | Use polyurethane repair system |
A product labeled “plastic repair” is not automatically suitable for every bumper. Polypropylene and TPO have low surface energy, which causes ordinary epoxy, polyester filler, and household superglue to peel unless the product is specifically formulated for automotive polyolefins.
How Do You Identify the Plastic?
Remove the bumper if possible and inspect the back for a molded recycling code or material abbreviation. Clean surrounding dirt first because textured black plastic can hide small lettering. If no marking exists, a repair supplier or body shop can often identify the substrate from the part number and vehicle application.
Do not burn an unknown bumper to identify it. Burning creates toxic fumes and can damage a part that might otherwise be repairable.
Which Bumper Repair Method Is Best?
Flexible two-part adhesive is the easiest method for a short, aligned crack. Plastic welding gives the strongest substrate-specific bond when the operator controls heat correctly. Hot staples are useful for locking a long split together from the rear, but they should support rather than replace a compatible plastic repair.
| Method | DIY difficulty | Material cost | Best crack length | Main limitation |
|---|---|---|---|---|
| Flexible structural adhesive | Low to moderate | $25-$60 | 1-8 inches | Requires careful curing |
| Hot stapler | Moderate | $40-$100 | 4-18 inches | Does not restore front appearance |
| Plastic welding | High | $50-$150 | 4-24 inches | Heat can warp thin plastic |
| Professional tab repair | High | $250-$700 | Mounting damage | Access and alignment are difficult |
| Bumper replacement | Moderate installation | $800-$2,500+ | Severe damage | Paint and sensor costs increase total |
Is Epoxy Better Than Plastic Welding?
Epoxy is better for a beginner repairing a short crack with clean, matching edges. Plastic welding is better when the plastic type is known and the crack needs a fused repair that flexes with the original substrate.
Adhesive systems reduce heat distortion but depend heavily on preparation, mix ratio, film thickness, and cure temperature. Welding avoids adhesive chemistry, yet excessive heat can thin the bumper, create a depression, or produce a brittle heat-affected area.
Hot staples add mechanical load distribution across the rear. They do not provide a finished front surface, and staples placed too close to the outer skin can telegraph through the paint.
What Tools and Materials Do You Need?
A typical repair requires a bumper-safe cleaner, abrasive paper, a rotary tool or sharp V-grooving tool, compatible adhesive or welding rod, reinforcement material, flexible filler, primer, paint, and clearcoat. Removing the bumper is strongly preferred because backside access controls repair quality.
Before You Start
| Requirement | Typical specification |
|---|---|
| Work time | 3-6 hours, excluding overnight cure |
| DIY material budget | $35-$150 |
| Sandpaper | 80, 180, 240, 320, and 400 grit |
| Crack groove | Approximately 3-5 mm wide and 2-3 mm deep |
| Stop-drill bit | 3 mm, or 1/8 inch |
| Adhesive | Automotive flexible PP, TPO, or bumper repair adhesive |
| Reinforcement | Automotive mesh or compatible plastic backing |
| Paint system | Adhesion promoter, flexible primer, basecoat, and clearcoat |
| Safety equipment | Safety glasses, nitrile gloves, respirator suitable for coatings |
Use a firm sanding block for the visible surface. Fingertip sanding follows low spots and commonly leaves a shallow wave that becomes obvious in daylight.
Step 1: Remove and Inspect the Bumper
Remove the bumper cover when its fasteners can be accessed without damaging clips. Disconnect lamps, fog-light wiring, parking sensors, and harness retainers only after identifying each connector.
Place the bumper on a padded stand with the painted surface supported without pressure. Wash both faces with automotive detergent, then wipe the repair area with a plastic-safe degreaser or isopropyl alcohol.
You will know it worked when: the surface has no road tar, silicone residue, wax, or oily fingerprints.
Common mistake: using petroleum solvent or brake cleaner without checking compatibility. These products can swell plastic or leave contamination.
Inspect for displaced edges, missing fragments, stretched holes, and cracks radiating from fasteners. Mark every damaged area before beginning the cosmetic repair.
Step 2: Stop the Crack and Create a Repair Groove
Drill a 3 mm hole at the visible end of a stable crack when the crack tip is clearly identifiable. The hole removes the sharp stress concentration that encourages propagation. Do not drill randomly through a spiderweb of impact fractures because the bumper may need replacement.
Align the crack edges and hold them with low-tack tape on the painted side. On the rear, use a rotary tool, scraper, or knife to create a shallow V-groove along the split. A groove approximately 3-5 mm wide and 2-3 mm deep gives adhesive or weld material a mechanical seat.
A front groove is useful for flexible filler. The rear groove must not cut so deeply that the bumper becomes a thin hinge beside the repair.
You will know it worked when: the crack closes without force and the groove exposes clean plastic rather than glossy contamination.
Common mistake: widening the crack by levering the edges apart. Remove only loose, whitened, or contaminated material.
Step 3: Reinforce the Backside
Choose one backside method based on plastic type, equipment, and crack geometry.
For adhesive repair, abrade a band at least 25-40 mm wide on both sides of the crack with 80-grit paper. Apply the specified adhesion promoter if the adhesive manufacturer requires it. Mix only the amount usable within the product’s working time, then apply adhesive, embed automotive reinforcement mesh, and cover the mesh completely.
For plastic welding, tack the crack at intervals, then make a continuous controlled weld using a matching rod. Keep the heat moving. A hot-air gun should not be aimed at one point until the surface glosses or sags.
For hot stapling, place stainless wave staples perpendicular to the crack at approximately 12-20 mm intervals. Sink each staple only until it locks the plastic. Clip protruding legs and cover the area with compatible repair adhesive or plastic weld.
You will know it worked when: the repaired rear face holds the crack closed while the outer surface remains aligned.
Common mistake: using fiberglass mesh with an adhesive that cannot bond to PP or TPO. Mesh increases area, but it cannot compensate for incompatible chemistry.
Step 4: Fill the Front Groove
Remove the alignment tape and inspect the front surface for raised edges. Sand the repair line with 80-grit paper, keeping the surrounding contour intact.
Apply a thin coat of polyolefin adhesion promoter to exposed PP or TPO if required by the filler system. Follow its flash time. Then force flexible bumper repair filler into the V-groove, slightly overfilling it to allow sanding.
Use a purpose-made bumper repair compound rather than household body filler. Rigid polyester filler can fracture when a flexible bumper bends during installation or a low-speed contact.
You will know it worked when: the filler bridges the groove without pinholes, soft edges, or visible air pockets.
Common mistake: applying one thick mass of filler. Two thin applications usually cure more evenly and reduce shrinkage mapping.
Step 5: Sand, Prime, and Paint
Allow the adhesive and filler to cure according to the product label and workshop temperature. Typical cure time is 30-60 minutes for initial sanding, while some structural adhesives require 12-24 hours before full loading.
Block-sand the filler with 180 grit, then refine with 240, 320, and 400 grit. Feather the surrounding paint over a progressively wider area. Use a guide coat if the contour is difficult to judge.
Spray flexible plastic primer over prepared bare plastic and repaired filler. Apply the color-matched basecoat in light, overlapping passes, followed by compatible clearcoat after the stated flash interval.
You will know it worked when: the repair disappears under an inspection light from several angles and the bumper contour matches the opposite side.
Common mistake: polishing before the clearcoat has hardened. Fresh clear can smear, trap solvent, or develop a dull patch.
Paint and Cure Timing
| Stage | Typical interval | Inspection point |
|---|---|---|
| Adhesion promoter flash | 5-15 minutes | Surface is flashed, not wet |
| Flexible filler cure | 30 minutes to 12 hours | Sandpaper produces dry dust |
| Primer flash between coats | 5-10 minutes | Primer is tack-free |
| Basecoat flash | 10-20 minutes | Finish is evenly matte |
| Clearcoat handling cure | 4-12 hours | Surface resists light touch |
| Full coating cure | 24-72 hours | Washing and polishing are safe |
Product instructions override these typical intervals, especially below 18°C or above 27°C.
What If the Crack Reaches a Mounting Tab?
A mounting-tab crack needs alignment testing before cosmetic finishing. Reinstall the bumper loosely after the structural repair and verify that fasteners enter without pulling the cover out of shape.
A tab can sometimes be rebuilt with compatible plastic, a reinforcing plate, or a professional plastic repair system. Replacement is usually preferable when the tab carries repeated tension, the surrounding plastic is torn, or the bumper gap cannot be restored.
Do not use metal screws as the only reinforcement on a flexible PP tab. The screw can create a new stress concentration and may loosen as the cover flexes.
What If Parking Sensors or Radar Are Nearby?
Damage near a parking sensor, blind-spot sensor, forward radar module, or camera deserves professional evaluation. Sensor brackets establish position and angle, while filler, heat, paint thickness, and distorted plastic can change the sensing environment.
Parking sensors may need a diagnostic scan after reinstallation. Radar and camera systems can require manufacturer-specific aiming or calibration, particularly after bumper replacement or impact deformation. A cosmetic repair does not prove that an ADAS system remains accurate.
Never bury a sensor, wiring connector, or bracket in adhesive. Mask openings and verify that each sensor sits flush and square.
Common Mistakes and How to Fix Them
| Failure mode | Likely cause | Recovery |
|---|---|---|
| Crack reopens | No backside reinforcement | Remove front filler and rebuild rear support |
| Adhesive peels in sheets | Silicone, wax, or wrong plastic system | Strip, abrade, clean, and use polyolefin promoter |
| Repair sinks after painting | Filler or adhesive was not fully cured | Sand back, allow full cure, refill and refinish |
| Bumper warps | Excessive welding heat | Heat-form carefully if possible, otherwise replace damaged area |
| Wave appears in daylight | Finger sanding without a block | Re-prime and block-sand with a rigid backing block |
| Paint edge remains visible | Small blend area or poor flash time | Extend the blend and follow coating intervals |
One counterintuitive rule matters: a harder repair is not automatically a stronger repair. A bumper must absorb minor impacts through controlled flexing, so a rigid patch can transfer force into the surrounding plastic and start a second crack.
Another practitioner rule is to test adhesion on a hidden area before committing to the visible panel. A product that feels hardened after an hour may still peel from contaminated polyolefin.
How Much Does a Cracked Bumper Repair Cost?
DIY repair typically costs $35-$150 before specialized paint equipment. Professional cosmetic repair commonly costs $250-$600, while a painted replacement cover with clips, labor, and calibration can exceed $2,000 on vehicles with radar or complex finishes.
| Repair scenario | Parts and materials | Labor | Typical total |
|---|---|---|---|
| Small unpainted crack, DIY | $35-$75 | $0 | $35-$75 |
| Painted crack, DIY aerosol system | $90-$200 | $0 | $90-$200 |
| Professional crack repair | $40-$100 | $200-$500 | $250-$600 |
| Replacement cover, standard vehicle | $250-$900 | $350-$900 | $600-$1,800 |
| Replacement with ADAS calibration | $500-$1,300 | $500-$1,500 | $1,000-$2,800 |
Insurance coverage depends on the cause, deductible, policy terms, and whether the repair cost is below the replacement estimate. Photograph the damage before disassembly and obtain an itemized estimate if a claim is possible.
Can You Repair a Bumper Without Removing It?
A bumper can be repaired in place when the crack is short, the rear face is accessible through the wheel well, and no wiring or sensor requires removal. In-place work is less reliable because restricted access makes cleaning, reinforcement, and alignment difficult.
Removing the cover is usually worth the added 30-90 minutes when the crack exceeds several inches or the bumper must be painted. Complete access lets you inspect hidden brackets and confirms whether the visible split is the only damage.
What About Zip Ties or Superglue?
Zip ties can provide temporary alignment through drilled holes, but they are not a durable cosmetic repair. Superglue becomes brittle and generally lacks reliable adhesion to PP and TPO bumper plastics.
A temporary mechanical repair may be appropriate for transporting a vehicle to a body shop. It should not be treated as a finished structural or paint repair.
FAQ
Can a cracked plastic bumper be repaired at home?
A cracked plastic bumper can be repaired at home when the split is accessible, the plastic type is identified, and the cover still fits its original position. A home repair needs backside reinforcement, compatible adhesive or welding material, flexible filler, and adequate curing time. Mounting tabs and sensor areas raise the risk beyond routine DIY work.
How long does a bumper crack repair last?
A properly prepared repair can last for years when the crack is stable and the bumper is not repeatedly overloaded. Longevity depends more on plastic compatibility, backside reinforcement, cleaning, and curing than on filler brand. A front-only patch often fails quickly because normal bumper flexing reopens the substrate.
Can cold weather cause a bumper crack?
Cold weather can make PP, TPO, and other plastics less flexible, allowing a low-speed impact to create a longer split than the same impact in warm conditions. Perform adhesive and paint work within the product’s temperature range, commonly around 18-27°C, unless the manufacturer specifies another range.
Should a crack be repaired before painting the car?
The bumper crack should be structurally repaired before any paintwork begins. Painting over a split hides the defect temporarily, but movement will usually reopen the line and create a visible ridge. Repairing the substrate first prevents wasted primer, basecoat, and clearcoat.
Is a cracked bumper an MOT or inspection failure?
Inspection rules vary by country, state, and local authority. A loose bumper, sharp exposed edge, blocked lamp, insecure mounting, or damaged safety equipment is more likely to cause a failure than a stable cosmetic crack. Check the applicable inspection rules before relying on a repaired cover.
The Bottom Line
To fix a cracked car bumper, identify the plastic, remove contamination, stop the crack, reinforce the rear, fill the front with flexible material, and refinish it only after full cure. DIY repair suits a stable cover with aligned edges and no sensor or mounting damage. Replace or professionally repair the bumper when impact has changed its shape, destroyed a tab, or involved ADAS equipment.


