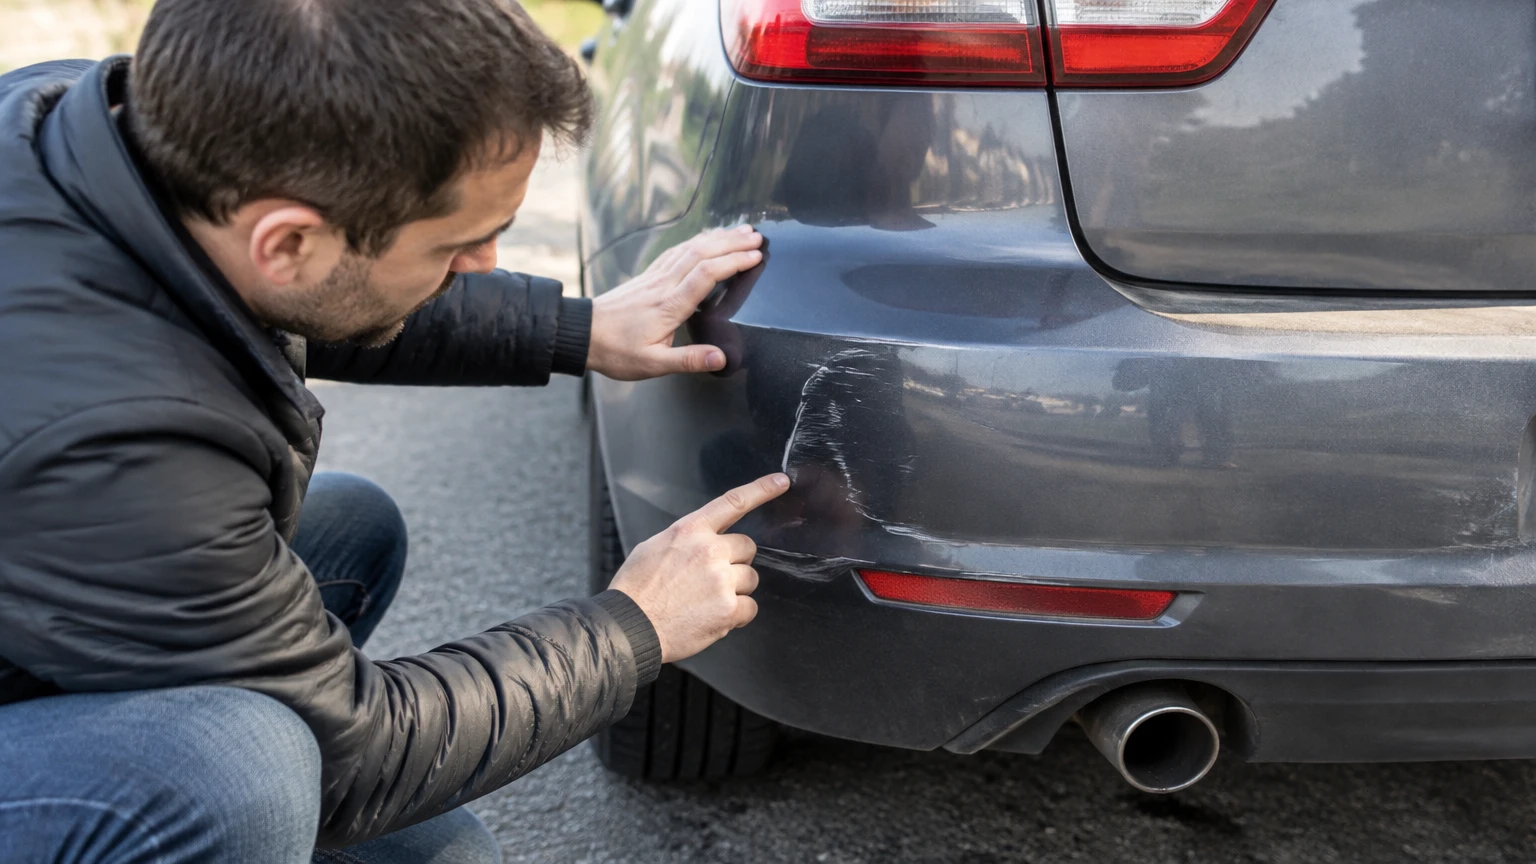
To check rear bumper damage after an accident, photograph the vehicle, inspect the cover and panel gaps, test the trunk or liftgate, look underneath without entering an unsafe area, and check warning messages and parking sensors. A bumper that looks normal can still conceal a crushed absorber, bent reinforcement bar, displaced body panel, or misaligned ADAS sensor.
Key Facts at a Glance
- A rear bumper is a system comprising the cover, absorber, reinforcement beam, mounts, body structure, wiring, and sensors.
- Uniform panel gaps are useful evidence, but the vehicle manufacturer’s repair dimensions override generic 3-5 mm measurements.
- A bumper cover can return to its original shape after impact while the absorber or reinforcement remains damaged.
- Do not drive if fuel, battery, exhaust, wheel, trunk-latch, brake, lighting, or structural damage is suspected.
- Bumper removal or replacement can require parking-sensor, blind-spot, camera, or radar calibration.
- Typical U.S. repair costs range from $250-$600 for minor refinishing to more than $4,000 for structural repair and electronic work.
What Does a Rear Bumper Include?
A rear bumper includes more than the painted plastic cover. The visible fascia attaches to energy-absorbing material, mounting hardware, an impact reinforcement, body structure, wiring, and, on many vehicles, sensors or camera components.
The bumper cover is commonly molded from polypropylene or a similar thermoplastic. Behind it may be an expanded-polystyrene absorber, plastic honeycomb, foam insert, or model-specific energy-management component. The reinforcement beam is usually high-strength steel or aluminum and connects through brackets, crush cans, or frame extensions.
The exact arrangement varies by year, make, and model. A 2008 compact sedan may have no blind-spot radar, while a newer SUV can have radar modules behind both rear corners, ultrasonic parking sensors in the cover, a liftgate camera, and wiring for trailer systems.
| Component | Typical location | Damage consequence | Safe owner check |
|---|---|---|---|
| Bumper cover | Outer rear surface | Scratches, cracks, loose edges | Visual inspection |
| Energy absorber | Behind cover | Reduced impact absorption | Visible only after removal |
| Reinforcement beam | Behind absorber | Reduced crash protection | Look only from a safe position |
| Mounts and brackets | Corners and body attachment points | Misalignment, rattles, separation | Check gaps and looseness |
| Radar or ultrasonic sensors | Rear corners or cover | False alerts or missed detection | Warning messages and function test |
| Rear body structure | Behind beam and trunk floor | Crumpling or shifted latch | Trunk operation and professional inspection |
The rear bumper is therefore not a single replaceable cosmetic panel. Its condition must be judged as a system.
When Should You Avoid Driving the Vehicle?
Do not drive a collision-damaged vehicle if fluid is leaking, a wheel or tire is damaged, the exhaust is hanging, the trunk cannot latch securely, lights do not work, the bumper is dragging, or the rear body has visibly collapsed.
Move the vehicle only far enough to reach safety when traffic conditions require it. Call roadside assistance when a high-voltage battery, fuel system, brake system, suspension, or structural rail may have been affected. A low-speed impact can still damage a tow hitch, battery enclosure, or hidden body structure.
Stop and Arrange Towing
Use a tow truck rather than driving when any of these conditions exists:
- The trunk or liftgate will not latch completely.
- The bumper or exhaust touches the tire, road, or suspension.
- Fuel, coolant, washer fluid, oil, or battery electrolyte is leaking.
- A rear wheel points differently from the other wheel.
- The airbag, restraint, brake, or high-voltage warning light is illuminated.
- A plug-in hybrid or electric vehicle has impact damage near its battery enclosure.
- The rear body floor, frame rail, or hitch appears folded, split, or pushed forward.
Do not crawl under a damaged car supported only by a jack. A flashlight inspection from outside is safer, but a collision shop must inspect concealed structure on a lift.
How Do You Check Rear Bumper Damage After an Accident?
A complete inspection takes about 20-45 minutes for a basic visual check and requires daylight, a flashlight, gloves, a camera, and a clean surface. The determining factor is not the scratch depth alone, but whether impact energy reached the mounts, reinforcement, body structure, wiring, or safety electronics.
Before You Start
| Requirement | Typical specification |
|---|---|
| Inspection time | 20-45 minutes |
| Minimum tools | Flashlight, phone camera, gloves, measuring tape |
| Useful supplies | Car wash soap, microfiber towels, masking tape |
| Inspection location | Level surface with daylight |
| Safety requirement | Engine off, parking brake applied, no unsupported crawling |
| Professional follow-up | Collision scan and lift inspection when impact was more than trivial |
Photograph the vehicle before washing it if insurance or liability may be involved. Take wide images of all four corners, close images of damage, the license plate, the road position if relevant, and the dashboard with the ignition on.
Step 1: Photograph and Clean the Damage
Photograph the rear bumper before moving clips, wiping transfer marks, or attempting a repair. After documentation, wash the area with mild vehicle soap and dry it with a microfiber towel so scratches, cracks, and paint transfer are distinguishable.
Check whether a mark is foreign material or missing vehicle material. Paint from another car may sit on top of the bumper and sometimes removes with appropriate automotive cleaner; a gouge exposes or removes the bumper’s original surface.
You will know this step worked when the entire bumper is clean enough to compare left and right sides. A common mistake is using abrasive household cleaner, which can enlarge a dull patch and erase evidence.
Step 2: Inspect the Cover, Corners, and Underside
Walk around the rear fascia and inspect the center, both corners, the wheel-arch edges, the lower valance, and the area beneath the license plate. Look for cracks, punctures, sharp folds, paint spiderwebbing, displaced edges, missing clips, and sections that can be pushed inward unusually easily.
Compare the damaged side with the opposite side. A corner that sits lower, protrudes farther, or separates from the quarter panel usually indicates broken tabs, displaced brackets, or damage behind the cover.
| Visible symptom | Likely area involved | Immediate implication |
|---|---|---|
| Shallow scuff with even gaps | Cover surface | Often cosmetic |
| Split corner near wheel arch | Cover and retaining tabs | Cover repair or replacement |
| Wide gap at one corner | Mounts, bracket, or body panel | Professional inspection |
| Cover pushed inward | Absorber or reinforcement | Hidden damage possible |
| Puncture near a sensor | Sensor, wiring, and cover | Diagnostic scan recommended |
| Lower edge dragging | Clips, valance, or underbody | Do not continue driving at speed |
You will know the check worked when no edge is loose and both corners have comparable height and projection. Do not heat a large dent with a heat gun, because molded clips can distort and sensor mounting geometry can change.
Step 3: Compare Panel Gaps and Alignment
Inspect the seams where the bumper meets the quarter panels, tail lamps, trunk, liftgate, and lower body. Measure only for comparison between sides unless the factory service manual supplies a specified dimension.
A generic 3-5 mm gap is not a universal pass standard. Manufacturers use different tolerances, and the correct evaluation is uniformity, flushness, fastener position, and comparison with an undamaged side.
Look for a gap that widens toward one end, a bumper edge sitting proud of the quarter panel, a lamp that no longer aligns, or a trunk seam that slopes. Mark suspicious areas with removable masking tape and photograph them before disassembly.
You will know the check worked when the seams are even, the surfaces are flush, and no fastener head or bracket is exposed. A common mistake is forcing the cover into position, which can hide broken mounts while leaving the reinforcement untouched.
Step 4: Open and Close the Trunk or Liftgate
Open and close the trunk or liftgate slowly at least three times. It should move without scraping, binding, unusual force, or a new change in latch effort, and the latch must engage fully without slamming.
Inspect the striker, latch opening, trunk floor, spare-tire well, weather seal, and side pockets for fresh folds, chipped paint, water, or displaced trim. A rear impact can push the body panel forward without producing a dramatic bumper crack.
| Trunk symptom | Possible cause | Recommended response |
|---|---|---|
| Requires extra force | Shifted latch or rear panel | Collision-shop inspection |
| Scrapes one side | Distorted opening or hinge area | Do not force closed |
| Will not latch | Structural or latch damage | Tow vehicle |
| New water leak | Seal, seam, or floor distortion | Dry and inspect promptly |
| Floor has a sharp fold | Rear body deformation | Professional measuring |
| Opens normally but warning appears | Wiring or sensor fault | Diagnostic scan |
You will know the check worked when the latch closes with its former effort and the seal contacts evenly. Do not use trunk closure as proof that the vehicle structure is undamaged.
Step 5: Inspect Underneath From a Safe Position
Use a flashlight while standing or kneeling beside the vehicle, not beneath an unsupported car. Inspect the lower cover, absorber edges visible through openings, reinforcement area, exhaust, heat shields, tow hitch, spare-tire well, and frame-rail extensions.
Look for fresh bare metal, buckled flanges, cracked undercoating, displaced fasteners, crushed foam, bent hitch components, and exhaust contact marks. Rust-colored lines in a new impact area can indicate disturbed coating, but surface color alone cannot prove a structural crack.
A reinforcement beam may look straight from one angle while its mounting bracket or crush can is folded. A collision center uses a lift, measuring system, and manufacturer repair information to determine whether the body points remain within tolerance.
You will know the owner-level check worked when nothing is leaking, hanging, rubbing, or visibly folded. The inspection is incomplete if the impact was strong enough to move the trunk, quarter panel, wheel, or hitch.
Step 6: Check Lights, Sensors, and Warning Messages
Turn the ignition on and record every warning message before clearing codes. Check rear lamps, license-plate lamps, the backup camera, parking sensors, blind-spot monitoring, rear cross-traffic alert, and any trailer-related function fitted to the vehicle.
Do not test a parking system by backing toward a person, wall, or another vehicle. Use a large cardboard box in an empty area, move at walking speed, keep the brake ready, and stop if alerts do not behave normally.
Ultrasonic sensors can fail because of a cracked sensor, loose bracket, damaged wiring, incorrect paint thickness, or a cover that no longer sits at the designed angle. Radar systems can report no obvious dashboard error while their aim or mounting position is wrong. A scan and calibration procedure based on the manufacturer’s instructions is the reliable test.
| System | Typical fault after impact | Verification method |
|---|---|---|
| Ultrasonic parking sensor | No alert or continuous tone | Scan and controlled low-speed test |
| Blind-spot radar | False or missing side warning | Diagnostic scan and calibration |
| Rear cross-traffic alert | Delayed or absent warning | Scan plus manufacturer test |
| Backup camera | Blank, tilted, or distorted image | Camera operation and alignment |
| Tail lamps | Flicker, warning, water entry | Lighting test and connector inspection |
| Trailer wiring | Intermittent lights or module code | Connector and module diagnosis |
You will know the check worked when no warning remains and each fitted system responds consistently. A normal warning-light check does not replace ADAS calibration after bumper removal or replacement.
Which Damage Is Cosmetic, Structural, or Electronic?
Cosmetic damage affects the finish or outer plastic without changing alignment, mounting, or safety components. Structural damage affects the absorber, reinforcement, brackets, body structure, hitch, or frame attachment points. Electronic damage affects sensors, wiring, cameras, modules, or calibration.
| Classification | Examples | Typical decision |
|---|---|---|
| Cosmetic | Scuff, transfer mark, shallow paint chip | Clean, refinish, or monitor |
| Cover damage | Crack, puncture, torn tab | Repair or replace cover |
| Internal impact damage | Crushed absorber, bent beam, broken bracket | Replace affected components |
| Body distortion | Shifted trunk floor, rail, quarter panel | Certified structural repair |
| Electronic fault | Sensor code, camera misalignment | Diagnose and calibrate |
| Safety-related damage | Fuel, battery, restraint, brake issue | Stop driving and tow |
A bumper that “popped back” after impact is not automatically safe. Thermoplastic can recover its shape while foam remains crushed and mounting points stay displaced.
What Hidden Damage Signs Matter Most?
The strongest hidden-damage indicators are a new trunk alignment problem, uneven gaps, a loose bumper edge, a new water leak, a rattling sound, sensor faults, or visible movement of the rear body. One symptom may have several causes, so diagnosis requires inspection rather than guessing from the bumper’s appearance.
| Symptom after impact | Common explanation | Priority |
|---|---|---|
| Rattle over bumps | Broken clip, absorber, or heat shield | Inspect soon |
| Trunk leak | Seal, seam, or floor distortion | Inspect promptly |
| False sensor alerts | Sensor angle, wiring, or cover issue | Avoid relying on system |
| Rear tire rub | Shifted bumper, wheel, or suspension | Stop driving |
| New exhaust vibration | Bent hanger or impact damage | Inspect before longer travel |
| No visible damage, warning code | Sensor or wiring fault | Scan vehicle |
A delayed warning can occur after moisture reaches a damaged connector. Recheck after rain and record the exact message rather than relying on memory.
How Much Does Rear Bumper Repair Cost?
Typical U.S. rear bumper costs range from $250-$600 for minor refinishing, $600-$1,200 for a cracked or punctured cover, $800-$2,000 when internal components need replacement, $1,500-$3,500 or more for sensor and calibration work, and $4,000-$10,000 or more for structural repair.
Prices vary by vehicle, labor rate, paint color, part availability, region, and whether the estimate includes scanning, calibration, rental transportation, and hidden damage discovered after disassembly.
| Repair scope | Typical U.S. cost | Typical shop time | Main variable |
|---|---|---|---|
| Clean and refinish scuff | $250-$600 | 1-2 days | Paint blending |
| Replace bumper cover | $600-$1,500 | 1-3 days | OEM part and paint |
| Cover plus absorber or mounts | $800-$2,000 | 2-4 days | Hidden attachment damage |
| Sensor diagnosis and calibration | $300-$1,500 added | Same day to 3 days | System and procedure |
| Radar or camera replacement | $1,000-$3,500 | 2-5 days | Module price and calibration |
| Structural repair | $4,000-$10,000+ | 1-3 weeks | Measuring and parts |
These are planning ranges, not a guarantee. Obtain a written estimate that identifies OEM, aftermarket, or recycled parts and states whether post-repair calibration is included.
Should You Repair or Replace the Bumper?
Repair is reasonable for limited scuffs or a small plastic defect when the cover remains aligned, mounts are intact, and no sensor sits in the damaged area. Replacement is usually more appropriate for a torn cover, missing mounting tabs, major deformation, sensor interference, or damage that prevents correct fit.
| Option | Typical cost | Best use | Main limitation |
|---|---|---|---|
| Refinish or plastic repair | $250-$800 | Surface damage and small defects | Cannot restore crushed structure |
| OEM cover replacement | $900-$2,500 installed | Exact fit and sensor compatibility | Higher parts cost |
| Reputable aftermarket cover | $600-$1,500 installed | Older vehicle or budget repair | Fit and material variation |
| Recycled original cover | $500-$1,400 installed | Matching part availability | Existing wear or hidden damage |
| Full collision repair | $2,000-$10,000+ | Internal or body damage | Longer downtime |
Plastic welding restores the cover’s shape, not a bent reinforcement beam or distorted body. Aftermarket covers can have different sensor openings, thicknesses, or bracket geometry, so sensor-equipped vehicles need documented compatibility.
When Is Professional Inspection Required?
Professional inspection is required after moderate or high-energy impact, any hit involving a hitch or truck, visible misalignment, sensor warnings, trunk-floor damage, or uncertainty about the reinforcement. A collision center can remove the cover, inspect attachment points, scan modules, and measure body structure.
Ask the shop for:
- Pre-repair diagnostic scan results.
- Photographs of hidden damage after disassembly.
- Part descriptions and source, such as OEM or recycled.
- Manufacturer repair procedures for structural work.
- Post-repair scan results.
- ADAS calibration documentation when applicable.
- A road test that confirms lights, camera, sensors, and trunk operation.
The owner-level inspection is good for triage and documentation. It is not a substitute for controlled structural measurement or radar calibration.
What Changes for Leased Cars, EVs, and Older Vehicles?
Leased vehicles require both safety repair and compliance with the leasing company’s wear standards. Document damage before repair and review the turn-in guide, because a repair that is mechanically sound may still be judged against appearance or part requirements.
Electric and hybrid vehicles require extra caution when the impact reaches the battery enclosure, charging components, high-voltage cables, or rear subframe. Do not touch orange cables or attempt an underbody repair without qualified equipment.
Older vehicles without ADAS may have lower repair costs, but reinforcement, hitch, exhaust, and body damage still matter. A lower market value does not make a bent structural component safe.
Common Inspection Mistakes and Fixes
- Mistake: judging only the paint. Fix: inspect gaps, trunk operation, underbody parts, and warning messages.
- Mistake: using a heat gun on a large dent. Fix: leave deformation for a repairer when clips, sensors, or wiring are nearby.
- Mistake: clearing warning codes before recording them. Fix: photograph the dashboard and request a pre-repair scan.
- Mistake: assuming a new cover restores safety. Fix: verify absorber, reinforcement, brackets, and body structure separately.
- Mistake: accepting a generic gap measurement. Fix: use the manufacturer’s specifications and compare both sides.
- Mistake: driving because the car starts normally. Fix: check latch security, leaks, lights, tires, exhaust, and structural symptoms first.
FAQ
Can a rear bumper be damaged without visible marks?
Yes. A flexible cover can absorb and release energy while the absorber, reinforcement, bracket, or sensor mount remains damaged. New gaps, trunk resistance, rattles, leaks, warning messages, and sensor errors provide stronger evidence than paint appearance alone.
How long can I wait before repairing bumper damage?
Repair cosmetic damage when practical, but address structural, sensor, lighting, latch, leak, or loose-cover problems immediately. Water can reach wiring, a loose cover can detach at speed, and an uncalibrated safety system may give unreliable warnings.
Does replacing a rear bumper require calibration?
It can. Parking sensors, blind-spot radar, rear cross-traffic systems, and cameras may require calibration after cover removal, sensor movement, bracket replacement, or module replacement. The vehicle’s manufacturer procedure determines whether a static target, road test, scan, or combination is required.
Is a cracked bumper safe to drive?
A small cosmetic crack may permit careful driving if the cover is secure, no sensor or light is affected, and the trunk latches correctly. A crack with a loose edge, sharp projection, exposed wiring, sensor damage, or structural symptoms requires prompt inspection and may require towing.
Should I report minor bumper damage to insurance?
Report the incident when another party, property, injury, lease obligations, or a potential hidden-damage claim is involved. Photographs, time-stamped messages, repair estimates, and scan records help establish the vehicle’s condition before disassembly.
The Bottom Line
To check rear bumper damage after an accident, document the vehicle, clean and inspect the cover, compare panel gaps, test the trunk, examine the underside safely, and check every fitted electronic system. Cosmetic scuffs can often wait for a repair estimate, but misalignment, leaks, sensor faults, latch problems, exposed wiring, and structural symptoms require professional inspection before normal driving.


