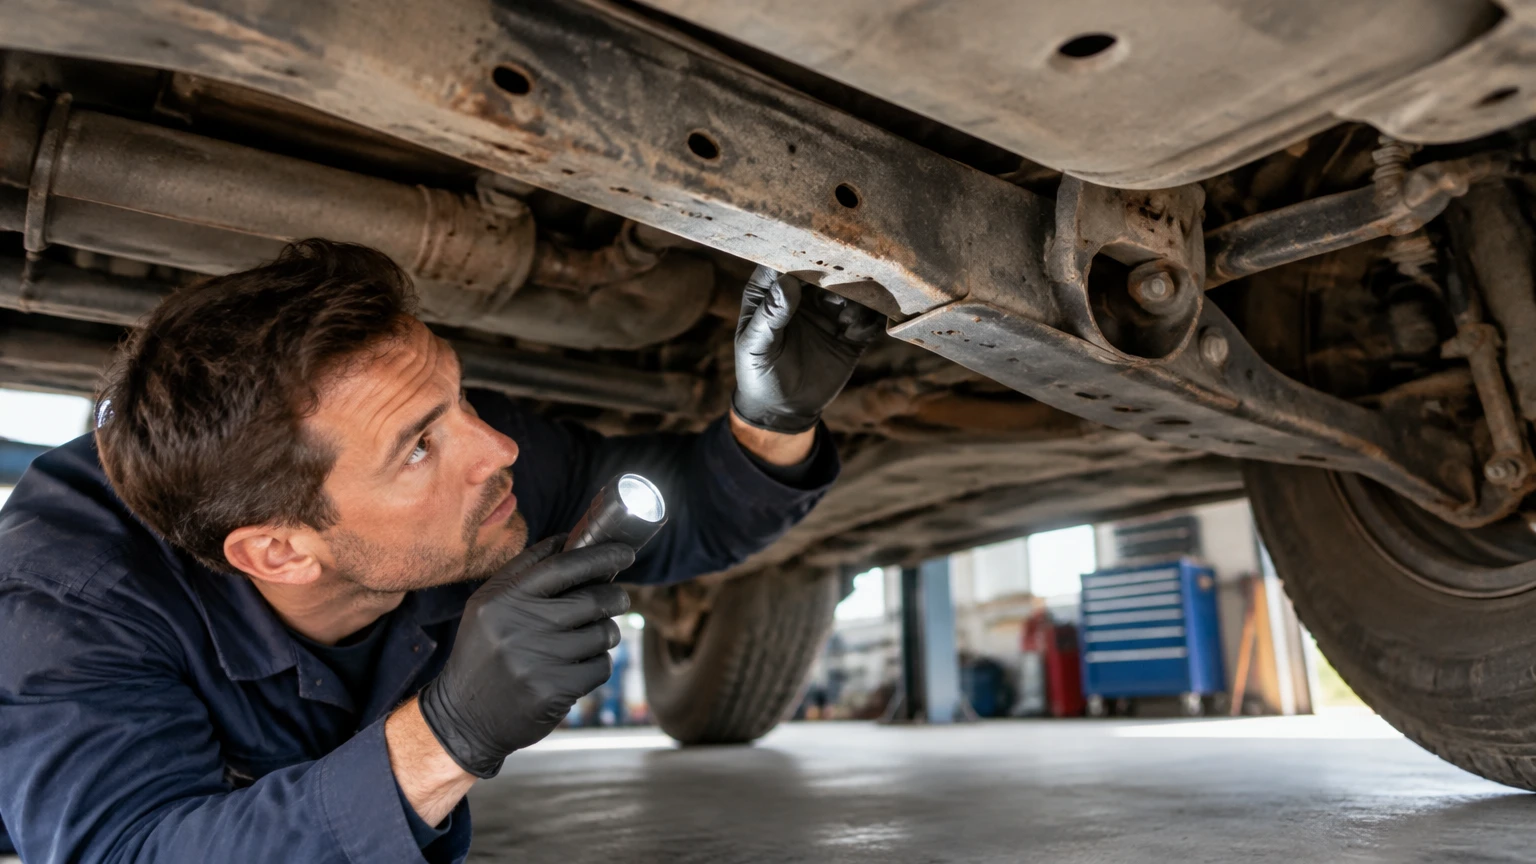
To check a car frame for damage, inspect body gaps, door operation, floor panels, welds, frame rails, suspension mounts, wheelbase symmetry, tire wear, and road tracking. A visual inspection can reveal major deformation, but only an alignment printout or professional 3D measurement against manufacturer specifications can confirm hidden sag, twist, diamonding, or sway.
Key Facts at a Glance
- A bent frame can alter wheel alignment, crash protection, door openings, steering behavior, and tire wear.
- Uneven panel gaps indicate possible movement, but they can also result from incorrectly fitted bolt-on panels.
- Wheelbase measurements should be compared with the vehicle manufacturer’s specifications, not a universal 3 mm rule.
- A four-wheel alignment can identify abnormal geometry, but it cannot always distinguish bent suspension parts from a distorted body structure.
- Frame rails, rocker panels, strut towers, suspension mounts, and factory welds provide stronger evidence than exterior paint condition.
- A collision-repair facility should use OEM dimensional data and a documented measuring system for final structural verification.
What Counts as Car Frame Damage?
Car frame damage is permanent or repairable deformation, cracking, separation, or corrosion in a vehicle’s load-bearing structure. The structure supports the powertrain and suspension, maintains wheel geometry, and manages collision energy through engineered load paths and crumple zones.
“Frame” means different things on different vehicles. A 2023 Toyota Camry uses a unibody structure, so the floor, rocker panels, pillars, rails, and roof form one integrated shell. A Ford F-150 uses a separate ladder frame beneath the body. A bent front rail on the truck may exist even when the cab doors still fit.
Frame damage matters because a vehicle can look attractive while its suspension mounting points remain displaced. A repaired bumper, hood, or fender cannot restore incorrect chassis geometry. The National Highway Traffic Safety Administration recommends following manufacturer repair procedures after collisions because modern structures use different steel grades, joining methods, and controlled deformation zones.
Which Vehicle Structures Need Inspection?
Vehicle architecture determines where damage appears and which repairs are acceptable.
| Structure | Common vehicles | Main load-bearing areas | Typical damage concern |
|---|---|---|---|
| Unibody | Sedans, hatchbacks, crossovers, compact SUVs | Rails, aprons, floor, rockers, pillars, towers | Crumple-zone deformation and displaced suspension points |
| Body-on-frame | Pickups, full-size SUVs, older cars | Ladder rails, crossmembers, body mounts | Bent rails, shifted crossmembers, torsional distortion |
| Spaceframe or composite | Exotics, race cars, specialized sports cars | Tub, cage, bonded or welded nodes | Cracked aluminum, carbon, tubing, or bonded joints |
| Subframe-equipped unibody | Many modern front- and all-wheel-drive cars | Removable front and rear subframes | Bent subframe mistaken for permanent body damage |
Unibody inspection must include the cabin shell, not only visible rails. Body-on-frame inspection must include crossmembers, suspension brackets, body mounts, and the frame interior where corrosion can remain hidden. A replaceable subframe may be damaged without the passenger cell being bent, but the distinction requires measurement.
Before You Start the Inspection
A basic screening takes 45-90 minutes and costs $0-$50 if you already have a flashlight, tape measure, gloves, and a level surface. Professional measurement commonly costs $150-$600 in the United States, depending on the shop and whether an alignment or written dimensional report is included.
Safety and tools checklist
- Park on level concrete, not a crowned street or sloped driveway.
- Use wheel chocks and a parking brake.
- Wear safety glasses and gloves.
- Use rated jack stands on approved support points if lifting is necessary.
- Never crawl under a vehicle supported only by a hydraulic jack.
- Bring a bright inspection light, steel tape, flashlight mirror, tread-depth gauge, paint-depth meter, and phone camera.
- Do not pressure-wash a vehicle immediately before a sale inspection because fresh water can hide leaks, wash away evidence, and create a misleadingly clean underside.
- Avoid touching high-voltage orange cables on hybrid and electric vehicles.
A home inspection is a screening process, not structural certification. Stop and arrange professional evaluation if you see cracked metal, leaking structural seams, a displaced wheel, exposed airbag wiring, fuel damage, or a vehicle that cannot be driven straight.
Step 1: Check the Exterior Panel Gaps
Inspect the hood, doors, trunk, tailgate, fenders, headlights, and bumpers in bright, indirect light. Look for gaps that widen, narrow, change direction, or fail to remain parallel along their length.
Typical modern body gaps often measure approximately 3-6 mm, but the correct value varies by manufacturer and panel location. A plastic gap gauge can identify a difference between sides, yet gap uniformity is more useful than a universal number.
Open and close every closure several times. A door that binds at the latch, requires upward lifting, rubs the striker, or sits proud of the adjacent quarter panel can indicate a shifted opening. The same symptom can result from a replaced door, loose hinges, worn striker hardware, or poor body repair.
What exterior clues mean
| Observation | Possible structural cause | Alternative explanation | Next check |
|---|---|---|---|
| Hood gap wider on one side | Shifted apron or front rail | Misadjusted hood or hinge | Inspect inner fender and hinge bolts |
| Door binds at top | Distorted pillar or rocker | Bent door, hinge, striker | Compare door shell and opening |
| Trunk sits high | Rear body displacement | Misadjusted latch or seal | Inspect spare-tire well and rear rails |
| Bumper fits poorly | Rear or front-end displacement | Replacement bumper mismatch | Check mounting brackets and rails |
| Fenders have uneven seams | Apron or rail movement | Poor panel installation | Inspect fasteners, paint, and welds |
Expert rule: panel gaps establish a suspicion, not a diagnosis. Bolt-on panels can be aligned over a damaged structure, while a poor replacement panel can create gaps on a straight vehicle.
Step 2: Look for Repair Evidence Inside and Underneath
Inspect the engine bay, door jambs, trunk, spare-tire well, and floor beneath removable carpeting. Search for paint overspray, mismatched texture, fresh seam sealer, non-factory welds, disturbed fasteners, rippled metal, and unpainted replacement steel.
Factory spot welds usually appear as consistent circular or oval impressions arranged in regular spacing. Irregular weld beads, grinder marks, overlapping patches, and localized undercoating suggest previous structural work. They do not automatically prove an unsafe repair, because a properly repaired vehicle may contain replacement sections and approved welds.
Check the inner fender aprons, radiator support, firewall, rocker panels, roof rails, and rear floor. In a unibody car, these areas connect the suspension and occupant compartment. Creased floor metal, torn seam sealer, buckled wheel wells, or cracked paint around a strut tower deserves professional measurement.
A paint-depth meter adds context. A large thickness difference can identify refinished panels, but paint thickness cannot reveal whether the underlying structure is straight. Use it to locate repair zones, then inspect the metal and dimensions.
Step 3: Inspect Frame Rails, Crumple Zones, and Welds
Raise the vehicle only with correct support points, or use a commercial lift. Examine both sides from front to rear, comparing left and right structural members at the same locations.
Look for folded metal, diagonal ripples, crushed box sections, cracked welds, open seams, fresh holes, clamp scratches, and localized undercoating. Collision clamps can leave deep gouges along rocker pinch welds or frame-rail flanges. Those marks indicate that the vehicle may have been mounted on a frame machine, not necessarily that the repair failed.
Crumple zones are intentionally shaped to deform. A wrinkled rail section after a collision is evidence that energy was absorbed, not evidence that every part of the chassis is irreparable. The correct question is whether the replacement parts, weld locations, and final dimensions comply with OEM repair procedures.
Common damage patterns
| Damage pattern | Physical description | Driving symptom | Confirmation method |
|---|---|---|---|
| Mash | Rail shortened with accordion folds | Reduced crush length or alignment failure | OEM length and rail-point measurement |
| Sag | Section displaced vertically | Uneven gaps or low body corner | Height and cross-measurement |
| Twist | One corner rotated relative to another | Persistent diagonal alignment error | 3D datum measurement |
| Diamond | Chassis becomes a parallelogram | Unequal wheelbase and dog-tracking | Cross-diagonal comparison |
| Sway | Front or rear section moves sideways | Crab-walking or steering correction | Centerline and thrust-angle measurement |
| Crack | Metal or weld separates | Noise, instability, or visible opening | Visual inspection and professional testing |
Surface rust is not automatically frame failure. Deep scaling, perforation, swelling seams, and thinning around suspension mounts are structural concerns, especially on boxed truck rails.
Step 4: Measure Wheelbase and Cross-Dimensions
Measure from the center of the front wheel hub to the center of the rear wheel hub on both sides, using the same reference method. Keep the tape level and record the tire pressure, wheel size, and vehicle load because suspension height can affect casual measurements.
Do not treat 3 mm as a universal pass-fail threshold. Factory tolerances differ by model, and tape placement can introduce several millimeters of error. A 5 mm apparent difference may be measurement technique on one vehicle, while a smaller difference at a critical datum can matter on another.
For a screening check, repeat each measurement twice and compare diagonal distances where accessible. Professional technicians use manufacturer datum points, tram gauges, electronic arms, or laser systems rather than wheel centers alone.
Wheelbase asymmetry can result from a bent control arm, shifted subframe, damaged axle, or tire and wheel variation. A frame conclusion requires correlation with suspension geometry and structural reference points.
Step 5: Check Tires, Alignment, and Steering Geometry
Inspect all four tires for inner-edge wear, feathering, cupping, diagonal wear, and unequal tread depth. Record tread depth across the inner, center, and outer grooves. A difference of 2/32 inch or more across the same tire is a useful reason to investigate, although tire pressure, worn bushings, toe error, and tire construction can produce similar patterns.
Request a printed four-wheel alignment report. Focus on toe, camber, caster, thrust angle, steering-axis inclination, and included angle where the shop provides them. Alignment values must be compared with the manufacturer’s specifications for the exact model, trim, suspension, and ride height.
A vehicle can align within the green range while still having prior structural damage if the technician adjusted the suspension to compensate. Conversely, an out-of-specification result does not prove a bent frame because a control arm, knuckle, strut, subframe, or bushing may be the failed component.
Expert rule: the most useful alignment clue is an asymmetrical correction pattern. If one side requires an extreme adjustment while the opposite side remains near nominal, ask which physical part creates the difference before blaming the frame.
Step 6: Conduct a Controlled Road Test
Test the vehicle on a flat, quiet road with correct tire pressures. Do not release the steering wheel on public roads if traffic, road crown, wind, or visibility makes the maneuver unsafe.
Observe whether the steering wheel remains centered, whether the vehicle pulls consistently, and whether the rear wheels follow the front wheels. A vehicle that appears to travel diagonally while the steering wheel is straight may have thrust-angle, rear-suspension, or structural alignment problems.
Pulling alone is weak evidence. Road crown, tire conicity, brake drag, unequal pressure, worn bushings, and a misaligned steering wheel can all cause drift. Clunks, steering changes during braking, unstable lane tracking, and a vehicle that crab-walks deserve immediate inspection.
Do not continue driving a vehicle with a displaced wheel, damaged steering component, fluid leak, exposed restraint wiring, or severe instability. Arrange transport to a collision or chassis specialist.
Which Frame-Damage Test Is Most Reliable?
Professional 3D measurement is the most reliable method for confirming structural distortion because it compares multiple vehicle datum points with OEM dimensions. Visual inspection is the best low-cost screen, while wheel alignment identifies abnormal geometry but cannot independently identify its source.
| Method | Typical cost | Typical time | Best use | Main limitation |
|---|---|---|---|---|
| Visual inspection | $0-$50 | 45-90 minutes | Used-car screening | Misses hidden multi-axis distortion |
| Tape and tram measurements | $50-$200 labor | 1-3 hours | Preliminary geometry check | Depends on access and technician skill |
| Four-wheel alignment | $100-$250 | 1-2 hours | Geometry screening | Suspension damage can mimic frame damage |
| Electronic or laser measurement | $300-$600 | 2-4 hours | Collision verification | Requires OEM data and trained operator |
| Ultrasonic measurement | $300-$700 typical | 2-4 hours | Difficult line-of-sight areas | Sensitive to setup and environment |
Laser or electronic systems can produce a before-and-after report, but equipment precision does not guarantee a useful diagnosis. The operator must select the correct model data, secure the vehicle properly, and measure undamaged reference points.
A professional report should identify measured points, manufacturer specifications, actual readings, repair recommendations, and final verification. Ask whether the shop will provide the report rather than only saying the car “measured fine.”
How Much Does a Frame Inspection Cost?
A basic frame inspection typically costs $100-$250, while electronic dimensional measurement commonly costs $300-$600. Repair costs often range from $1,500 to more than $5,000, but replacement of structural sections, aluminum or composite work, corrosion repair, paint, calibration, and parts availability can increase the total.
| Service | Typical United States price | Typical duration | Useful output |
|---|---|---|---|
| Collision visual inspection | $100-$250 | 1-2 hours | Damage-area assessment |
| Four-wheel alignment | $100-$250 | 1-2 hours | Toe, camber, caster, thrust angle |
| 3D dimensional scan | $300-$600 | 2-4 hours | OEM comparison report |
| Frame straightening | $1,500-$5,000+ | 3-7 business days | Structural correction and refinishing |
| Structural section replacement | $3,000-$10,000+ | 1-3 weeks | Cut-and-join repair with refinishing |
Prices vary by region, vehicle construction, insurance requirements, and whether the shop charges separately for teardown. Ask whether the quoted inspection includes disassembly, alignment, a written report, and post-repair measurement.
Can You Drive a Car With Frame Damage?
A car with confirmed frame damage should not be driven until a qualified technician determines that steering, suspension attachment points, restraint systems, and wheel alignment remain safe. A minor cosmetic deformation in a replaceable bolt-on member differs from a cracked rail, displaced strut tower, or compromised passenger-cell structure.
After a collision, structural safety also includes airbags, seat belts, sensors, steering components, brake lines, fuel systems, and advanced driver-assistance systems. A vehicle can measure correctly and still require radar, camera, or restraint-system calibration.
Situations that justify towing
- A wheel sits visibly backward or inward in the wheel opening.
- The steering wheel changes position while braking.
- A tire contacts the body or suspension.
- The vehicle moves sideways despite a centered steering wheel.
- A frame rail, rocker, strut tower, or suspension mount is cracked.
- Airbag, seat-belt, fuel, brake, or high-voltage systems show damage.
Should You Buy a Car With Reported Frame Damage?
Most private used-car buyers should avoid a vehicle with reported structural damage unless a qualified collision shop provides OEM-based measurements, repair documentation, and a clear safety assessment. A discounted price does not compensate for uncertain crash performance, difficult resale, insurance restrictions, or future alignment problems.
A clean Carfax or AutoCheck report does not prove an undamaged frame. Those services depend on participating data sources, and cash repairs may never be recorded. Conversely, a branded or rebuilt title does not describe repair quality by itself, so inspect the structure and documentation rather than relying on title language alone.
For a purchase inspection, require:
- A cold-start and complete road test.
- Lift inspection with photographs.
- Four-wheel alignment printout.
- Paint and repair-history inspection.
- OEM dimensional measurement when structural work is suspected.
- Invoices identifying replaced rails, aprons, subframes, or quarter sections.
- Confirmation that required ADAS and restraint calibrations were completed.
Walk away when the seller refuses a lift inspection, will not permit an independent shop, hides the title brand, or explains structural welds only as “normal factory work.”
Common Inspection Mistakes and Fixes
| Mistake | Why it fails | Better approach |
|---|---|---|
| Trusting a clean history report | Unreported repairs are omitted | Combine records with lift inspection |
| Judging only panel gaps | Bolt-on panels can be adjusted | Inspect rails, towers, floors, and welds |
| Using wheelbase as final proof | Tape and suspension movement create error | Compare OEM datum points professionally |
| Blaming every pull on the frame | Tires, brakes, and road crown also pull | Check pressures, brakes, tires, and alignment |
| Assuming fresh undercoating is protective | Localized coating can hide repairs | Compare texture and inspect edges |
| Measuring on a sloped driveway | Ground angle distorts height readings | Use level concrete or a calibrated lift |
One counterintuitive problem is a recently aligned vehicle with severe inner-edge wear. Alignment settings may be within a broad green range while the actual steering-axis or thrust geometry remains unequal. Request the numerical report, not the color indicator.
Another is a straight-looking truck with hidden internal rust. Boxed rails can corrode from trapped moisture and road salt, leaving the exterior coated while the metal around suspension mounts loses thickness. A borescope through factory access holes can reveal internal scaling.
What Documentation Should a Repair Shop Provide?
A collision shop should provide photographs, parts invoices, alignment data, structural measurement results, repair procedures used, and calibration records where applicable. The strongest evidence is a pre-repair and post-repair dimensional report tied to the exact vehicle identification number and manufacturer specifications.
Ask who supplied the dimensions, whether the shop measured the vehicle before pulling or cutting, and whether the final report shows all readings inside specification. “Straightened” describes an action, not a verified result.
For insurance claims, retain estimates, supplements, photographs, title records, and invoices. Local disclosure and rebuilt-title rules vary, so consult the relevant state motor-vehicle agency before selling a repaired vehicle.
FAQ
Can a four-wheel alignment prove the frame is straight?
No. A four-wheel alignment proves that measured wheel angles fall within the machine’s selected limits, not that every structural datum is correctly positioned. A bent control arm or adjustable suspension can disguise structural displacement. Use alignment as a screening tool and electronic dimensional measurement for confirmation.
Does a bent radiator support mean the frame is damaged?
Not necessarily. Many radiator supports bolt to the vehicle and can be replaced independently. The answer depends on whether the front rails, aprons, crush boxes, or suspension mounting structures behind the support are distorted. Measure the adjacent structural points before classifying the damage as frame damage.
How can I check a truck frame for rust?
Inspect both sides of the rails, crossmembers, spring hangers, steering mounts, and suspension brackets for scaling, swelling, perforation, and thinning. Tap carefully only where safe, compare metal thickness around mounts, and use a borescope inside boxed sections. Surface rust differs from metal loss that weakens a load path.
Why does a car drive sideways after an accident?
A car may drive sideways because the rear axle thrust angle, subframe, frame rail, or suspension mounting points shifted. Tire conicity and alignment errors can create similar sensations. A measured thrust-angle result, wheelbase comparison, and inspection of rear suspension attachment points identify the likely cause.
Is frame damage always visible?
No. Twist, small datum displacement, internal boxed-rail corrosion, and distorted suspension towers can remain invisible behind paint and trim. Professional measuring equipment detects dimensional errors that a flashlight and tape measure may miss. Visible ripples and uneven gaps are warning signs, not a complete inspection.
What is the first thing to inspect after a collision?
Start with safety-critical leaks, wheel position, steering and suspension components, airbags, seat belts, and exposed wiring, then inspect the structure. Do not begin by judging paint or panel fit. A collision shop should measure the vehicle against OEM specifications before approving structural repairs.
The Bottom Line
To check a car frame for damage, begin with panel gaps and closure operation, then inspect floors, welds, rails, crumple zones, suspension mounts, tires, wheelbase, alignment, and road tracking. Visual evidence can identify major problems, but OEM-based 3D measurement is the appropriate confirmation for suspected structural distortion. When buying a used vehicle, an independent lift inspection and written alignment or dimensional report are worth far more than a clean appearance or history report. A careful inspection protects both the vehicle’s resale value and its ability to manage a future collision safely.


