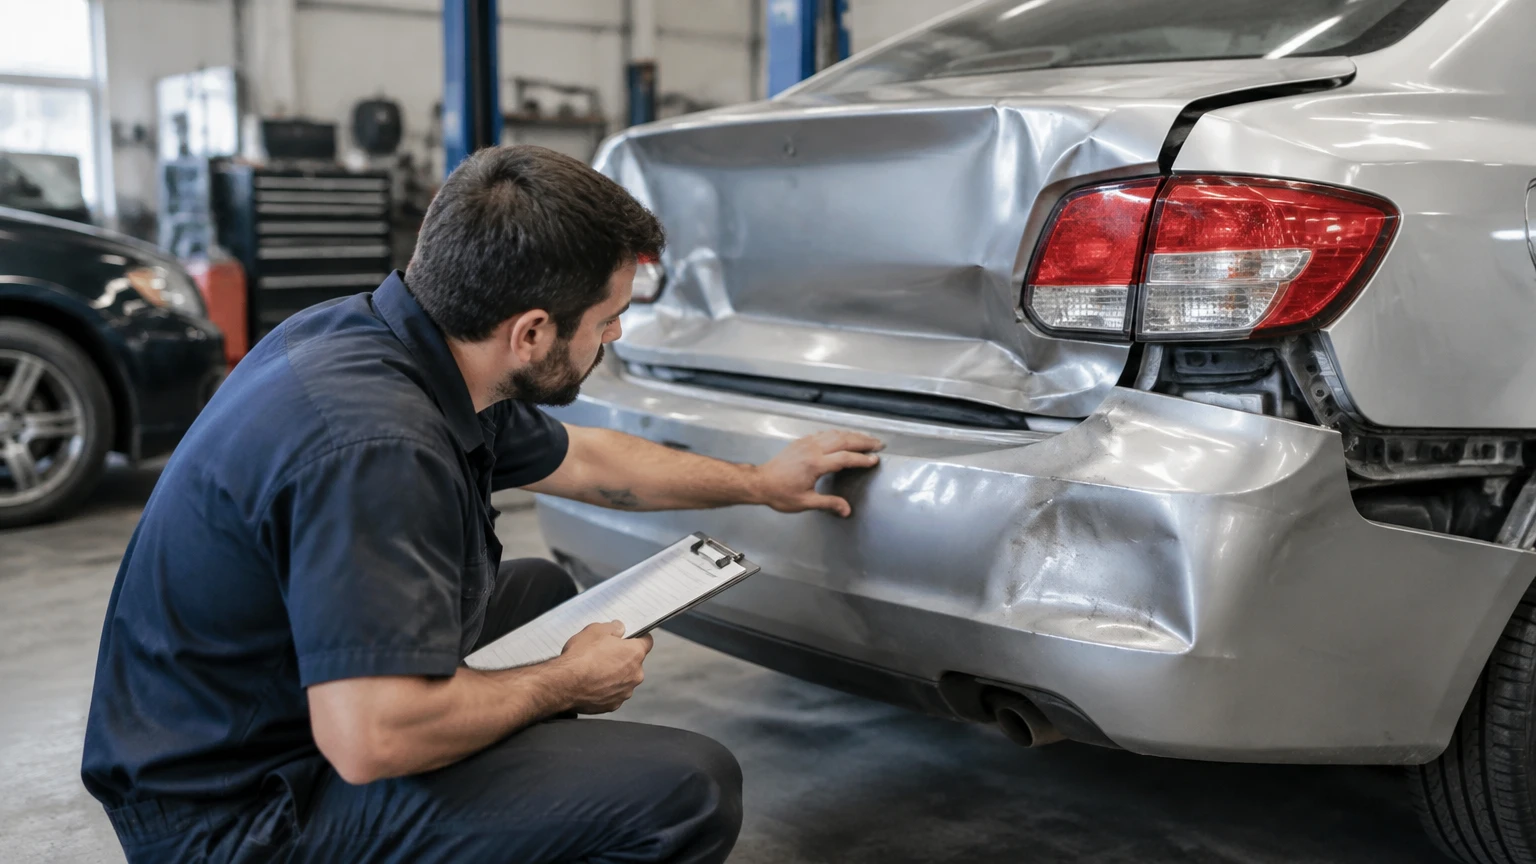
Rear-end collision repair costs $300-$10,000 or more, with severe structural or high-tech vehicle damage sometimes exceeding $15,000. A typical bumper-only repair often costs $1,000-$3,500, while the national average auto-body claim reported by CCC Intelligent Solutions is roughly $4,500-$4,818. The vehicle’s age, hidden damage, parts, labor rate, sensors, and frame condition determine the final bill.
Key Facts at a Glance
- A minor scratch or paintless dent repair commonly costs $125-$900.
- A bumper-cover replacement commonly costs $1,000-$2,000 before advanced sensor work.
- ADAS components and calibration can raise a repair to $1,500-$3,500.
- Structural rear-body or unibody damage commonly reaches $5,000-$15,000 or more.
- A photo estimate is preliminary because teardown can reveal absorbers, reinforcements, wiring, and floor damage.
- Repair time ranges from several hours for PDR to two to four weeks for structural work.
How Much Does Rear-End Collision Repair Cost?
Rear-end collision repair usually costs $300-$10,000, but a practical estimate requires identifying the damaged layer: paint, bumper cover, reinforcement, lighting, electronics, trunk structure, or unibody frame. A low-speed impact may cost $300, while a newer SUV with radar sensors, a damaged liftgate, and bent rear rails can exceed $10,000.
| Damage category | Typical cost | Typical time | Common components |
|---|---|---|---|
| Paint scuff or shallow dent | $125-$900 | 1-2 days | Clear coat, paint, dented panel |
| Bumper cover replacement | $1,000-$2,000 | 2-3 days | Cover, clips, brackets, absorber |
| Bumper and ADAS repair | $1,500-$3,500 | 3-5 days | Radar, ultrasonic sensors, calibration |
| Lamp, trunk, or exhaust damage | $2,000-$5,500 | 5-7 days | LED lamp, liftgate, exhaust parts |
| Structural rear-body damage | $5,000-$15,000+ | 2-4 weeks | Floor pan, rails, quarter panel, measuring |
The reported $4,500-$4,818 average claim figure is useful for market context, not personal budgeting. Averages combine inexpensive cosmetic claims with expensive repairs involving newer vehicles, electronics, labor-intensive refinishing, and structural measurement.
What Determines the Final Price?
Vehicle repair cost is primarily the sum of parts, labor, paint materials, diagnostics, calibration, storage, and rental-related charges. Labor rates vary by region and facility, while OEM parts for luxury vehicles and EVs can cost several times more than comparable aftermarket components.
A typical estimate may contain 8-20 labor hours for a bumper and trunk repair, plus paint labor calculated separately. A complex repair can add teardown labor, scanning, alignment checks, corrosion protection, seam sealer, wheel alignment, and a post-repair road test.
Why Is Hidden Damage So Expensive?
Hidden damage is expensive because a flexible bumper cover can conceal crushed energy absorbers, a bent reinforcement bar, displaced parking sensors, wiring damage, and distorted body mounts. The outer plastic panel is only the visible layer of a rear crash-management system.
Modern vehicles use crumple zones to absorb impact energy before it reaches the passenger compartment. A bumper cover may spring back after a low-speed impact, but the foam absorber or metal reinforcement behind it may have compressed permanently and require replacement.
Rear-end impact energy can also travel into the trunk floor, rear body panel, quarter panels, exhaust system, and unibody rails. Damage to one mounting point may create uneven gaps or water leaks even when the bumper appears straight.
Practitioner insight: A bumper that looks acceptable before removal is not evidence that the absorber or reinforcement is reusable. Collision technicians normally inspect those components after disassembly because compressed materials may not provide a second-impact level of protection.
What Does a Professional Repair Involve?
Professional collision repair normally includes scanning, disassembly, damage measurement, parts replacement, structural correction, refinishing, calibration, reassembly, and a final quality inspection. The sequence matters because calibration performed before the bumper is correctly mounted can produce inaccurate results.
1. Pre-Repair Diagnostic Scan
Technicians scan the vehicle before disassembly to record diagnostic trouble codes in airbag, parking-assist, blind-spot, restraint, and body-control systems. A scan documents the vehicle’s condition, but it does not replace physical inspection.
2. Teardown and Supplement Estimate
The shop removes the bumper cover, lamps, trim, trunk lining, and sometimes interior panels. Hidden damage found during teardown becomes a supplement, which is an approved addition to the original estimate.
3. Structural Measurement and Correction
A unibody vehicle may require anchoring to a frame machine and computer-guided three-dimensional measurement. Technicians compare reference points with manufacturer dimensions, then repair or replace affected rails, floor sections, rear body panels, and reinforcements.
4. Parts Replacement and Body Repair
The shop installs approved replacement parts, repairs eligible metal panels, replaces damaged clips, and restores mounting points. A bolt-on reinforcement and a crumpled unibody rail are not equivalent repairs, even if both sit behind the bumper.
5. Refinishing and Paint Blending
Refinishing includes sanding, corrosion protection, primer, color application, clear coat, curing, and adjacent-panel blending when required. A replacement bumper often needs paint matching because plastic and metal panels can display the same color differently.
6. Reassembly and ADAS Calibration
Technicians reinstall sensors, cameras, lamps, trim, trunk seals, and wiring. Radar, camera, blind-spot, and parking systems may require static calibration, dynamic calibration, or both, depending on manufacturer instructions.
7. Final Scan and Road Test
A final scan confirms whether warning codes remain. The technician should also verify trunk operation, lighting, parking assistance, steering behavior, panel alignment, water sealing, and road-test performance.
How Much Do Common Rear-End Repairs Cost?
Common repair prices range from approximately $125 for a small paintless dent to more than $15,000 for substantial unibody damage. The following figures are typical U.S. planning ranges, not binding estimates.
| Repair item | Typical parts cost | Typical labor and calibration | Approximate total |
|---|---|---|---|
| Paintless dent repair | $0-$50 | $125-$300 | $125-$350 |
| Bumper cover and brackets | $400-$1,000 | $500-$1,000 | $1,000-$2,000 |
| Parking sensor replacement | $100-$500 each | $200-$800 | $500-$1,500 |
| Blind-spot radar repair | $500-$1,500 | $300-$1,200 | $800-$2,700 |
| LED taillight replacement | $300-$1,500 | $150-$500 | $450-$2,000 |
| Trunk or liftgate replacement | $800-$3,000 | $1,000-$3,000 | $1,800-$6,000 |
| Rear body or floor repair | $1,500-$6,000 | $3,000-$9,000 | $5,000-$15,000+ |
Parts prices depend heavily on vehicle design. A basic compact sedan may use a relatively inexpensive bumper assembly, while a luxury SUV may integrate radar brackets, illuminated trim, exhaust outlets, and expensive LED lamps into the same repair zone.
When Do Sensors and Cameras Raise the Bill?
Sensors raise the bill when they are broken, displaced, blocked, or unable to meet the manufacturer’s aiming tolerance. A sensor does not need visible cracking to fail; a bent bracket can change its field of view and generate an inaccurate system.
| Technology | Typical rear location | Common repair requirement | Typical added cost |
|---|---|---|---|
| Ultrasonic parking sensor | Bumper cover | Sensor, holder, scan | $150-$600 each |
| Blind-spot radar | Rear corner | Radar, bracket, calibration | $800-$2,700 |
| Rear camera | Liftgate or trunk handle | Camera, wiring, aiming | $300-$1,500 |
| 360-degree camera | Bumper, mirror, grille | Camera replacement and calibration | $500-$2,000 |
| Rear cross-traffic radar | Rear quarter area | Module, bracket, calibration | $800-$2,500 |
Calibration rule: A shop should not claim that a warning light is the only sign of successful ADAS repair. The repair order should identify the required calibration procedure and record whether the procedure passed.
Can a Rear-End Collision Bend the Frame?
Yes. A rear-end collision can bend unibody rails, the rear body panel, trunk floor, quarter-panel structure, or suspension mounting points even when the bumper cover has minor visible damage. Frame damage is confirmed through dimensional measurement and inspection, not appearance alone.
Most modern passenger cars use unibody construction rather than a separate ladder frame. Collision facilities measure manufacturer-specified reference points, compare left and right geometry, and inspect welds, seams, reinforcements, and suspension alignment.
Structural repair becomes more expensive when technicians must remove glass, interior trim, exhaust components, fuel-system shielding, or high-voltage components. A repair that returns dimensions to specification is different from a repair that merely makes the bumper fit.
What Are Signs of Structural Damage?
Signs include uneven trunk gaps, a trunk that binds, water entering the spare-tire well, exhaust misalignment, rear wheels that do not track correctly, uneven tire wear, and recurring alignment problems. These symptoms require inspection even if the car drives normally.
A damaged rear floor may also interfere with battery compartments, wiring harnesses, or restraint-system components. Do not rely on a short neighborhood drive to clear a structural vehicle.
Should You File an Insurance Claim?
File an insurance claim when the expected repair cost materially exceeds your deductible, when another driver is liable, or when hidden damage could make the final amount uncertain. Paying cash may be reasonable when damage is clearly below the deductible and no safety system or structural component is involved.
| Scenario | Repair estimate | Deductible or exposure | Common decision |
|---|---|---|---|
| Minor scratch, own fault | $400 | $1,000 deductible | Pay privately |
| Bumper replacement, own fault | $2,200 | $500 deductible | Consider a claim |
| Other driver clearly liable | $4,000 | Usually third-party claim | Notify insurer and pursue claim |
| Hidden structural damage possible | $3,000 initial estimate | Final cost uncertain | Claim or obtain teardown estimate |
| Repair near vehicle value | $9,000 | Vehicle worth $11,000 | Compare total-loss outcome |
Insurance decisions also involve future premiums, claim history, rental coverage, diminished value, and fault rules. State law controls how liability and comparative negligence affect recovery, so a local insurance professional or attorney may be appropriate for disputed responsibility.
How Do Deductibles Change the Math?
The direct financial benefit of a first-party claim is generally the approved repair cost minus the deductible, subject to policy limits and exclusions. A $1,200 repair with a $1,000 deductible creates only $200 of immediate claim value before possible premium effects.
The calculation changes when the other driver caused the collision. A third-party liability claim may not involve your collision deductible, although coverage disputes and fault investigations can delay payment.
Which Parts Should You Approve?
OEM parts are usually the safest default for newer, leased, luxury, and highly equipped vehicles, while quality aftermarket or recycled parts may reduce cost on older vehicles when fit, function, warranty, and insurer approval are acceptable. Part choice should be documented rather than decided from price alone.
| Part type | Typical price position | Best fit | Main concern |
|---|---|---|---|
| OEM new | Highest | New, leased, luxury, safety-equipped vehicles | Cost and availability |
| Certified aftermarket | Lower than OEM | Older vehicles and cost-controlled claims | Fit and sensor compatibility |
| Recycled OEM | Variable | Older vehicles with available salvage stock | Condition and warranty |
| Remanufactured electronic | Variable | Selected modules and lamps | Programming and calibration |
A bumper cover is not automatically a structural component, but its brackets, radar mounts, and sensor openings can affect safety-system performance. Ask whether the proposed part carries the correct mounting geometry and whether the shop will warranty fitment and calibration.
How Long Will the Repair Take?
Minor paint or PDR work can take several hours to two days, a bumper replacement commonly takes two to five days, and structural repairs usually take two to four weeks. Parts delays, supplements, insurer approvals, calibration scheduling, and facility backlog often determine the calendar time.
| Repair scope | Shop time | Likely calendar time | Main delay risk |
|---|---|---|---|
| PDR or small paint repair | 2-8 hours | Same day-2 days | Paint matching |
| Bumper replacement | 8-16 hours | 2-5 days | Parts and paint booth |
| Bumper plus sensors | 12-24 hours | 3-7 days | Calibration equipment |
| Trunk and lamp repair | 20-40 hours | 5-10 days | Parts and supplements |
| Structural correction | 40-100+ hours | 2-4 weeks | Measurement and approvals |
Rental-car coverage may end according to policy limits rather than the actual repair schedule. Ask the insurer how many days are covered before authorizing work.
How Are EV Repairs Different?
EV rear-end repairs require model-specific procedures for high-voltage isolation, battery protection, aluminum or cast structural parts, and wiring inspection. Tesla, Rivian, Lucid, Ford, Hyundai, and other EV manufacturers publish different repair requirements, so a generic body-shop process may be inadequate.
An impact near the rear floor can affect battery enclosures, high-voltage cables, cooling lines, and crash sensors. The presence of a battery does not mean every rear bumper repair requires battery replacement, but technicians must verify the relevant components.
Use a manufacturer-authorized or properly equipped collision facility when the repair involves structural castings, battery enclosures, high-voltage wiring, or manufacturer-required procedures. EV repair cost can rise sharply when specialized parts, software access, transport, or battery inspection is required.
What Should You Check After Repair?
Check panel gaps, trunk operation, lighting, warning messages, water sealing, sensor operation, and road behavior before accepting a completed repair. A clean exterior does not prove that calibration, structural measurement, or trunk sealing was completed correctly.
Use this inspection sequence:
- Compare trunk and bumper gaps on both sides.
- Open and close the trunk five times without forcing the latch.
- Inspect the spare-tire well and trunk carpeting for moisture.
- Confirm brake, reverse, turn-signal, and license-plate lights.
- Check for blind-spot, parking-assist, airbag, and cruise-control warnings.
- Test parking sensors in a safe area.
- View paint color in sunlight and under artificial light.
- Ask for pre-scan, post-scan, and calibration documentation.
- Drive on a smooth road and check steering, vibration, and tracking.
- Keep the repair order and warranty in your records.
Practitioner insight: Water intrusion is often discovered after a repair rather than during delivery. A trunk seal can appear installed while a distorted rear body flange prevents uniform compression.
Common Mistakes That Increase Cost or Risk
Accepting a photo estimate as final
Photo estimates cannot reveal compressed absorbers, damaged brackets, wiring faults, or frame displacement. Treat the first estimate as a starting scope until teardown and measurement are complete.
Skipping calibration
A bumper replacement without required radar, camera, or parking-sensor calibration can leave the safety system unavailable or inaccurate. Ask for written calibration results.
Choosing the lowest bid without comparing scope
One estimate may include OEM parts, blending, scans, and calibration, while another excludes those items. Compare line by line, not by the final total alone.
Driving a structurally damaged vehicle
A car with a binding trunk, exposed wiring, leaking fuel or exhaust components, warning lights, or abnormal wheel alignment should not be treated as roadworthy merely because it starts.
Ignoring diminished value
A repaired late-model vehicle may lose resale value because accident history appears on a vehicle-history report. Eligibility and calculation depend on jurisdiction, vehicle age, severity, and insurer policy.
When Does Repair Become a Total Loss?
A vehicle becomes a total loss when the insurer determines that repairing it is uneconomical or legally classified as excessive relative to its actual cash value. The threshold varies by state and insurer, and it may depend on repair cost, salvage value, taxes, storage, rental expense, and pre-loss vehicle value.
For example, a $12,000 repair on a vehicle worth $14,000 may trigger a total-loss evaluation, especially when hidden damage remains possible. The insurer may compare the expected total claim cost with the vehicle’s actual cash value rather than comparing the body-shop estimate alone.
Owners should request the valuation report, comparable vehicles, deductible treatment, and salvage deduction. A vehicle with a branded title can face financing, insurance, and resale restrictions even when repairs are technically possible.
Which Repair Approach Fits Your Vehicle?
| Owner situation | Recommended facility | Parts preference | Main reason |
|---|---|---|---|
| Leased vehicle under five years old | Certified collision center | OEM where required | Lease return and safety compliance |
| Older low-value sedan | Reputable independent shop | Quality aftermarket or recycled OEM | Control claim and repair cost |
| Luxury SUV with radar systems | Brand-certified facility | OEM or approved equivalent | Sensor geometry and programming |
| EV with rear structural damage | EV-authorized repairer | Manufacturer-specified parts | High-voltage and structural procedures |
| Minor dent with intact paint | Specialist PDR shop | Original panel | Lowest cost and fastest completion |
A certified facility is not automatically the best choice for every cosmetic repair, and an independent shop is not automatically unsafe. Verify equipment, technician training, insurer approval, warranty terms, and calibration capability for the specific vehicle.
Frequently Asked Questions
Can a rear-end collision damage the exhaust system?
Yes. A rear impact can bend exhaust tips, mufflers, hangers, heat shields, or pipes, especially when the bumper or rear floor moves forward. Exhaust damage may cause rattling, leaks, poor alignment, or heat transfer near plastic and wiring. A technician should inspect the system rather than judging it by appearance.
Is it safe to drive after a rear-end collision?
Driving may be unsafe when the trunk will not latch, fluids leak, warning lights appear, wheels are misaligned, lamps do not work, or structural damage is suspected. A vehicle with cosmetic damage only may be drivable, but an inspection should confirm that restraint, lighting, and crash-management components remain intact.
Will a rear-end collision affect my vehicle’s resale value?
A reported collision can reduce resale value even after a correct repair because buyers and valuation systems may see the accident history. The reduction depends on vehicle age, repair severity, title status, market demand, and whether structural or airbag damage was recorded.
Can I repair a cracked bumper myself?
A vehicle owner can sometimes replace cosmetic trim or a bumper cover, but DIY work is unsuitable when radar, cameras, parking sensors, structural mounts, airbags, wiring, or high-voltage components are involved. Incorrect mounting can cause sensor failure even when the replacement panel looks aligned.
How can I get a more accurate repair estimate?
Provide the shop with the vehicle identification number, make, model, year, photographs, warning-light information, and collision location. Request a written estimate that separates parts, labor hours, paint, scans, calibration, supplements, storage, and tax, then ask whether teardown is required.
The Bottom Line
Rear-end collision repair costs $300-$10,000 in common cases and can exceed $15,000 when structural damage, advanced driver-assistance systems, luxury parts, or EV components are involved. The most reliable estimate comes after scanning, teardown, dimensional measurement, and sensor inspection, not from bumper appearance or an app-based photo quote.
Compare the deductible with the likely complete repair cost, confirm whether calibration is included, and inspect trunk alignment, water sealing, warning messages, lights, and documentation before accepting the vehicle. For a specific answer to “How Much Does Rear-End Collision Repair Cost?”, the vehicle’s year, model, damage location, dashboard warnings, trunk operation, and local labor rate matter more than any national average.


