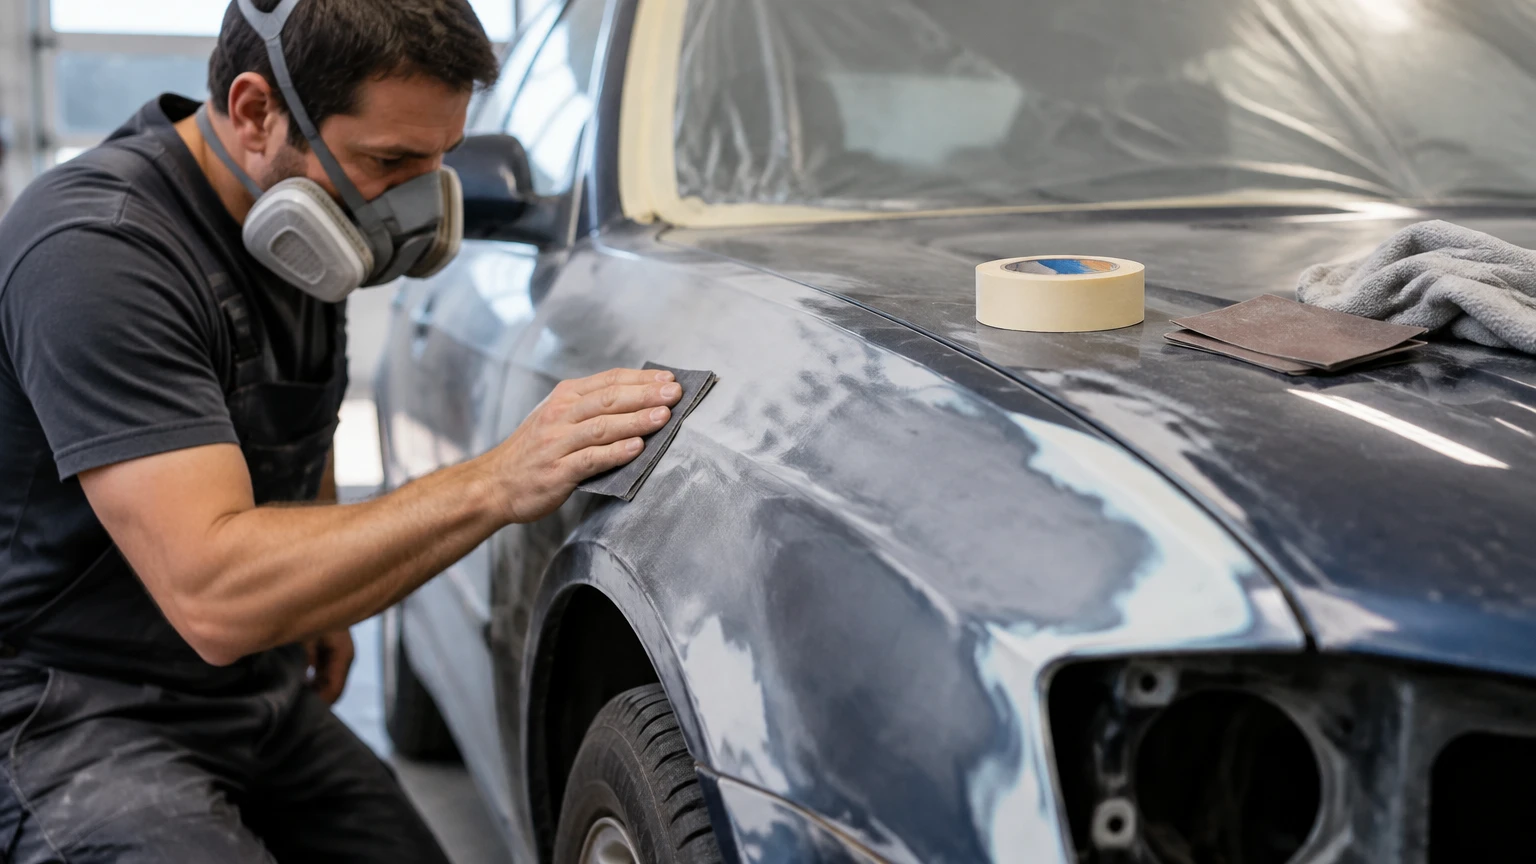
Yes, you can paint over existing car paint when the old coating is firmly attached, free from active rust, chemically compatible, and thoroughly cleaned and abraded. New automotive paint should never be sprayed directly over a glossy finish because it lacks sufficient mechanical tooth, allowing peeling, bubbling, or delamination.
Key Facts at a Glance
A stable factory finish can provide an excellent foundation for a respray.
A uniformly dull surface is the practical visual test for adequate scuffing.
Use approximately 400-600 grit for sound old paint before primer or basecoat.
Peeling, cracking, solvent-sensitive, or rusted paint should be removed rather than covered.
Typical DIY materials cost $200-$600, excluding major compressor or spray-booth purchases.
Automotive coatings containing isocyanates require professional-level respiratory and ventilation controls.
Can You Paint Over Existing Car Paint?
You can paint over existing car paint if the coating is stable and properly prepared. The correct process is usually called a respray, repaint, or scuff-and-shoot job, although the last term should not be interpreted as spraying directly over an unprepared surface.
A sound factory finish often remains tightly bonded to an electrocoat, primer, and body panel. Preserving those layers can reduce labor and retain corrosion protection. Painting over old paint becomes risky when the underlying layer has already lost adhesion, because the new coating adds stress and weight without repairing the weak interface.
Check every panel in bright, angled light. Look for peeling clearcoat, cracking, bubbling, rust stains, solvent wrinkles, feather edges, and repairs that differ in hardness or texture. A finish that looks merely faded may be reusable, while a finish that looks smooth but has hidden lacquer or silicone contamination requires testing.
What makes old paint suitable?
Suitable old paint is dry, firmly attached, chemically resistant, and free from active corrosion. A thumbnail should not lift an edge, and sanding should produce powder or controlled residue rather than gummy rolls, curled flakes, or soft swelling.
Clean a small hidden area, scuff it, and apply a test patch of the intended primer or paint. Allow the patch to cure according to its technical data sheet, then inspect for lifting, wrinkling, softening, or poor adhesion. This small test can prevent an entire vehicle from requiring a strip-down.
Why Does Sanding Make New Paint Stick?
Sanding creates microscopic scratches that increase mechanical interlocking between the old surface and the new coating. A glossy clearcoat has low surface roughness, so fresh paint may sit on top of it without forming a reliable bond.
The scratches must be shallow and consistent. Coarse scratches remain visible through thin basecoat, while overly fine polishing can leave insufficient tooth. The goal is not to remove every micrometre of old paint. The goal is to remove gloss and create a uniform surface for the next layer.
A practical inspection method is to wipe the panel dry and view it from several angles. Any remaining shiny island indicates incomplete preparation. Edges around handles, moldings, panel creases, and recessed areas deserve special attention because hand sanding commonly misses them.
Paint adhesion also depends on cleanliness, coating chemistry, cure state, and temperature. Abrasion cannot compensate for wax, silicone, oil, uncured filler, or an old coating that is already delaminating.
How Should You Prepare Existing Paint?
Prepare existing paint through inspection, washing, degreasing, repair, sanding, dust removal, masking, and sealing. The sequence matters because sanding contaminants into a coating can spread silicone and wax across the panel instead of removing them.
Step 1: Inspect and test the coating
Mark peeling, cracking, rust, stone chips, dents, and previous repairs with removable tape. Test questionable areas before buying paint for the entire vehicle.
A stable panel sands evenly and remains attached at its edges. A failing panel produces curled chips, loose islands, or a boundary that continues to lift when lightly scraped.
Step 2: Wash before sanding
Wash with automotive shampoo or a residue-free detergent, then rinse thoroughly. Dish soap can remove some wax, but it is not a substitute for a dedicated automotive wax and grease remover.
Use separate clean microfiber towels for washing and solvent wiping. Follow the solvent manufacturer’s flash or evaporation instructions, and change towels frequently so contamination is not redistributed.
Step 3: Repair damage
Remove rust to sound metal, treat corrosion according to the product instructions, and use compatible body filler only over a properly prepared substrate. Shape filler with approximately 80-180 grit, refine with 220-320 grit, and remove deep scratches before primer.
Do not bury rust bubbles under filler. The corrosion will continue expanding beneath the new finish, often producing a visible ring or blister within months.
Step 4: Sand the old finish
For sound paint, use approximately 400-600 grit abrasive, a gray nonwoven scuff pad, or the combination specified by the coating manufacturer. Use a sanding block on broad flat areas and flexible abrasives around curves.
Wet sanding reduces airborne dust but can hide low spots and introduce water into seams. If wet sanding, allow panel gaps, trim channels, and body seams to dry completely before masking or spraying.
Step 5: Remove residue and inspect
Blow or wipe away sanding dust, then perform a final compatible solvent wipe. A clean panel should appear uniformly dull, with no glossy spots, greasy streaks, or loose edges.
Step 6: Seal questionable or mixed substrates
Use an epoxy primer or compatible sealer over exposed metal, filler, repaired areas, or mixed old coatings when the product system permits it. Primer is not a cure for loose paint. Remove unstable material first.
Step 7: Apply the finish system
Apply the recommended number of primer, basecoat, and clearcoat layers, observing the product’s recoat window and flash time. Technical data sheets take priority over generic timing because temperature, humidity, reducer choice, and spray-film thickness alter drying.
Which Paint System Should You Choose?
Two-stage urethane, consisting of basecoat and clearcoat, generally offers the strongest combination of color control, UV resistance, chemical resistance, and repairability for a modern road car. Single-stage urethane or enamel can reduce cost and labor, while lacquer is mainly a period-correct choice.
| Paint system | Typical use | Durability | Typical material cost |
|---|---|---|---|
| Acrylic lacquer | Period-correct classic restoration | Low to moderate UV and chemical resistance | $150-$400 |
| Acrylic enamel | Budget project or utility vehicle | Moderate, often improved with hardener | $150-$500 |
| Single-stage urethane | Daily driver or commercial vehicle | High, with color and gloss combined | $300-$900 |
| Basecoat plus clearcoat | Modern repaint and color change | High UV and chemical resistance | $500-$1,500 |
Acrylic lacquer dries mainly through solvent evaporation and remains relatively easy to sand and polish, but it offers less modern chemical and ultraviolet protection. Enamel can be economical, yet hardener selection and recoat timing must match the product system.
Urethane is durable, but two-component products can contain hazardous isocyanates. The finish benefit does not make improvised respiratory protection acceptable.
Do You Need Primer or Sealer?
You do not always need full-panel primer over a sound, compatible, uniformly scuffed finish, but primer or sealer is strongly recommended over exposed metal, body filler, unknown coatings, and areas with mixed absorption. A sealer can reduce color variation and lower the chance of solvent interaction.
Use epoxy primer where corrosion resistance and substrate isolation matter, following its recoat limits and sanding instructions. Use a compatible urethane sealer where the paint manufacturer specifies it for color uniformity or intercoat compatibility.
Primer cannot stabilize peeling paint. Covering a weak layer simply moves the failure farther from the surface, making later repairs larger and more expensive.
How Much Paint Thickness Is Too Much?
Factory automotive paint commonly measures about 4-6 mils, or roughly 100-150 microns, across the complete coating system, although thickness varies by manufacturer and panel. A repaint can add approximately 3-5 mils when applied correctly, but repeated repairs can create brittle, chip-prone edges.
| Layer or condition | Typical thickness | Main risk |
|---|---|---|
| Factory complete coating | 4-6 mils | Normal production variation |
| New primer and sealer | 1-3 mils | Excess buildup at edges |
| Basecoat | 0.8-1.5 mils | Solvent trapping if too wet |
| Clearcoat | 2-3 mils | Runs, solvent pop, brittle film |
| Multiple repaint layers | 8-12+ mils total | Chipping, cracking, edge mapping |
Thickness gauges provide useful evidence, especially on vehicles with unknown repair history. A paint meter cannot prove adhesion or chemical compatibility, so thickness readings should support, not replace, physical inspection and test patches.
The practitioner rule is simple: preserve sound layers, remove failed layers, and avoid burying defects under extra material.
Should You Paint Over Clearcoat?
You can paint over clearcoat after removing its gloss and verifying that the clear layer is firmly bonded. A faded clearcoat that remains attached may be sanded and refinished, but clearcoat that is peeling in sheets should be removed back to a stable boundary.
A color change may require additional attention at jambs, edges, fuel doors, and trim openings. Spraying only the exterior panels can leave the old color visible when doors open or panels are viewed from an angle.
For a same-color refresh, blending may reduce the visible transition. For a major color change, full-panel coverage and careful edge planning usually produce a more coherent result than attempting to hide the old color with thin coats.
When Must You Strip to Bare Metal?
Strip to bare metal when corrosion, widespread delamination, incompatible coating chemistry, severe cracking, or excessive accumulated film prevents a stable repair. Bare-metal preparation is slower and more expensive, but it removes uncertainty that sanding and sealing cannot resolve.
| Condition | Paint over it? | Better action |
|---|---|---|
| Sound factory finish with fading | Yes | Clean, scuff, seal or refinish |
| Small chips without rust | Yes | Feather, prime, level, refinish |
| Peeling clearcoat | Sometimes | Remove loose clear to stable coating |
| Bubbling rust | No | Remove corrosion and repair substrate |
| Widespread cracking | No | Strip affected panels or vehicle |
| Unknown soft coating | Not without testing | Solvent and test-patch evaluation |
Stripping is not automatically superior. Bare steel can flash-rust quickly, and media blasting can distort thin panels or drive abrasive into seams. The best method depends on corrosion severity, panel condition, equipment, and the quality target.
How Much Does Repainting Over Existing Paint Cost?
A typical DIY repaint over sound paint costs approximately $200-$600 for abrasives, masking materials, primer, color, clearcoat, cleaning products, and disposable protection. Professional exterior resprays commonly range from $1,500-$4,500, while bare-metal restoration can exceed $6,000-$15,000.
| Project type | Typical labor time | Typical cost |
|---|---|---|
| DIY single-panel repair | 6-15 hours | $75-$250 |
| DIY exterior respray | 25-60 hours | $200-$1,200 |
| Professional respray over sound paint | 15-40 labor hours | $1,500-$4,500 |
| Professional bare-metal restoration | 60-120+ labor hours | $6,000-$15,000+ |
These are typical planning ranges, not fixed quotes. Rust repair, trim removal, jamb painting, color matching, bodywork, booth time, and reassembly can change the price substantially.
A low quote often excludes preparation. Ask whether the estimate includes dent repair, corrosion treatment, panel removal, masking, jambs, primer, clearcoat, polishing, and warranty coverage.
How Long Does the Process Take?
A straightforward exterior respray over stable paint commonly requires 25-60 DIY hours or 15-40 professional labor hours, excluding long cure periods and major body repair. A careful job can occupy several days because cleaning, sanding, masking, coating windows, and curing cannot be compressed safely.
At approximately 21-25°C, many systems specify 10-20 minutes between coats, but the technical data sheet controls. A vehicle may be handleable after 24-48 hours while remaining too soft for aggressive washing, polishing, or reassembly.
Humidity, cold panels, heavy application, and poor airflow extend solvent release. Rushing the next coat can trap solvent, cause wrinkling, solvent pop, gloss loss, or later shrinkage.
What Safety Precautions Matter?
Automotive paint safety requires suitable ventilation, chemical-resistant gloves, eye protection, skin coverage, and respiratory protection selected for the coating. Two-component urethane products containing isocyanates present an inhalation hazard that ordinary dust masks and many consumer disposable masks do not address.
Spraying should occur only where local fire, environmental, and workplace rules permit it. Solvent vapors can ignite, and overspray can contaminate neighboring property, HVAC systems, soil, or water.
For professional-grade 2K products, an approved supplied-air respirator and properly designed spray environment may be required by the product safety data sheet and local regulations. If that equipment is unavailable, choose a qualified refinishing shop rather than treating safety as an optional upgrade.
What Are the Common Failure Modes?
Most repaint failures originate in contamination, unstable substrate, incorrect sanding, excessive film, or incompatible products. The visible defect usually appears in the new finish, but the cause often lies several layers below it.
| Failure | Likely cause | Corrective action |
|---|---|---|
| Wrinkling or lifting | Solvent attack on old coating | Stop, cure, sand back, isolate, retest |
| Fish eyes | Silicone, oil, wax, or contamination | Clean, sand after cure, correct source |
| Sand scratches | Coarse abrasive under thin coating | Re-level with finer grit and refinish |
| Peeling edges | Gloss, dust, or weak old paint | Remove loose material and feather |
| Orange peel | Viscosity, gun setup, temperature, technique | Correct product settings, then polish or refinish |
| Solvent pop | Heavy film or insufficient flash | Cure fully, level, and recoat correctly |
Why does new paint lift or wrinkle?
New paint lifts when its solvents soften or swell an incompatible old coating. The defect can resemble wrinkled skin, especially where the new coat is heavy or the old finish is lacquer-based and poorly cured.
Do not sand the wrinkle flat immediately and continue spraying. Let the area cure, remove the damaged material to a stable boundary, apply a compatible barrier system, and repeat the test patch.
Why do fish eyes appear?
Fish eyes are small circular craters caused by low-surface-energy contamination, commonly silicone, oil, wax, polish, or aerosol residue. They can also originate from contaminated air lines or a dirty spray environment.
Correct the contamination source first. Adding fish-eye eliminator may help within the manufacturer’s system, but it does not remove the contamination and can create later compatibility problems.
Which Approach Fits Your Situation?
A budget DIY owner should preserve the old coating, use careful 400-600 grit preparation, and select a simpler compatible single-stage system if local safety controls are adequate. The trade-off is less color depth and potentially lower chemical resistance than a professional two-stage finish.
A weekend enthusiast can use a basecoat-clearcoat system, but should invest more effort in panel removal, dust control, moisture filtration, test panels, and edge preparation. A spray gun cannot compensate for poor bodywork.
A show-car restorer should strip unstable or historically layered coatings and document the substrate before rebuilding it. Painting over old paint may save hours, but concours-level work prioritizes defect elimination and long-term evidence of a controlled substrate.
Is Painting Over Existing Car Paint Worth It?
Painting over existing car paint is worth doing when the original coating is stable and the goal is a practical color refresh, repair, or respray. It is not worth doing when rust, peeling, cracking, soft coatings, or heavy previous repairs make the old layer an unreliable foundation.
The highest-value preparation is inspection, contamination control, correct abrasion, and a small compatibility test before full application. Choosing a more expensive paint cannot rescue an unstable substrate.
FAQ
Can you paint a car without sanding the old paint?
You should not paint directly over glossy automotive paint because the new coating has little mechanical tooth. At minimum, clean and abrade the existing finish until it is uniformly dull, then remove dust and contamination before applying compatible primer or paint.
Can you paint over automotive clearcoat with a spray can?
You can spray over clearcoat only after cleaning, sanding, and compatibility testing. Aerosol paint may differ in solvent strength, resin chemistry, and cure behavior from the existing finish, so a hidden test patch is especially important before treating a visible panel.
What grit should you use before automotive paint?
Use approximately 400-600 grit for a sound old finish before primer or basecoat, unless the product manufacturer specifies a different range. Use coarser abrasives for shaping body filler, then refine those scratches so they cannot print through the new coating.
Can you paint over a different color?
You can paint over a different color after adequate coverage and preparation, but the color change may require sealer or additional basecoat. Dark colors under light colors can affect hiding, while jambs, panel edges, and trim openings may reveal the previous color.
How long should automotive paint cure before washing?
Many systems become handleable after 24-48 hours at approximately 21-25°C, but full cure varies by product, film thickness, airflow, and temperature. Follow the technical data sheet, and avoid aggressive washing, polishing, or wax until the coating has reached its specified cure state.
Is it cheaper to repaint or wrap a car?
A wrap can be cheaper for a temporary color change when the existing paint is smooth, stable, and free from peeling. Wrap film does not hide major dents or repair failing paint, and removal can expose or lift weak coating, so surface condition remains the deciding factor.
The answer to Can You Paint Over Existing Car Paint? is yes, provided the old finish is stable, clean, compatible, and uniformly abraded. Remove or repair failed coating and corrosion first, then use a tested primer and finish system rather than relying on paint thickness to conceal problems.


