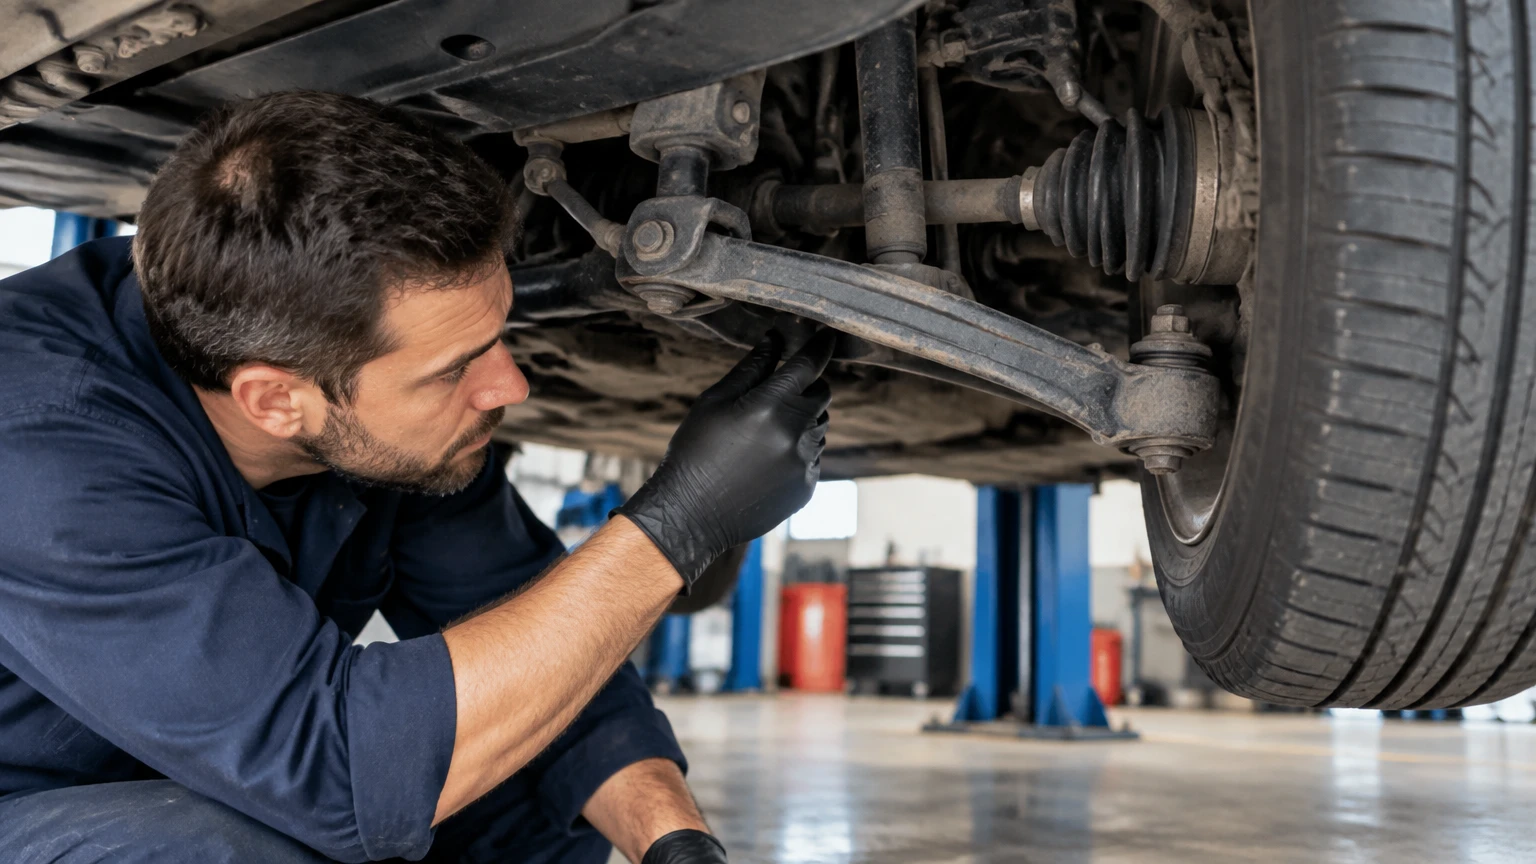
To identify bent suspension components after an accident, compare the damaged side with the undamaged side, inspect for deformation and fresh stress marks, measure wheel position and suspension reference points, then obtain a computerized alignment and structural check. Do not rely on appearance alone, because knuckles, subframes, and strut towers can bend without obvious cracks.
Key Facts
A crooked steering wheel, persistent pull, or rapid inner-edge tire wear after a collision requires an alignment inspection.
A side-to-side measurement difference can reveal damage, but factory dimensions are more reliable than a universal 3 mm rule.
A bent control arm, tie rod, knuckle, strut, or subframe can make the vehicle unsafe even when the tire still holds air.
Never straighten a collision-damaged suspension component with heat, a press, or a hammer unless the vehicle manufacturer specifically permits that repair.
A professional alignment printout identifies altered camber, caster, and toe, but it does not always identify which part is bent.
A vehicle that pulls severely, has a damaged tire, leaks fluid, or cannot maintain steering control should be towed rather than test-driven.
What Counts as a Bent Suspension Component?
A bent suspension component is a steering or wheel-location part whose shape or mounting position has changed enough to alter wheel geometry, load capacity, or movement. Typical affected parts include control arms, trailing arms, tie rods, steering knuckles, struts, shock mounts, sway-bar links, subframes, and suspension mounting brackets.
The suspension keeps each tire positioned relative to the body and road. Camber describes the wheel’s inward or outward tilt, caster describes steering-axis tilt viewed from the side, and toe describes whether the tires point inward or outward from above. A collision can change one or more of these angles by bending metal or shifting a mounting point.
A replacement part may be required even when the visible bend is small. A 1-2 mm change at a suspension pivot can create a much larger change at the tire because the wheel sits farther from the pivot. The actual limit depends on the vehicle design, part length, material, and manufacturer alignment specification.
How Does Accident Force Reach the Suspension?
Impact force travels from the tire and wheel into the hub, bearing, knuckle, control arms, steering links, strut, and subframe. A direct wheel impact often damages the tire, rim, wheel bearing, knuckle, and lower control arm before the force reaches the unibody or frame.
Engineered crumple zones protect the passenger compartment, but suspension parts are not disposable in every vehicle. Some stamped control arms and tie rods are intended to deform before a more expensive structural member, while cast aluminum knuckles and subframes can crack or bend with little visible warning.
A curb strike can produce similar damage without a major crash. Tire sidewall cuts, a bent rim, and a shifted alignment after a low-speed impact deserve the same inspection sequence.
Before You Start: Safety, Tools, and Decision Rules
A basic inspection takes about 45-90 minutes and costs $0-40 if you already have a flashlight, ruler, tape measure, gloves, and a tire-pressure gauge. A raised-vehicle inspection also requires a level surface, wheel chocks, a correctly rated floor jack, two jack stands, and manufacturer-approved lift points.
Do not work beneath a vehicle supported only by a jack. Do not place any part of your body beneath a suspended wheel unless the vehicle is supported by properly positioned stands.
Stop and Arrange a Tow If:
- The tire has a sidewall bulge, cut, exposed cord, or rapid air loss.
- The wheel contacts the strut, control arm, fender, or brake hose.
- The steering wheel requires constant correction or the vehicle pulls sharply.
- A ball joint, tie rod, sway-bar link, or control arm is separated.
- Brake fluid, power-steering fluid, or damper oil is leaking.
- The vehicle sits dramatically lower on one side.
- The airbag, high-voltage, or electronic stability-control warning remains active after the crash.
A cautious driveway inspection is appropriate only when the vehicle is stable, the tires and brakes appear intact, and the damage does not involve a high-voltage battery or compromised structural area.
How to Identify Bent Suspension Components After an Accident
Use a fixed sequence: document the accident area, compare wheel position, inspect components, check free play, measure reference points, and confirm the result with alignment data. The strongest diagnosis combines physical evidence with geometry measurements; no single symptom proves that one specific component is bent.
Step 1: Document the Vehicle Before Disassembly
Photograph each wheel from the front, rear, and side before removing anything. Record the steering-wheel position, tire pressures, dashboard warnings, fluid leaks, wheel damage, and the direction of the impact.
Measure tire pressure first. A 5-10 psi difference can cause a pull that resembles altered camber or caster, and a low tire can make a straight suspension appear damaged.
Check whether the steering wheel is centered while the front wheels point straight. A crooked steering wheel after a crash suggests changed toe or steering linkage position, but it does not identify whether the tie rod, rack, knuckle, or control arm caused the change.
Success checkpoint: The damaged side, wheel position, tire condition, and warning lights are recorded before the vehicle is moved.
Common mistake: Adjusting the steering wheel or replacing a tire before preserving evidence for an insurer or repairer.
Step 2: Compare the Damaged Side With the Opposite Side
Remove the wheel only after safely supporting the vehicle, then compare the same component on both sides. Look for bent stamped sections, bowed rods, displaced bushings, cracked castings, broken brackets, fresh metal scuffing, chipped paint, and shiny stress marks.
Use the unaffected side as a visual reference, not as a specification. Some suspension components are intentionally different left to right because of steering, exhaust, driveshaft, or packaging requirements.
Check the fasteners and washers. A bolt head with fresh witness marks, a shifted eccentric washer, or damaged threads can indicate that a mounting point moved during impact. A torn bushing may look like a bent arm because rubber deformation changes the arm’s resting position.
Success checkpoint: Both sides have comparable photographs and the inspection identifies physical differences tied to the impact direction.
Common mistake: Looking only for a dramatic kink. Cast knuckles, forged arms, and subframes can have subtle bends that appear smooth.
Step 3: Check Wheel Center and Setback
Measure from a fixed body reference to the center of the wheel hub on both sides. Useful screening measurements include hub-center height to the wheel arch and hub-center distance to a repeatable point at the front or rear of the opening.
A wheel that sits farther rearward after a front-corner impact commonly indicates a bent lower control arm, rear control-arm pivot, subframe, or body mounting point. A front wheel pushed forward can indicate damage to the same parts in the opposite direction.
Body panels can mislead you. A displaced fender or bumper may change the opening without changing suspension geometry, so confirm wheel setback from chassis or suspension reference points when possible.
Success checkpoint: The measurements are taken from identical points, with the vehicle on level ground and the steering centered.
Common mistake: Measuring from a bent bumper, loose splash shield, or damaged fender lip.
Step 4: Measure Suspension Reference Points
Measure from a stable subframe or body datum to matching bolts, ball-joint centers, knuckle features, or control-arm pivots. A digital caliper works for short exposed distances, while a tape measure or tram gauge works for larger cross-body measurements.
A side-to-side difference of about 3 mm is a useful screening warning, not a universal legal or repair limit. Manufacturer body-repair data and alignment specifications take priority. Some vehicles have different nominal dimensions on each side, and some suspension designs cannot be diagnosed accurately with a simple mirror measurement.
Measure diagonally as well as laterally. If two corresponding points have changed relative to one another, the subframe may have shifted. If the subframe points remain correct but the wheel-end point has moved, the arm, knuckle, or hub carrier becomes more suspect.
Success checkpoint: Measurements use documented factory reference points or matching physical points, and the results are written down rather than estimated visually.
Common mistake: Treating a tape-measure difference as proof of a bent part without checking whether a subframe shifted.
Step 5: Check Wheel Play and Joint Movement
With the wheel raised, hold it at 12 and 6 o’clock and rock it firmly. Movement can indicate a worn or damaged ball joint, wheel bearing, hub, or knuckle, although the exact source requires a second test and visual observation.
Hold the wheel at 3 and 9 o’clock and rock it again. Side-to-side movement commonly points toward inner or outer tie-rod play, steering-rack movement, or looseness at the knuckle. A bent tie rod may have no detectable looseness, so a negative shake test does not clear it.
Have an assistant rock the wheel while you watch each joint. Observe whether movement occurs between the stud and housing, through a rubber boot, at the bearing, or at the steering rack. Do not confuse normal steering-rack movement with a failed tie rod.
Success checkpoint: The moving joint is identified while the wheel is loaded and unloaded according to the manufacturer’s procedure.
Common mistake: Replacing a wheel bearing because of 12-and-6 movement without checking ball-joint movement separately.
Step 6: Inspect the Strut, Shock, and Tower
Inspect the strut tube, piston rod, spring seat, spring, upper mount, and tower. Look for a bent tube, scraped piston rod, leaking damper oil, shifted spring, cracked mount, broken coil, or a spring seat that sits at a different angle from the opposite side.
Under the hood, inspect the strut tower for wrinkled metal, cracked seam sealer, chipped paint around mounting studs, elongated holes, and upward “mushrooming.” In the wheel well, inspect the apron and rail near the tower because structural distortion can hold a replacement strut in the wrong position.
A leaking shock does not prove that the strut is bent, and a straight-looking strut does not prove that the tower is undamaged. Alignment results and structural measurement are needed when the wheel angle remains abnormal after replaceable parts are changed.
Success checkpoint: The damper, upper mount, spring seat, and surrounding body metal are checked as one assembly.
Common mistake: Replacing only the strut cartridge when the upper tower or steering knuckle is the part that moved.
What Damage Looks Like by Component
| Component | Main function | Specific signs after impact | Usual confirmation |
|---|---|---|---|
| Lower control arm | Locates the wheel laterally and longitudinally | Buckled metal, shifted bushing sleeve, torn rubber, changed wheel setback | Alignment plus pivot-to-knuckle measurement |
| Inner or outer tie rod | Transfers steering-rack movement | Bowed shaft, damaged boot, bent threads, altered toe | Toe reading and joint inspection |
| Steering knuckle | Carries hub, bearing, caliper, and suspension joints | Cracks, altered camber, damaged bearing seat, no obvious bend | Alignment and replacement comparison |
| Strut or shock | Damps movement and may locate the wheel | Bent tube, scraped rod, oil leak, tilted spring perch | Visual check and camber or caster data |
| Ball joint | Allows controlled knuckle rotation | Torn boot, separated stud, excessive movement | Loaded joint test and manufacturer procedure |
| Wheel bearing and hub | Supports wheel rotation | Grinding, looseness, damaged flange, sensor fault | Runout, play test, and scan data |
| Sway-bar link | Transfers roll force | Bent rod, separated ball socket, torn boot, clunk | Visual inspection and movement test |
| Subframe | Carries suspension pivots | Shifted marks, damaged bushings, altered diagonal dimensions | Chassis measuring system |
| Strut tower | Holds upper suspension mount | Wrinkles, cracked sealer, displaced studs, uneven tower height | Structural measurement |
A professional technician should inspect the steering rack, brake hose, ABS wiring, wheel-speed sensor, and brake rotor after a direct wheel impact. These parts may not be bent suspension components, but damage can create unsafe braking or stability-control faults.
Which Test Is Most Reliable?
A professional alignment printout is the best first confirmation of changed wheel geometry, while a three-dimensional structural measurement is the best method for locating shifted body or subframe points. Visual inspection identifies obvious damage, but it cannot reliably clear a cast knuckle, aluminum subframe, or hidden tower deformation.
| Method | Typical precision or output | Typical time | Main limitation |
|---|---|---|---|
| Visual inspection | Obvious cracks and bends | 30-60 minutes | Misses hidden geometry changes |
| Side-to-side measurement | About 1-3 mm screening resolution | 45-90 minutes | Requires correct reference points |
| Four-wheel alignment | Camber, caster, toe in degrees | 45-90 minutes | Shows geometry, not always the failed part |
| Runout measurement | Hub or wheel deviation in mm | 20-45 minutes | Requires a dial indicator and access |
| 3D structural measurement | Factory-point deviation in mm | 2-6 hours | Requires model-specific data and equipment |
Alignment tolerances vary by make, model, ride height, load condition, and axle design. A generic 0.5-degree side-to-side difference can be a warning, but the printed manufacturer range determines whether the result is acceptable.
A vehicle may align within tolerance after a crash and still contain a cracked or weakened part. Conversely, a small alignment difference may result from tire construction, road crown, worn bushings, or normal production variation. The technician must inspect the hardware that produced the measurement.
What Do Driving Symptoms Indicate?
A post-accident steering or tire symptom identifies a problem category, not a single failed component. Perform a road test only at low speed on a private or controlled road when the vehicle tracks predictably, the tire is sound, and no part contacts the body.
| Symptom | Common causes | Immediate response |
|---|---|---|
| Steering wheel crooked | Changed toe, bent tie rod, shifted rack, altered arm position | Arrange alignment inspection |
| Vehicle pulls strongly | Caster difference, tire damage, brake drag, camber change | Stop if correction is constant or severe |
| Inside-edge tire wear | Excessive negative camber or toe-out | Avoid extended driving |
| Clunk over bumps | Sway link, ball joint, bushing, strut mount | Inspect before road use |
| Vibration at speed | Bent wheel, tire belt damage, hub runout, bearing damage | Tow if vibration is severe |
| Steering binds or fails to self-center | Bent strut, knuckle, rack, or damaged mount | Do not drive |
| ABS or stability warning | Damaged wheel-speed sensor, wiring, hub, or calibration issue | Scan system before repair approval |
Road crown can cause a mild pull, especially on roads that slope toward drainage. A strong pull that remains on a level surface is not normal road crown.
What Should Be Repaired, Replaced, or Measured?
Replace a bent suspension part with a correct vehicle-specific component, then perform an alignment and inspect the opposite side. Replaceable components should not be heated, hammered, or pressed back into shape because the repair can alter strength, surface treatment, and fatigue resistance.
Struts and shocks are commonly replaced in axle pairs when one unit is damaged or substantially worn, because unequal damping can affect braking and handling. Control arms and tie rods are not automatically replaced in pairs, but the opposite side should be checked for corrosion, bushing wear, and previous impact damage.
Request a pre-repair alignment printout when an insurer is involved. If the vehicle has aluminum suspension parts, a subframe impact, unusual alignment readings, or visible tower damage, request model-specific structural measurement rather than relying on a visual estimate.
Modern vehicles may also require steering-angle, yaw-rate, camera, radar, or wheel-speed calibration after suspension repairs. The owner’s repair manual or manufacturer service information determines the required procedure.
Typical Costs and Repair Time
Costs vary by vehicle, region, corrosion, drivetrain, and whether the impact damaged structural or electronic systems. The following figures are typical U.S. independent-shop ranges, not fixed prices.
| Service or repair | Typical parts and labor | Typical time | Usually required afterward |
|---|---|---|---|
| Diagnostic alignment | $100-$200 | 1-2 hours | Repair decision and printout |
| Tie-rod replacement | $150-$350 | 1-1.5 hours | Alignment |
| Control-arm replacement | $250-$650 | 1.5-3 hours | Alignment |
| Strut assembly, one side | $300-$800 | 2-3 hours | Pair inspection and alignment |
| Steering-knuckle replacement | $400-$1,000 or more | 2-4 hours | Bearing check and alignment |
| Subframe replacement or repositioning | $800-$2,500 or more | 5-12 hours | Structural measurement and alignment |
| 3D structural measurement | $300-$800 | 2-6 hours | Collision repair plan |
| ADAS calibration | $150-$1,000 | 1-4 hours | Scan and road verification |
A four-wheel alignment is not a substitute for structural measurement. Alignment answers whether the wheels currently meet specification; structural measurement answers whether selected body and suspension mounting points match factory coordinates.
Common Mistakes and How to Fix Them
Replacing Parts Without Baseline Measurements
Replacing the visibly damaged arm before recording alignment data can hide the original failure pattern. Ask the shop to save the pre-repair alignment sheet, photographs, and structural measurements.
Assuming the Wheel Is the Only Damaged Part
A bent rim can cause vibration, but it does not explain every altered camber or caster reading. Inspect the tire, hub, bearing, knuckle, control arm, and subframe after a direct wheel hit.
Treating an Alignment as Proof of a Sound Vehicle
A vehicle can meet toe specifications while a ball joint boot, tower, wheel bearing, or control-arm bushing remains damaged. Alignment confirms geometry, not overall roadworthiness.
Straightening Collision-Damaged Metal
Do not heat or press a bent tie rod, control arm, knuckle, or strut. Replace the part unless the manufacturer’s repair information provides a specific approved procedure.
Ignoring the Opposite Side
The undamaged side provides the comparison reference, but it may already have wear or previous damage. Compare both sides with factory specifications and inspect the opposite part before closing the repair.
Driving on a Damaged Tire
A tire can lose internal strength after a sidewall strike while appearing inflated. Replace any tire with exposed cords, a bulge, deep sidewall cuts, or suspected belt separation.
Special Situations That Change the Diagnosis
Front-Corner Impact
Prioritize the tire, wheel, bearing, knuckle, lower control arm, tie rod, strut, and front subframe. Wheel setback and caster differences are especially useful because front-corner impacts often move the wheel longitudinally.
Rear-Corner Impact
Inspect the trailing arm, lateral link, toe link, rear knuckle, rear hub, axle beam, and rear subframe. A rear wheel can show severe toe change even when the steering wheel remains centered.
Aluminum Suspension Parts
Aluminum knuckles and arms can crack or deform with little paint disturbance. Do not use heat or welding unless the manufacturer expressly approves the repair, and treat unexplained alignment changes as evidence requiring professional inspection.
Electric and Hybrid Vehicles
Do not lift or disassemble an electric vehicle near a damaged high-voltage battery, orange cable, or battery enclosure without trained procedures. A suspension inspection does not establish that the high-voltage system is safe.
FAQ
Can a bent suspension part be repaired instead of replaced?
Most bent steering and suspension parts should be replaced, not straightened. Heating, pressing, or hammering can change the metal’s strength and surface treatment. Some manufacturers permit controlled repair of specific subframes or steel brackets, but the decision must follow vehicle-specific service and collision-repair information.
Will a wheel alignment find every bent component?
No. A wheel alignment detects changed camber, caster, toe, and sometimes thrust angle, but it does not always identify the damaged part or reveal a crack that has not changed geometry. Combine the alignment printout with a physical inspection and structural measurement when readings remain abnormal.
How long can I drive with a crooked steering wheel?
Drive only far enough to reach a repair facility if the vehicle tracks safely, the tire is undamaged, and no warning or binding exists. A severely crooked wheel, strong pull, vibration, loose steering, or damaged tire requires towing because continued driving can accelerate tire failure.
Should control arms be replaced in pairs after an accident?
Control arms do not automatically require pair replacement. Replace the damaged arm, then inspect the opposite arm for bent metal, torn bushings, corrosion, and previous repairs. Struts and shocks are more commonly replaced in pairs when one unit has failed because unequal damping can affect vehicle balance.
Can a bad tire mimic a bent suspension component?
Yes. Uneven tire pressure, conicity, belt separation, a bent rim, or internal tire damage can cause pulling or vibration that resembles suspension damage. Swap equivalent front tires left to right only when the tire design permits it, or use a known-good wheel assembly during diagnosis.
What should I give the insurance adjuster?
Provide accident photographs, tire and wheel images, the pre-repair alignment report, structural measurement results, scan reports, and a written list of damaged parts. Ask whether the estimate includes post-repair alignment, ADAS calibration, wheel-speed sensor checks, and inspection of the opposite suspension side.
The Bottom Line
How to identify bent suspension components after an accident is a process of combining side-to-side inspection, wheel-position measurements, joint checks, alignment data, and structural verification. Visual evidence can locate obvious damage, but a professional alignment and model-specific measurement are needed for hidden knuckles, subframes, strut towers, and mounting-point changes. If the vehicle pulls sharply, has tire or steering damage, or shows fluid leakage, tow it before diagnosis.


