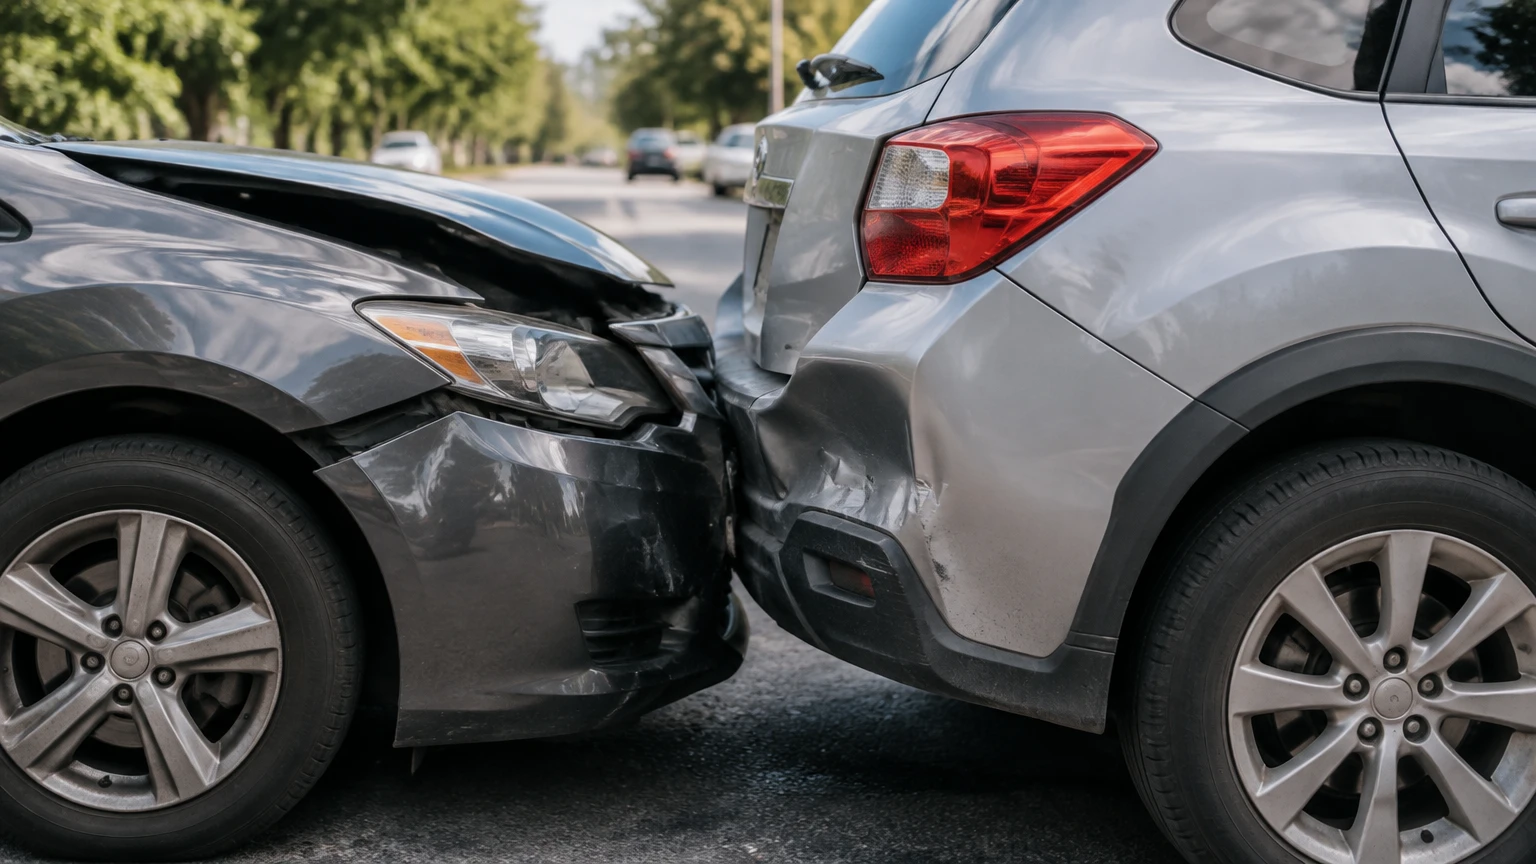
The most common types of rear-end collision damage affect the bumper system, trunk or liftgate, unibody structure, exhaust and suspension components, and electronic safety systems. A bumper cover can appear repairable while the reinforcement bar, crash absorbers, frame rails, wiring, or ADAS sensors behind it require replacement, measurement, or calibration.
Key Facts at a Glance
- Rear-end collision damage ranges from paint scuffs to bent unibody rails and crushed trunk floors.
- A flexible plastic bumper cover does not prove that the reinforcement bar underneath is undamaged.
- A trunk that no longer closes evenly can indicate latch, hinge, quarter-panel, or floor-pan distortion.
- Typical repair costs range from about $150 for minor cosmetic work to more than $10,000 for structural damage.
- Blind-spot radar, parking sensors, cameras, and wiring can require calibration after bumper replacement.
- A vehicle should receive a teardown and diagnostic scan when gaps, warning lights, leaks, alignment, or operating behavior change.
How Does a Rear-End Collision Transfer Energy?
A rear-end collision transfers energy through the bumper cover, reinforcement bar, energy absorbers, rear body structure, floor, suspension, and sometimes the drivetrain. Modern vehicles use crush zones to manage impact energy, so a controlled buckle can indicate that the structure performed its intended safety function, not that the damage is harmless.
The outer bumper fascia is usually a thermoplastic cover. It can flex during a low-speed impact and regain much of its shape. Behind it, the reinforcement bar and absorber are designed to deform or crush. Those parts may remain visibly hidden until a technician removes the cover.
Residual force can reach the rear frame rails, trunk floor, quarter panels, suspension mounting points, exhaust system, and wiring harnesses. Impact direction matters: a centered collision behaves differently from an offset impact that twists one rail or pushes a corner inward.
Why Can a Bumper Look Fine After an Impact?
A bumper can look acceptable while the reinforcement bar, absorber, brackets, radar mounts, or body structure are damaged. Plastic returns toward its original contour more readily than steel or aluminum, while mounting points can move without creating a large crack in the cover.
A visual estimate is therefore limited. Collision technicians normally remove the cover when the impact involved meaningful speed, visible panel-gap changes, sensor warnings, a displaced exhaust, a trunk problem, or a collision with a heavy vehicle.
What Are the Most Common Types of Rear-End Collision Damage?
The five common categories are bumper and reinforcement damage, unibody or frame distortion, trunk and hatch damage, mechanical damage, and electrical or ADAS damage. One collision can create several categories because the impact path moves from the exterior toward the vehicle’s structure and systems.
1. Bumper Cover, Absorber, and Reinforcement Damage
Bumper-system damage includes scuffs, cracks, torn mounting tabs, a crushed absorber, bent brackets, and a deformed reinforcement bar. Minor paint transfer may require cleaning or refinishing, but a split cover or distorted mounting point usually requires replacement.
Paintless dent repair is appropriate only when the affected metal is accessible, the paint remains intact, and the panel has not stretched or buckled. PDR is generally unsuitable for a cracked plastic fascia, a crushed crash bar, broken sensor mounts, or damage around a trunk opening.
The reinforcement bar is a structural impact component, although it is not the same as the vehicle’s frame. A collision center should inspect the bar, absorber, brackets, welds, and mounting bolts before approving cosmetic-only work.
2. Unibody Rails, Trunk Floor, and Frame Alignment
Structural damage occurs when rear frame rails, crossmembers, the trunk floor, or suspension mounting points move beyond manufacturer tolerances. Unibody vehicles combine the body and frame into one structure, so rear-end damage can affect crash performance, wheel alignment, sealing, and future repairability.
Technicians use a frame rack or measuring system to compare datum points with factory dimensions. Straightening may be appropriate when the manufacturer’s repair information permits it. Some damaged sections require approved sectioning or replacement rather than pulling.
A vehicle that tracks sideways, develops unusual tire wear, or has unequal rear wheel alignment may have thrust-angle or suspension-mounting damage. Structural measurement is more reliable than judging whether the vehicle “looks straight.”
3. Trunk, Hatch, Liftgate, and Weather-Seal Damage
Trunk and liftgate damage includes bent hinges, a displaced latch, distorted striker mounts, a warped lid, crushed rear body panels, and damaged weather stripping. A lid that requires extra force to close is a repair clue, not a minor convenience issue.
The trunk floor can buckle even when the deck lid appears usable. Water then enters through the seal or rear lamp area and collects beneath the spare tire, battery, trim, or carpeting. Moisture can corrode connectors and create intermittent electrical faults weeks after the collision.
What Signs Suggest Trunk-Floor Damage?
Uneven gaps, a latch that needs slamming, rippled metal beneath the carpet, displaced spare-tire foam, a new water leak, or a tail lamp that no longer sits flush justify a teardown. Technicians should inspect seams, drain plugs, rear body panels, and the floor around suspension and bumper mounts.
4. Exhaust, Suspension, Axle, and Driveline Damage
Mechanical damage commonly affects exhaust pipes, mufflers, heat shields, rear suspension links, shocks, parking-brake components, and wheel-alignment hardware. A rear collision can push the exhaust forward, bend a hanger, crack a pipe, or transmit force into a catalytic converter or oxygen-sensor wiring.
Driveshaft, differential, axle, transfer-case, or transmission damage is possible but less common than bumper, body, exhaust, or suspension damage. The likelihood rises when the impact reaches the rear axle, when the vehicle is rear-wheel drive or all-wheel drive, or when the car is pushed into another object.
A post-collision road test should check vibration, gear engagement, fluid leaks, exhaust noise, steering behavior, braking, and tire scrub. Mechanics should not assume a drivetrain fault from impact alone; diagnostic evidence and physical inspection must support the conclusion.
5. ADAS Sensors, Cameras, and Electrical Wiring
Rear-end collision damage can disable blind-spot monitoring radar, rear cross-traffic alert, parking sensors, backup cameras, and related wiring. Sensor brackets can shift by a small amount while the component appears intact, producing warnings or unreliable detection.
A new bumper cover may require sensor aiming or calibration because the sensor’s angle, height, and distance from the bumper affect its field of view. Calibration requirements vary by manufacturer and system. A scan tool alone does not replace physical aiming when the service procedure requires targets or measured geometry.
Warning messages such as “Blind Spot Monitor Unavailable,” parking-sensor faults, camera distortion, or repeated communication codes should remain unresolved until the vehicle has completed diagnostics and the required calibration.
Which Damage Is Cosmetic, Structural, Mechanical, or Electronic?
Cosmetic damage affects appearance, structural damage affects crash load paths, mechanical damage affects movement or propulsion, and electronic damage affects sensors, communication, or driver-assistance functions. The categories overlap, so a cracked bumper can coexist with a bent rail and a failed radar module.
| Damage category | Typical examples | Main inspection method | Typical consequence |
|---|---|---|---|
| Cosmetic | Scuffs, paint transfer, shallow dent, cracked fascia | Visual inspection and paint evaluation | Refinishing or panel replacement |
| Structural | Bent rail, buckled trunk floor, displaced crossmember | Teardown and dimensional measurement | Safety, alignment, or total-loss concern |
| Mechanical | Crushed exhaust, bent control arm, damaged shock | Lift inspection, alignment, road test | Noise, vibration, pulling, fluid leak |
| Electronic | Radar fault, broken harness, camera error | OBD scan, wiring test, calibration | Warning lights or unavailable safety features |
| Water-related | Damaged seal, lamp leak, wet spare-tire well | Moisture inspection and hose test | Corrosion, mold, connector failure |
How Much Does Rear-End Collision Repair Cost?
Typical rear-end collision repair costs range from approximately $150-$600 for minor cosmetic work, $1,000-$2,000 or more for bumper replacement, $1,200-$4,000 for exhaust or suspension repairs, and $2,000-$10,000 or more for structural damage. Local labor rates, vehicle construction, parts availability, paint blending, and hidden damage determine the final estimate.
These figures are planning ranges, not universal prices. Luxury vehicles, EVs, vehicles with multiple radar modules, and models requiring extensive paint blending can exceed them.
| Repair area | Typical cost range | Typical repair time | Main cost driver |
|---|---|---|---|
| Scuff or minor cosmetic repair | $150-$600 | 1-2 days | Paint labor and panel access |
| Bumper cover replacement | $1,000-$2,000+ | 2-4 days | Cover, reinforcement, paint, clips |
| Trunk or liftgate repair | $800-$2,500 | 3-5 days | Lid, hinges, latch, alignment |
| Exhaust or suspension repair | $1,200-$4,000 | 3-6 days | Pipes, sensors, links, alignment |
| ADAS diagnosis and calibration | $500-$3,500+ | 1-3 days | Sensor parts and calibration procedure |
| Structural repair | $2,000-$10,000+ | 1-3 weeks | Measuring, pulling, sectioning, parts |
What Determines the Final Estimate?
The estimate changes when teardown reveals a bent bar, hidden brackets, damaged wiring, paint blending across adjacent panels, corrosion, unavailable parts, or calibration requirements. Insurers may issue an initial estimate from photographs and add a supplement after the collision center exposes additional damage.
Repair time also includes parts ordering, paint curing, frame measurement, alignment, software procedures, and quality checks. A one-day bumper repair becomes a multi-day job when a radar module, backordered lamp, or damaged trunk floor is involved.
Should You Use OEM, Aftermarket, or Recycled Parts?
OEM parts provide the closest match to the manufacturer’s fit, material, sensor mounting, and repair specifications, while certified aftermarket and recycled parts can reduce cost when fitment and safety requirements are verified. The appropriate choice depends on vehicle age, lease terms, insurance rules, sensor integration, and the part’s structural role.
| Part choice | Typical price effect | Best application | Main limitation |
|---|---|---|---|
| OEM bumper or sensor mount | Highest, often baseline | New vehicle, lease, complex ADAS | Cost and backorder risk |
| CAPA-certified aftermarket cover | Often 20%-40% below OEM | Older daily driver with verified fit | Fit and sensor-housing variation |
| Recycled OEM body panel | Often 15%-40% below new OEM | Older vehicle with matching paint or refinishing | Condition and availability |
| OEM structural component | Highest justified safety choice | Rails, reinforcements, approved structural parts | Manufacturer repair rules apply |
| Paintless dent repair | Lowest for qualifying dents | Intact paint and accessible shallow metal | Cannot repair cracks or stretched metal |
A low-cost bumper cover is not automatically equivalent to an OEM component. The cover must hold trim, lamps, reflectors, and sensors in the required position, and the repair facility should verify compatibility before installation.
What Is the Correct Inspection and Repair Sequence?
The correct sequence is diagnostic scanning, visual inspection, teardown, structural measurement, mechanical repair, panel replacement, refinishing, calibration, and quality control. Performing paintwork before confirming structure and electronics can create rework, delayed delivery, and unresolved safety faults.
- Document the collision. Photograph panel gaps, warning messages, fluid leaks, tire position, and the trunk area before disassembly.
- Perform a pre-repair scan. Record diagnostic trouble codes and module communication faults before parts are removed.
- Remove the bumper cover. Inspect the absorber, reinforcement bar, brackets, radar mounts, harnesses, and rear body panels.
- Measure the structure. Compare frame rails, trunk-floor points, crossmembers, and suspension locations with manufacturer dimensions.
- Inspect mechanical systems. Check exhaust routing, suspension links, wheel alignment, axle components, fluid leaks, and underbody damage.
- Repair or replace approved parts. Follow manufacturer procedures for straightening, sectioning, welding, fasteners, and corrosion protection.
- Refinish and reassemble. Blend paint where needed, restore seam sealer, install clips, and confirm trunk and lamp alignment.
- Complete calibration and testing. Perform required ADAS aiming, post-repair scan, alignment, road test, water test, and final inspection.
What Should Be Checked Before Vehicle Delivery?
The repaired vehicle should have even panel gaps, a secure bumper, a correctly closing trunk, no warning lights, correct wheel alignment, quiet exhaust operation, functional lamps, dry cargo carpeting, and documented ADAS calibration when applicable.
A post-repair scan matters because clearing a warning light does not prove that the underlying sensor or communication fault is corrected. The collision center should provide calibration or diagnostic documentation when the manufacturer’s procedure calls for it.
When Can a Rear-End Collision Total a Vehicle?
A vehicle may be declared a total loss when the estimated repair cost plus related expenses approaches or exceeds its actual cash value under the insurer’s state-specific rules. Structural damage, unavailable parts, airbag deployment, salvage value, prior damage, and diminished market value can influence the decision.
Total-loss thresholds differ by jurisdiction and insurer. Some locations use a percentage formula, while others apply a total-loss threshold. The repair estimate alone does not determine the outcome.
An owner should compare the insurer’s valuation with vehicle condition, mileage, options, comparable local listings, taxes, and documented improvements. A repairable vehicle can still be a poor repair candidate when corrosion, prior damage, or extensive structural distortion is present.
What Changes for Electric Vehicles?
EV collision repair requires attention to the battery enclosure, high-voltage cables, isolation faults, lifting points, and manufacturer-specific inspection procedures. A rear impact does not automatically damage the battery, but technicians must not lift, weld, or probe near high-voltage components without the required training and equipment.
EV repair can cost more when battery protection structures, specialized diagnostic procedures, or manufacturer-approved parts are involved. The repair facility should identify the vehicle’s high-voltage system, isolate it according to manufacturer instructions, and verify post-repair electrical safety.
An EV owner should choose a facility with documented EV training and access to the correct scan, measurement, and calibration equipment. A general body repair capability is not proof of high-voltage competence.
What Mistakes Cause the Most Trouble?
The most damaging mistakes are accepting a photograph-only estimate, ignoring a trunk leak, skipping alignment, and returning a vehicle with uncalibrated safety sensors. These errors can leave structural, water, tire-wear, or driver-assistance problems unresolved after the visible damage is repaired.
- Accepting an exterior-only estimate: Request teardown when the impact was more than a minor parking-lot contact or when gaps and warnings changed.
- Ignoring a trunk that needs extra force: Inspect the latch, striker, hinges, rear body, seal, and trunk floor.
- Skipping a four-wheel alignment: Compare thrust angle and rear toe after suspension or structural impact.
- Treating a warning light as cosmetic: Scan the vehicle and complete the specified calibration.
- Using incompatible parts: Verify sensor mounts, brackets, reflectors, lamps, and connector compatibility.
- Failing to test for water entry: Inspect the spare-tire well and carpeting after repair, especially after lamp or trunk damage.
Which Post-Repair Symptoms Need Immediate Attention?
A vehicle that pulls, vibrates, produces new exhaust noise, develops tire scrub, leaks water, or displays an ADAS warning needs prompt reinspection. These symptoms can indicate alignment error, displaced suspension, an unsealed body seam, a wiring fault, or incomplete calibration.
Stop driving and arrange an inspection when the trunk cannot latch securely, a wheel visibly sits out of position, fluid leaks appear, braking changes, or high-voltage warnings occur. Cosmetic completion is not evidence of mechanical safety.
Rear-End Collision Damage: Practical Decision Table
| Situation | Most likely concern | Recommended next action | Driving advice |
|---|---|---|---|
| Scuff with even gaps and no warnings | Cosmetic fascia damage | Obtain paint and clip estimate | Short trips may be reasonable |
| Cracked cover or displaced bumper | Hidden bar or absorber damage | Request bumper removal and inspection | Avoid highway driving until checked |
| Trunk requires slamming | Latch, floor, hinge, or seal distortion | Inspect structure and water entry | Do not ignore prolonged use |
| Car pulls after impact | Rear toe, thrust angle, or suspension | Perform measurement and alignment | Limit driving until inspected |
| Blind-spot warning remains active | Radar, harness, bracket, or calibration fault | Scan and calibrate using procedure | Do not rely on the feature |
| EV warning or underbody impact | Battery enclosure or isolation concern | Use qualified EV collision facility | Do not probe or tow improperly |
Frequently Asked Questions
Can a low-speed rear-end collision cause frame damage?
Yes, a low-speed collision can damage a reinforcement bar, mounting bracket, trunk floor, or rail, although severe frame distortion is less common than bumper or latch damage. The risk increases when the striking vehicle has a high bumper, the impact is offset, or the struck vehicle is stationary against another object.
Does rear-end damage reduce a vehicle’s value?
Rear-end damage can reduce resale value even after high-quality repairs because accident history, structural work, paint measurement, and buyer concerns affect marketability. The reduction depends on vehicle age, damage severity, repair documentation, title status, and whether unibody or suspension components were replaced.
Can insurance pay for hidden collision damage?
Insurance may cover hidden damage related to the same covered collision when inspection and documentation establish causation. A collision center can submit a supplemental estimate with photographs, measurements, diagnostic codes, and parts documentation, but coverage depends on the policy, liability, deductible, and applicable law.
Should I replace a bumper after a minor impact?
Replace a bumper when the fascia is cracked, mounting tabs are broken, sensor housings are distorted, or the reinforcement and absorber are damaged. Repair may be suitable for limited scuffs or a qualifying dent, provided the plastic, mounts, sensor positions, and structural components remain within specification.
How long should a rear-end collision repair take?
Minor cosmetic work may take one to two days, while bumper and trunk repairs commonly require two to five days. Structural repair, parts backorders, paint blending, mechanical damage, and ADAS calibration can extend the process to one to three weeks.
What documents should I request after repair?
Request the final itemized estimate, supplement history, parts information, alignment report, diagnostic scan results, ADAS calibration record, warranty terms, and any structural measurement documentation. These records help verify completed work and support future resale, insurance, or warranty questions.
The Bottom Line
The most common types of rear-end collision damage include bumper-system damage, unibody misalignment, trunk and liftgate distortion, exhaust or suspension damage, and ADAS or electrical faults. A visible bumper mark does not reveal the full condition of the vehicle, so the correct response combines teardown, structural measurement, mechanical inspection, diagnostic scanning, and calibration when required. Knowing What Are the Most Common Types of Rear-End Collision Damage? helps you request the right inspection before cosmetic repairs conceal a safety or reliability problem.


