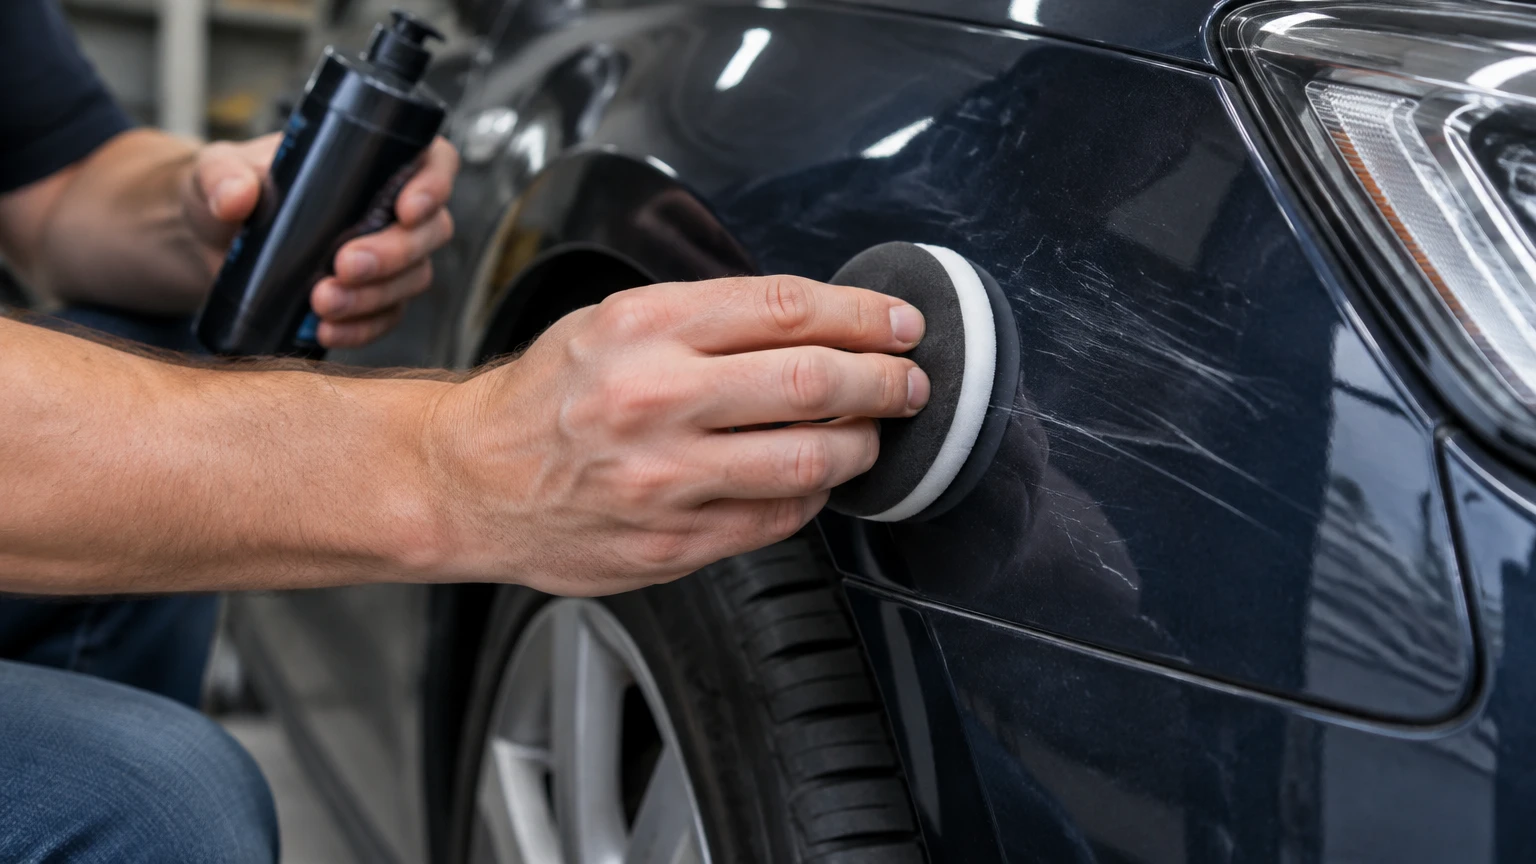
How to remove scratches from car paint depends on whether the damage remains in the clear coat or reaches the color coat, primer, or substrate. Clean the panel, perform the fingernail test, then polish shallow marks, compound deeper clear-coat damage, or use color-matched touch-up paint when pigment is missing.
Key Facts / At a Glance
A scratch that does not catch a fingernail is usually suitable for hand polishing.
A visible white, gray, black, or metallic line usually indicates lost paint, not a polishable scratch.
Polishing removes a small amount of clear coat; repeated aggressive correction can expose the base coat.
Touch-up paint must cure before leveling, and typical curing takes 24-48 hours.
Wet sanding is a leveling step, not a complete repair; compounding and finishing polish must follow it.
Professional repair is the safer choice for exposed metal, rust, multiple panels, or valuable vehicles.
What Kind of Car Scratch Do You Have?
Car paint normally uses primer, a pigmented base coat, and a transparent clear coat over metal or plastic. The layers are thin, and their actual thickness varies by manufacturer, paint system, panel location, and previous refinishing.
| Layer | Typical thickness | Visible when damaged | Corrective approach |
|---|---|---|---|
| Clear coat | 35-50 microns | Gloss loss, swirls, gray haze | Polish or compound |
| Base coat | 13-25 microns | Different color or metallic pigment | Touch-up paint |
| Primer | 18-25 microns | Usually gray, white, or beige | Touch-up and sealing |
| Metal or plastic substrate | 0 microns of paint | Bare metal, corrosion, black plastic | Professional or careful refinish |
Use the fingernail test
Wash and dry the area, then drag a clean fingernail across the scratch at a right angle. If the nail glides over the mark, the defect probably lies in the clear coat. If the nail catches, material has been removed or displaced more deeply.
The fingernail test is useful, but it is not a paint-thickness measurement. A shallow-looking mark on a repainted panel may have less remaining clear coat than the same mark on factory paint. A paint-depth gauge is the more reliable professional diagnostic tool.
Check the scratch in different conditions
A white line can be transferred paint from another object rather than missing paint. Put a small amount of automotive shampoo on a microfiber towel and clean the mark; if the color transfers to the towel or disappears when wet, the defect may be surface transfer.
Look at the area under direct sunlight and a cool-white LED. Warm garage lighting can hide haze, sanding marks, and uneven touch-up paint. Do not diagnose a scratch on a dusty or wax-covered panel.
Which Method Matches the Scratch?
The correct repair is the least aggressive method that produces the required improvement. Hand polish is appropriate for isolated clear-coat marks, while machine compounding and sanding remove more material and create more opportunity for damage.
| Scratch condition | Identification | Recommended method | Typical DIY time |
|---|---|---|---|
| Swirl or wash mark | Nail does not catch | Finishing polish by hand or DA polisher | 20-45 minutes |
| Light clear-coat scratch | Nail barely catches, no color change | Compound, then polish | 45-90 minutes |
| Deep clear-coat scratch | Nail catches clearly, original color remains | DA correction, possible 2000-3000 grit sanding | 1-3 hours |
| Base coat or primer damage | White, gray, black, or colored layer visible | Touch-up base coat and clear coat | 2-3 days |
| Bare metal or rust | Metallic substrate or orange corrosion visible | Prompt professional repair | 1-3 days |
A scratch that spans a body crease, reaches several panels, or exposes metal deserves a professional estimate. Body lines have less accessible flat surface for safe polishing, and a visually acceptable spot repair can look worse than the original damage when color blending is poor.
How to Remove a Light Clear-Coat Scratch by Hand
Hand polishing removes or levels a very small amount of clear coat around a shallow defect. The procedure usually takes 30-60 minutes, costs approximately $15-$40 for materials, and offers the lowest risk when the fingernail does not catch.
Before you start
Prepare automotive shampoo, two clean wash mitts, a clay bar or synthetic clay towel if bonded contamination is present, three or more edgeless microfiber towels, painter’s tape, a foam applicator, automotive compound or polish, and wax or a spray sealant.
Work in shade between approximately 60 and 80°F, on cool paint. Avoid household cleaners, paper towels, rough sponges, and circular scrubbing with dry product.
Step 1: Wash and decontaminate the panel
Wash the vehicle with automotive shampoo and dry it with a clean microfiber towel. Feel the paint through a thin plastic bag; roughness indicates bonded contamination that can interfere with correction.
Use clay lubricant and a clay bar only when needed. Knead the clay frequently, and discard it if it falls on the ground. Aggressive claying can create its own marring.
You will know it worked when: the panel feels smooth and the scratch remains clearly visible.
Common mistake: polishing dirt into the clear coat.
Step 2: Test the mildest product
Apply a quarter-sized amount of finishing polish to a foam applicator. Tape a small test section approximately 12 by 12 inches, then work the product with firm, overlapping cross-hatch strokes for 45-60 seconds.
Wipe the residue with a clean microfiber towel and inspect it under LED light. If the mark has not changed, move to a dedicated compound rather than pressing harder with the polish.
You will know it worked when: reflections look sharper and the scratch appears reduced from multiple angles.
Common mistake: judging the result under dim garage lighting.
Step 3: Compound only if necessary
Use a small amount of automotive compound on a fresh foam applicator. Make two or three controlled passes, wiping and inspecting after each pass; do not repeatedly attack one deep line because a remaining scratch may be deeper than the safe correction limit.
Follow compound with finishing polish. Compounding can leave a gray or cloudy appearance called compounding haze, especially on black paint, but a finer polish normally restores clarity.
You will know it worked when: the defect is reduced without a dull ring around the test area.
Common mistake: using more pressure instead of changing the product or stopping.
Step 4: Protect the corrected paint
Remove residue with a clean towel and apply a wax, polymer sealant, or ceramic spray according to its label. Polishing can remove previous wax protection, but protection does not rebuild clear coat.
You will know it worked when: water beads or sheets consistently across the repaired area.
Common mistake: treating protection as a permanent repair for missing paint.
Should You Use a Dual-Action Polisher?
A dual-action, or DA, polisher is usually safer than a rotary polisher for an inexperienced user because the pad oscillates instead of maintaining one fixed rotational path. A DA machine can still remove too much paint when used with an aggressive pad, compound, pressure, or repeated passes.
For a first correction, use a 5- or 6-inch DA polisher, a medium foam cutting pad, a finishing pad, and a small test area. Set the machine at the product maker’s medium speed, keep the pad flat, move it approximately 1-2 inches per second, and never hold it stationary.
| Correction option | Typical material cost | Skill level | Best result |
|---|---|---|---|
| Hand polish | $15-$40 | Beginner | Light marring and transfer |
| DA polish | $120-$350 including machine | Beginner-intermediate | Larger clear-coat areas |
| DA compound and polish | $150-$400 | Intermediate | Moderate clear-coat scratches |
| Rotary correction | $250-$600 including machine | Advanced | Fast, heavy correction |
| Body-shop refinish | $300-$1,200 per panel | Professional | Missing paint and blending |
A DA polisher is not “impossible” to misuse. Excessive sanding beforehand, a dirty pad, high pressure, and repeated correction on a small spot can still cause a strike-through. Keep several pads available because saturated foam cuts inconsistently and traps abrasive residue.
Should You Wet-Sand a Car Scratch?
Wet sanding should be reserved for advanced correction or cured touch-up paint because it deliberately abrades the surface faster than ordinary polishing. Use a hard, level sanding block, lubricated water, and frequent inspections; never sand freehand with folded paper.
For clear-coat leveling, detailers commonly begin with 2000 or 3000 grit, depending on scratch depth and paint condition. Sand perpendicular to the scratch in short, straight strokes, clean the slurry frequently, and stop as soon as the defect is level. The sanding haze must then be removed with compound and finishing polish.
A 3000-grit sheet does not guarantee safety. Previous repainting, thin factory clear coat, sharp panel edges, and concentrated finger pressure can produce a breakthrough quickly. Sanding adjacent edges is especially risky because clear coat often measures thinner there.
Practitioner rule: if you cannot measure paint thickness or recognize the transition from scratch leveling to clear-coat removal, skip sanding and obtain a professional estimate.
How Do You Repair Exposed Paint or Metal?
Missing pigment cannot be polished back into the panel. Use an exact paint-code touch-up system when the scratch reaches the base coat or primer, and obtain professional help when bare metal has rusted or the damaged area is large.
Step 1: Identify the factory paint code
Find the paint code on the driver’s door-jamb label, under the hood, in the trunk area, or through the manufacturer’s parts system. Order a matching base coat and clear coat, preferably from the vehicle manufacturer or a reputable automotive paint supplier.
A color name such as “black” is not enough. Metallic flake, pearl, three-stage paint, fading, and panel angle can make a nominally correct color look different.
Step 2: Clean and stabilize the groove
Wash the area, dry it, and remove residue with a manufacturer-approved panel wipe or a small amount of isopropyl alcohol on a lint-free swab. Do not flood seams, sensors, rubber seals, or unprotected plastic with solvent.
If orange rust is present, stop and address it promptly. A fiberglass rust pen can remove light surface corrosion, but spreading rust under intact paint requires a proper corrosion repair rather than cosmetic filling.
Step 3: Apply very small amounts of paint
Use a fine micro-applicator or sharpened wooden toothpick to place thin layers inside the scratch. Allow the base coat to flash or dry according to its product instructions, often 20-30 minutes between thin applications.
Avoid the broad brush attached to many bottle caps. It deposits too much material and creates a raised, dark line that is difficult to level.
Step 4: Add clear coat and allow full cure
Apply clear coat after the base coat has dried. Leave a slight raised area rather than trying to achieve a perfect flush fill immediately, then protect the vehicle from rain, dust, and washing while the repair cures.
Typical touch-up clear coat requires 24-48 hours before leveling. Cold temperatures, heavy layers, and high humidity can extend that time.
Step 5: Level and polish the repair
After full cure, use a small hard sanding block with 2000- or 3000-grit paper and abundant lubrication. Sand only the raised touch-up material, checking every few strokes. Finish with compound and polish after the repaired area is flush.
Touch-up paint can protect metal and improve appearance, but it rarely produces an invisible repair on a door or hood. A body shop can blend color into adjacent paint and clear-coat a larger area.
What Does Car Scratch Repair Cost?
Typical DIY scratch repair costs $15-$60 for hand correction or touch-up materials, while professional repair commonly costs $150-$1,200 depending on depth, panel size, paint type, and blending requirements.
| Repair scenario | DIY materials | Professional range | Typical duration |
|---|---|---|---|
| Clear-coat polish | $15-$40 | $100-$250 | 30-60 minutes |
| DA correction | $120-$400 | $200-$500 | 1-3 hours |
| Touch-up paint | $25-$75 | $250-$800 | 2-3 days with curing |
| Bare metal and rust | $50-$150 temporary materials | $400-$1,200 | 1-3 days |
| Multi-panel repaint | Not recommended | $900-$2,500+ | 2-7 days |
Prices are typical North American ranges, not fixed estimates. Labor rates, local taxes, paint complexity, insurance requirements, and whether a shop must remove trim can change the total substantially.
Common Mistakes and How to Fix Them
Using toothpaste or household cleaner
Toothpaste contains mild abrasives, binders, water, and flavoring ingredients that are not formulated for automotive clear coat. It may temporarily reduce the appearance of a tiny mark but can leave uneven haze and does not replace missing pigment.
Fix: clean the panel and use a dedicated automotive polish with a foam applicator.
Polishing a deep scratch repeatedly
A deep scratch may remain visible because the bottom lies below the safe correction level. Removing more clear coat does not make the missing base coat reappear.
Fix: stop after a few controlled passes. If color is missing, use touch-up paint or seek a refinish estimate.
Sanding with finger pressure
A fingertip concentrates force into a narrow ridge, creating an uneven low spot and increasing the chance of cutting through the clear coat.
Fix: use a rigid or semi-rigid sanding block and inspect frequently.
Reusing a contaminated microfiber towel
A towel that contains dried compound, grit, or trim dressing can introduce fresh scratches during wiping.
Fix: use clean, folded towels, dedicate separate towels to paint and wheels, and launder them without fabric softener.
Applying touch-up paint too heavily
A thick brush stroke dries into a raised ridge that catches light and may trap solvent beneath the surface.
Fix: use multiple thin applications, wait between coats, and level only after complete curing.
What Changes for Black Paint, Plastic, PPF, and Ceramic Coatings?
Black paint reveals haze, towel marring, and uneven polishing more readily than light colors. Use softer finishing pads, inspect under a strong LED, and make a small test spot before correcting the whole panel.
Plastic bumpers use flexible substrates and may have different paint behavior from steel panels. A scratch that reaches black plastic usually needs adhesion-promoting primer and refinishing rather than ordinary touch-up paint alone.
Paint protection film, or PPF, is not factory paint. Do not compound or sand PPF as if it were clear coat; check the film manufacturer’s care instructions, because light marks may self-heal with controlled warmth while deeper cuts require film replacement.
Ceramic coating does not repair a scratch underneath it. Polishing can remove the coating in the worked area, so clean and recoat that section after correction if the product system requires it.
When Should a Body Shop Repair It?
Choose a professional repair when the scratch exposes bare metal, shows rust, crosses several panels, reaches a sharp edge, or affects a leased or high-value vehicle. A shop can measure paint thickness, identify previous repairs, blend color, and apply corrosion protection that a cosmetic touch-up may not provide.
A professional is also appropriate when the scratch is on a pearl or tri-coat finish. These systems often require a controlled base layer, translucent mid-coat, and clear coat; a single bottle of conventional touch-up paint may not match the panel.
For a leased vehicle, compare the repair estimate with the leasing company’s inspection standards before doing DIY work. An uneven touch-up or visible sanding ring can be charged as a poor repair even when the original scratch was minor.
Frequently Asked Questions
Can wax hide a car scratch permanently?
Wax can temporarily reduce contrast by filling microscopic defects, but it cannot remove a scratch or replace lost paint. Washing and solvent exposure usually reduce the masking effect. Use wax as protection after correction, not as a substitute for polishing or touch-up paint.
Will a scratch remover work if my fingernail catches?
A scratch remover may reduce the sharp edges of a mark that barely catches, but it cannot safely remove every scratch that catches a nail. If the original color remains, controlled machine correction may help; if another color or metal is visible, paint replacement is required.
How long should I wait before washing touch-up paint?
Follow the touch-up product instructions, but a typical repair should avoid washing for at least 48 hours and aggressive polishing for several days. Cold weather and thick applications require longer curing. Pressure washing directly at the repair can dislodge incompletely cured paint.
Can I remove scratches from a car with a ceramic coating?
You can correct the paint, but polishing usually removes the ceramic coating in that area. Do not wet-sand or compound a coated panel without confirming the coating thickness and repair method. After correction, clean the surface and reapply a compatible coating or sealant.
Why did the scratch return after polishing?
The product may have contained fillers or oils that temporarily masked the defect, or the scratch may extend below the corrected surface. Wipe the area with an appropriate panel cleaner, inspect it under LED light, and determine whether paint is missing before repeating correction.
The Bottom Line
How to remove scratches from car paint safely depends on scratch depth, not on the product label. Polish a clean clear-coat mark, use a DA correction process for deeper but intact clear coat, and apply color-matched touch-up paint when pigment or primer is visible. Stop before repeated correction removes the remaining clear coat, and choose a professional repair for rust, bare metal, multi-panel damage, or valuable paintwork.


