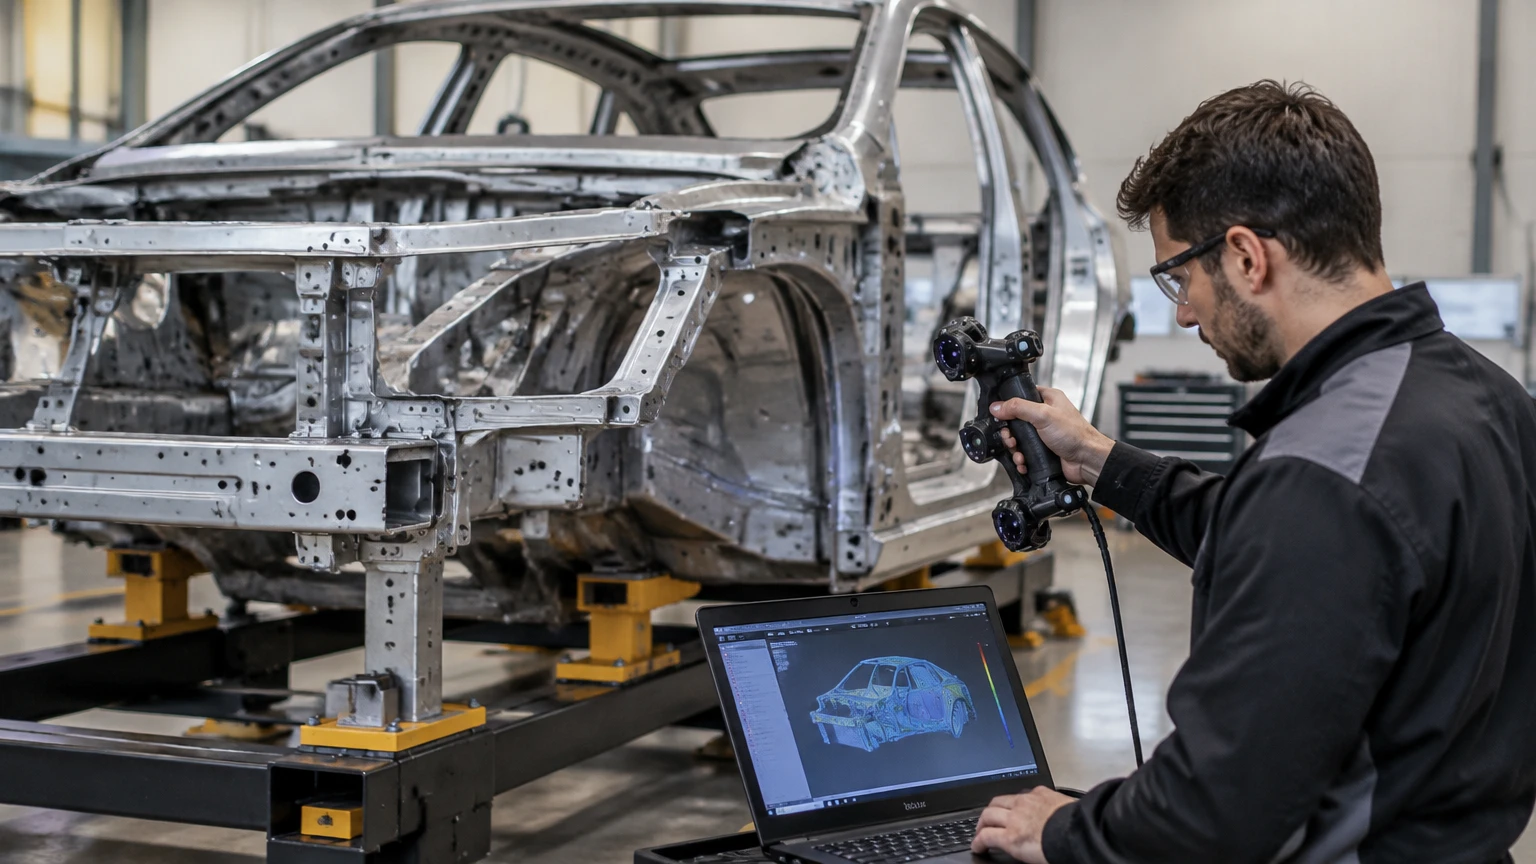
Auto frame inspection measures a vehicle’s structural reference points in three dimensions and compares their current positions with OEM specifications. Technicians use visual checks, datum points, tram gauges, lasers, ultrasonic equipment, or optical scanners to identify crush, sway, twist, sag, cracks, corrosion, and unsafe repairs before determining whether the vehicle can be safely repaired or driven.
Key Facts at a Glance
- Auto frame inspection checks chassis geometry, not merely exterior panel alignment.
- Technicians compare OEM datum points across length, width, and height.
- Typical passenger-vehicle tolerances range from approximately ±1 to ±3 mm, but the correct limit comes from the vehicle manufacturer’s repair data.
- A four-wheel alignment report cannot prove that the entire unibody or frame is structurally straight.
- A computerized measurement commonly takes 1.5-3 hours and costs about $250-$500 when purchased separately.
- A post-repair scan confirms whether structural points returned to specification after straightening or component replacement.
How Does Auto Frame Inspection Work?
Auto frame inspection works by establishing a vehicle-specific geometric reference system, measuring structural points against that system, and comparing the results with OEM dimensions. The technician first identifies damage visually, then records the position of suspension mounts, frame rails, strut towers, floor points, or other manufacturer-designated datums in three-dimensional space.
The inspection does not ask only whether the car points straight down the road. It asks whether structural points retain the correct relationships to one another. A vehicle may track normally while its floor, rail, or suspension pickup point remains displaced because tires, steering adjustments, or replacement panels compensate for the damage.
The coordinate system
A measuring system normally evaluates three dimensions:
| Dimension | Common structural meaning | Typical symptom when displaced |
|---|---|---|
| Length | Crush, extension, or shortened rail | Reduced front crush space or incorrect bumper position |
| Width | Side sway or lateral movement | Unequal rail spacing or shifted suspension pickup |
| Height | Sag, mash, or vertical displacement | Uneven ride height or altered suspension geometry |
| Diagonal | Twist, diamond, or skew | Cross-measurements that do not match left to right |
The datum plane provides a horizontal reference beneath the vehicle. The centerline divides the vehicle into left and right sides. Technicians then compare measured points, including cross-diagonals, against the factory dimension sheet or an OEM database.
The exact reference points matter. A target attached to the wrong hole, a bent bolt, or a dirty mounting surface can create a false deviation that looks like structural damage.
What does an inspection actually measure?
An inspection measures the position and relationship of load-bearing and geometry-critical points. Depending on the vehicle, these points may include front frame rails, rear rails, strut towers, subframe mounts, suspension bolts, rocker reinforcements, floor datums, and body pillars.
The report may show each point as within specification, out of specification, or unavailable because corrosion or damage prevents reliable measurement. A useful report identifies the OEM target, measured value, allowable range, actual deviation, and measurement date.
| Structural area | Measurement concern | Why the result matters |
|---|---|---|
| Front strut towers | Left-right position and height | Affects camber, caster, steering, and crash load paths |
| Front rails | Length, width, and crush profile | Influences bumper and crumple-zone performance |
| A-pillars and rocker area | Cabin geometry and floor displacement | Helps assess occupant-cell deformation |
| Rear suspension mounts | Symmetry and height | Affects thrust angle, tire wear, and stability |
| EV battery enclosure mounts | Position and enclosure damage | Can affect battery security and high-voltage safety |
A measurement result is meaningful only when the vehicle is supported correctly and measured at the manufacturer’s specified ride height or setup condition. Suspension loading, a lifted wheel, missing components, or an incorrect trim-level database can change the result.
What Are the Main Frame Inspection Methods?
The main methods are manual tram measurement, laser measurement, ultrasonic measurement, and optical or photogrammetric scanning. No method automatically produces a reliable diagnosis: technician setup, OEM data, calibration, target placement, and vehicle support affect every result.
Manual tram gauges
A tram gauge uses adjustable bars or pointers to compare distances between structural points. The technician records length and diagonal measurements and checks them against an OEM dimension sheet.
Manual measurement remains useful for older vehicles, classic cars, quick screening, and shops without a current digital database. It is portable and inexpensive, but it depends heavily on access, reading technique, and the operator’s ability to control three-dimensional error.
Laser measurement
Laser systems project or read beams from targets attached to designated points. The equipment can display changes during a frame pull, making it useful for collision repair and repeated verification.
Laser equipment often provides typical repeatability near ±0.5 mm under controlled shop conditions, but that figure is not a universal vehicle accuracy guarantee. Line-of-sight obstructions, reflective contamination, calibration status, and target placement can reduce reliability.
Ultrasonic measurement
Ultrasonic systems calculate point locations from sound transmission between transmitters and receivers. They can work where direct laser visibility is limited, but temperature, target placement, equipment setup, and calibration still influence the result.
The often-quoted ±0.1 mm figure describes potential instrument precision in controlled conditions, not necessarily the final accuracy of a complete vehicle inspection. Treating ultrasonic equipment as automatically infallible is a measurement mistake.
Optical and photogrammetric scanning
Camera-based systems create a three-dimensional representation from images or optical targets. They can scan quickly and reduce physical contact with some areas, which helps during initial estimating or damage triage.
Optical systems can struggle with rust, mud, glossy surfaces, hidden datums, poor lighting, and obstructed structural areas. A fast scan is not a substitute for exposing and measuring a concealed reference point when the decision involves structural repair.
Which inspection method is best?
The best method is the one that uses current OEM dimensions, correct fixturing, calibrated equipment, and a technician trained for the vehicle type. A high-end scanner with incorrect datum selection is less trustworthy than a carefully performed manual measurement using the correct factory chart.
| Method | Typical precision claim | Typical use | Main limitation |
|---|---|---|---|
| Manual tram gauge | ±2 to ±3 mm | Older vehicles and screening | Operator and reading error |
| Laser system | About ±0.5 mm under controlled conditions | Collision repair and live pulling | Line-of-sight obstruction |
| Ultrasonic system | Potentially near ±0.1 mm instrument precision | Specialist repair facilities | Setup and calibration sensitivity |
| Optical scan | About ±1 mm in suitable conditions | Rapid mapping and estimating | Obscured or reflective surfaces |
What Happens During a Professional Inspection?
A professional inspection normally follows six stages: preparation, visual assessment, referencing, data acquisition, analysis, and reporting. A basic visual inspection may take 30-45 minutes, while a computerized measurement usually takes 1.5-3 hours because target placement and access require more time than the scan itself.
1. Prepare and clean the vehicle
The technician removes heavy dirt, mud, loose undercoating, shields, or covers that block structural datums. The vehicle is placed on a suitable rack or measuring platform, with tire pressure, ride height, loading condition, and suspension state checked against the procedure.
Cleaning should not erase evidence. Fresh undercoating, disturbed seam sealer, grinding marks, and non-factory welds may document earlier repairs, so photographs should precede aggressive cleaning.
2. Perform visual and tactile checks
The inspector uses lighting, mirrors, and touch to examine rails, welds, seams, pillars, floor sections, and suspension mounting areas. Warning signs include kinked metal, cracked paint, broken welds, buckling, chipped coating, asymmetrical panel gaps, fresh weld beads, and localized undercoating.
A tactile inspection can identify a ridge beneath coating that a photograph misses. Visual evidence does not establish a dimensional failure, but it determines where measurements deserve priority.
3. Establish reference points
Targets, pointers, clamps, or transmitters are installed on manufacturer-specified datums. The technician verifies the point identity rather than assuming that a nearby hole or bolt is equivalent.
This stage creates many false positives. A corroded hole, replacement fastener, bent suspension component, or incorrectly selected vehicle trim can move a target several millimeters.
4. Capture three-dimensional data
The system records point locations and cross-measurements. Manual systems use gauges and dimension sheets, while computerized systems calculate coordinates continuously or in successive scans.
Technicians often measure before repair, during structural pulling, and after repair. The intermediate measurement helps prevent pulling one section into tolerance while moving another section out of tolerance.
5. Compare measurements with OEM data
Software or a technician compares actual values with factory tolerances. The analysis should identify the direction and magnitude of deviation, not merely label a vehicle “good” or “bad.”
A 5 mm deviation at a noncritical, easily replaceable bracket does not carry the same consequence as a 5 mm displacement at a strut tower or cabin datum. Location, material, load path, and repair method determine significance.
6. Issue and explain the report
A useful report lists the vehicle identification, database version, measurement conditions, reference points, deviations, images, and final status. Color-coded graphics can improve readability, but the written interpretation remains important because color alone does not explain repairability.
What Do Frame Inspection Tolerances Mean?
Frame inspection tolerances are vehicle-specific limits for acceptable dimensional deviation, commonly around ±1 to ±3 mm for many modern passenger-vehicle reference points. The range is a practical guide, not a universal legal threshold, because OEM repair manuals assign different tolerances to different points and structures.
High-strength steel complicates interpretation. Advanced high-strength steel and ultra-high-strength steel may have tensile strengths reaching approximately 1,500 MPa, but strength does not mean a deformed part can safely be pulled back into shape.
Some steels lose their designed properties after overheating, stretching, or uncontrolled straightening. OEM procedures may require replacement of a rail, pillar reinforcement, bumper reinforcement, or battery enclosure component rather than repair. The measurement report identifies geometry; it does not independently certify metallurgy.
Common deformation patterns
- Crush: A rail becomes shorter after longitudinal impact.
- Sway: A section moves sideways from the centerline.
- Sag or mash: A point moves vertically downward.
- Diamond: One side of the structure shifts forward or rearward relative to the other.
- Twist: Opposing corners occupy different heights or diagonal relationships.
- Collapse: A localized section buckles rather than moving uniformly.
How Much Does Auto Frame Inspection Cost?
Auto frame inspection commonly costs $75-$150 for a visual pre-purchase check, $250-$500 for computerized laser or three-dimensional measurement, and $600-$1,200 or more for commercial truck mapping. Collision insurers or repair estimates may include computerized measurement in a larger repair bill rather than charging it separately.
| Inspection type | Typical price | Typical duration | Best fit |
|---|---|---|---|
| Lift-based visual inspection | $75-$150 | 30-45 minutes | Used-car screening |
| Manual tram measurement | $100-$300 | 1-2 hours | Older or classic vehicles |
| Laser or computerized measurement | $250-$500 | 1.5-3 hours | Collision diagnosis |
| Heavy-truck frame mapping | $600-$1,200+ | 4-8 hours | Commercial vehicles and severe damage |
Price increases when panels, shields, suspension parts, or undercoating must be removed. A cheap visual inspection cannot provide the same evidence as a calibrated dimensional report.
Can Wheel Alignment Prove a Straight Frame?
Wheel alignment cannot prove that a frame or unibody is structurally straight. Alignment equipment measures wheel and steering relationships, while frame inspection measures structural datums that may be displaced even when adjustable suspension components restore acceptable alignment readings.
A vehicle can receive a green alignment printout after technicians adjust toe, camber, or steering position. That adjustment may conceal a shifted subframe, bent floor, or altered thrust angle. Alignment is valuable supporting evidence, not a structural certificate.
| Evidence source | What it can show | What it cannot prove |
|---|---|---|
| Four-wheel alignment | Wheel angles and thrust direction | Whole-body dimensional accuracy |
| Tire wear | Repeated geometry or suspension symptoms | Location of structural displacement |
| Panel gaps | Possible deformation or prior repair | Hidden datum accuracy |
| Frame measurement | OEM-point geometry | Complete material integrity without further inspection |
When Should You Pay for a Frame Scan?
A buyer should pay for computerized measurement when a vehicle has collision records, uneven gaps, suspicious undercoating, abnormal tire wear, steering corrections, visible rail damage, or a history that cannot be documented. A fleet should require measurement after medium or severe collisions because load, mileage, and liability magnify small structural errors.
A visual inspection may be adequate for a clean vehicle with no impact indicators and a transparent repair history. It is not adequate when the purchase decision depends on whether a prior collision affected the cabin, suspension mounts, or crumple zones.
Used-car buyers
Request an inspection on a lift and compare both sides for welds, seams, coating, clamp marks, and displaced fasteners. A targeted computerized scan is usually better value than discovering structural damage after purchase, especially on late-model vehicles with expensive sensors and complex aluminum or high-strength-steel structures.
DIY restorers
Use factory dimension sheets and cross-measurements for early screening, but obtain professional verification before paint, final welding, or suspension installation. A home-built plumb-bob setup can identify a major diagonal error, but it cannot validate every OEM repair restriction.
Fleet managers
Record pre-repair and post-repair measurements, alignment results, photographs, and repair invoices. Heavy loads, long mileage, and repeated road impacts make tire wear and handling symptoms appear sooner when chassis geometry remains incorrect.
How Are Rust and Hidden Damage Evaluated?
Rust is evaluated through visual inspection, probing, coating removal, thickness assessment where appropriate, and dimensional measurement. A digital frame scan can identify displaced geometry, but it cannot by itself determine whether corrosion has reduced section thickness or weakened a weld.
Structural rust commonly affects frame rails, rocker reinforcements, floor seams, suspension mounts, and body attachment points. Flaking scale, swelling beneath seam sealer, perforation, and soft metal require more invasive assessment than surface discoloration.
Hidden collision damage includes repaired rails beneath new undercoating, replaced panels with incorrect datum locations, bent reinforcements, and floor distortion under carpeting. Inspectors should compare weld appearance, coating texture, fastener finish, and symmetry rather than relying on a single clue.
What Happens After a Failed Measurement?
A failed measurement triggers a second verification of vehicle identity, ride height, datum selection, target placement, calibration, and obstruction. If the deviation remains, the repair facility determines whether the structure can be aligned under the OEM procedure or whether the damaged component must be replaced.
A car that drives straight is not automatically cleared. The technician should identify the affected point, deviation direction, material, repair instruction, and safety consequence before recommending continued use.
Common discrepancies and corrections
| Problem | Likely cause | Corrective action |
|---|---|---|
| Report shows 5 mm deviation, vehicle drives normally | Wrong target or datum | Reinstall target and repeat measurement |
| Laser cannot read a point | Exhaust, cable, or lift obstruction | Restore line of sight and clean target |
| Two shops produce different results | Different ride height or databases | Match setup and OEM data version |
| One side measures high | Uneven support or loaded suspension | Level rack and follow setup procedure |
| Point is unavailable | Rust, coating, or crushed mount | Expose, document, and use OEM-approved alternative |
The strongest practical rule is simple: never authorize structural repair from a single unexplained number. Repeat questionable measurements before cutting, pulling, welding, or approving a vehicle for return to service.
Why Is Post-Repair Verification Necessary?
Post-repair verification confirms that structural points meet OEM dimensions after pulling, welding, replacement, or component installation. The second scan can reveal over-pulling, residual twist, movement transferred to another section, or a replacement component installed in the wrong position.
A complete repair file should pair the before and after reports. The final report should also be considered alongside weld quality, corrosion protection, airbag and restraint-system diagnostics, wheel alignment, steering calibration, and ADAS calibration where the repair affected sensors or mounting geometry.
Measurement is therefore one part of a repair decision. It is highly valuable, but it does not replace inspection of material condition, joining technique, safety systems, or manufacturer repair restrictions.
FAQ
Is a frame inspection the same as a vehicle inspection?
No. A general vehicle inspection covers brakes, tires, fluids, lighting, suspension, and visible mechanical condition. Frame inspection concentrates on structural geometry, deformation, corrosion, reference points, and repair evidence, so a buyer may need both services.
Can a bent frame be repaired safely?
A bent frame can sometimes be repaired safely when the OEM procedure permits controlled straightening and the final dimensions, material condition, welds, and related safety systems meet requirements. Some ultra-high-strength components, pillars, rails, and reinforcements require replacement instead of straightening.
How accurate is a computerized frame measurement?
Typical computerized systems can report sub-millimeter or approximately millimeter-level repeatability under controlled conditions, but final vehicle accuracy depends on calibration, datum access, target placement, support, ride height, and database selection. The equipment specification is not the same as whole-vehicle diagnostic certainty.
Does a frame inspection find every collision repair?
No. Frame inspection can identify dimensional displacement and some repair evidence, but a skilled repair can leave geometry within specification while changing components or joining methods. Paint thickness, weld inspection, coating comparison, repair invoices, and OEM procedure review may be necessary.
Should I drive a vehicle before the inspection?
Avoid driving a vehicle with suspected severe structural damage, steering instability, fluid leaks, damaged wheels, or compromised suspension. A technician should determine whether the vehicle can move safely onto a rack; towing is safer when impact severity is uncertain.
What should a frame inspection report include?
The report should include vehicle identification, OEM data source, setup conditions, measured datums, allowable tolerances, actual deviations, images, equipment information, and before-and-after status when repairs occurred. A report that only says “frame straight” provides too little evidence for a major purchase or safety decision.
The Bottom Line
Auto frame inspection works by comparing three-dimensional OEM reference-point geometry with the vehicle’s measured structure. The process combines visual evidence, calibrated measurement, correct ride-height setup, and professional interpretation. A visual check may cost $75-$150, while computerized measurement commonly costs $250-$500 and takes 1.5-3 hours.
A wheel alignment, normal road behavior, or even clean body panels cannot independently prove structural integrity. For a collision-damaged vehicle, a used car with repair warnings, or a fleet vehicle returning to service, the strongest decision combines a pre-repair measurement, OEM repair instructions, documented structural work, and a post-repair scan. That is how How Does Auto Frame Inspection Work? becomes a practical safety decision rather than a question answered by appearance alone.


