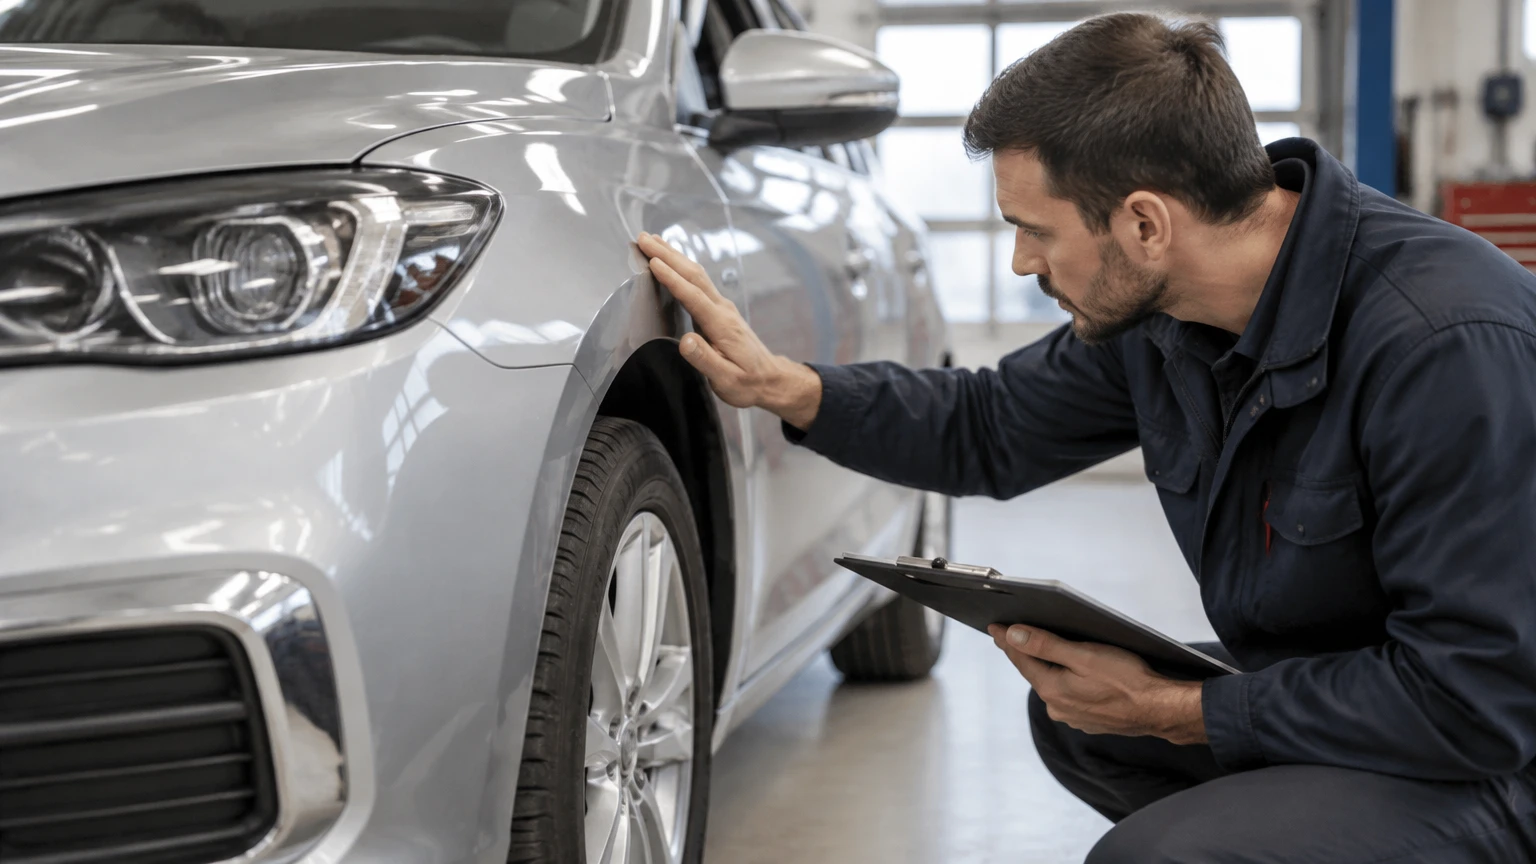
To check a car after collision repair, inspect the paperwork, paint, panel alignment, structure, electronics, safety systems, and road behavior before accepting delivery. Allow 30-45 minutes in daylight, compare the repair with the insurance estimate, request diagnostic and alignment records, and do not sign a final release until defects are documented.
Key Facts at a Glance
- A completed collision repair requires more than a visually attractive exterior; structural alignment, restraint systems, wheel alignment, and ADAS operation also require verification.
- A typical owner inspection takes 30-45 minutes, while an independent post-repair inspection commonly takes 2-4 hours.
- A typical independent inspection costs about $200-$600, depending on scanning, frame measurement, and travel.
- A warning light that appears after delivery may indicate an unresolved fault, an incomplete repair, or a code that was cleared without correcting its cause.
- Factory panel gaps vary by model; a uniform gap matters more than applying one universal 3.5-4.5 mm rule to every vehicle.
- ADAS calibration evidence should identify the system, procedure, result, and any required road test or target setup.
What Must a Post-Repair Inspection Verify?
A post-repair inspection verifies four connected areas: appearance, alignment, mechanical and electrical function, and crash-safety systems. A bumper can match the surrounding paint while its radar bracket is bent, and a straight-looking fender can conceal incorrect mounting, damaged wiring, or incomplete corrosion protection.
Collision repair follows vehicle-specific procedures. I-CAR repair guidance emphasizes that technicians must identify OEM procedures, required scans, and calibration requirements rather than relying on visual judgment alone. The exact standard depends on the vehicle identification number, model year, impact location, and equipment.
The inspection should establish five facts:
- The documented repair matches the authorized estimate.
- Replacement parts are identified and correctly installed.
- The body and chassis meet manufacturer alignment requirements.
- Mechanical, electrical, restraint, and diagnostic systems operate correctly.
- The vehicle is safe to return to ordinary use.
What to Bring Before Visiting the Shop
Bring the original insurance estimate, photographs of the collision, the vehicle owner’s manual, and a phone for recording defects. A flashlight helps with underbody inspection, while a clean microfiber cloth can reveal overspray or rough clear coat, but do not touch fresh paint aggressively.
| Item | Typical quantity | Purpose | Limitation |
|---|---|---|---|
| Insurance estimate | 1 copy | Compare authorized and completed work | May omit supplements |
| Phone camera | 1 device | Record defects and mileage | Cannot measure structure |
| Flashlight | 1 | View clips, leaks, and wiring | Poor substitute for a lift |
| Paint-depth gauge | 1, optional | Compare coating thickness | Cannot prove structural quality |
| Tire-pressure gauge | 1 | Check repaired wheel and tire | Does not replace alignment data |
Step 1: Audit the Repair Documents
Request the final itemized invoice, the completed repair plan, parts information, diagnostic scan results, wheel-alignment printout, and ADAS calibration report before signing acceptance paperwork. The documents should identify what was replaced, repaired, refinished, calibrated, or left untouched.
Compare the invoice with the insurance estimate and approved supplements. Look for differences in bumper reinforcements, lamps, sensors, suspension parts, airbags, seat-belt pretensioners, wheels, tires, and structural components. “Repaired” and “replaced” are not interchangeable descriptions.
Parts terminology matters, but a label alone does not establish safety. OEM means original equipment manufacturer; aftermarket means a non-OEM replacement; recycled or salvage parts may be identified separately. Ask whether the insurer or owner authorized the selected part and whether the part carries the required fit, function, and safety specifications.
A scan report should show the pre-repair and post-repair condition where applicable. A page stating “codes cleared” is weaker evidence than a report listing the scan tool, vehicle identification number, active faults, stored faults, and system status.
Documents That Deserve Extra Attention
| Repair area | Document to request | Acceptance detail |
|---|---|---|
| Chassis or unibody | Frame measurement report | Values within the manufacturer’s specified range |
| Steering or suspension | Four-wheel alignment printout | Toe, camber, caster, and thrust angle within specification |
| Airbags or restraints | SRS scan and parts record | No active restraint faults; correct components installed |
| Camera or radar | ADAS calibration report | System name, calibration method, result, and road-test status |
| EV high-voltage area | Isolation and repair documentation | No isolation fault; authorized procedure recorded |
Step 2: Inspect Paint and Exterior Finish in Daylight
Inspect the repaired vehicle in dry, direct or evenly shaded daylight, preferably before washing or leaving the premises. View each repaired panel from three distances: about three meters for color and shape, one meter for blending and texture, and close range for dust, sanding marks, runs, and overspray.
Check the repaired panel against adjacent original panels rather than against a generic color sample. Metallic and pearl finishes can appear different when viewed from a changed angle, and a blend may extend into an adjacent panel even when the invoice lists only one replacement panel.
Run a clean fingertip lightly along the panel edge and weather seal. Roughness, masking lines, hardened overspray, or paint on rubber indicate poor finishing. Inspect wheel openings, lamp edges, door jambs, glass, emblems, parking-sensor rings, and trim clips.
A paint-depth gauge can find unusually thick areas, but thickness is not a pass-fail safety test. Typical factory coating readings may fall around 100-150 microns, while refinished panels can measure 200-400 microns or more; model, location, filler, and gauge calibration create substantial variation.
Exterior Defects and Their Likely Meaning
| Finding | Typical location | Possible cause | Requested correction |
|---|---|---|---|
| Color shift | Door, quarter panel, hood | Poor blend or incorrect formula | Refinish or blend under shop lighting |
| Orange peel | Clear coat surface | Incorrect spray setup or curing | Sand and refinish if outside shop standard |
| Paint run | Vertical edge or lamp opening | Excess material | Repair finish without damaging substrate |
| Overspray | Glass, seal, wheel well | Inadequate masking | Remove safely and replace damaged seals |
| Sanding scratches | Bumper or repaired edge | Incomplete preparation | Rework before delivery |
Step 3: Check Panel Gaps, Latches, and Seals
Open and close every repaired door, hood, liftgate, trunk, and fuel or charging flap several times. The panels should move without abnormal force, sit flush when closed, and latch with a normal sound; resistance, a raised corner, or a latch that needs slamming indicates an adjustment or alignment problem.
Compare panel gaps from one end to the other and compare the repaired side with the undamaged side. Factory tolerances differ by model, so the manufacturer’s body-repair specification outranks a universal measurement. A visibly widening gap, offset lamp, uneven bumper edge, or door that sits proud of the quarter panel deserves documentation.
Check rubber weather seals for folds, pinches, cuts, and sections pulled away from their channels. Poor seal installation can create wind noise and water entry even when exterior gaps look acceptable. Ask the shop to perform a water-leak test if the roof, windshield, doors, trunk, or liftgate were involved.
Inspect fasteners and trim. Missing clips can allow a bumper or splash shield to move later, while nonmatching fasteners can signal incomplete reassembly.
Step 4: Inspect the Structure, Underside, and Powertrain Area
A vehicle owner cannot reliably certify structural integrity from a driveway inspection; frame measurement equipment and repair documentation are required for that conclusion. The owner can, however, identify missing components, exposed metal, fluid leaks, damaged undertrays, and suspicious weld or seam areas that require professional review.
With the vehicle safely parked, inspect the repaired area under the hood and around the trunk or liftgate. Look for loose wiring, disconnected grounds, missing clips, unpainted bare metal, uneven seam sealer, and crushed or incorrectly routed harnesses. Do not place any part of your body beneath a vehicle supported only by a jack.
Check the ground after the vehicle has been parked for several minutes. Clear water from air conditioning is normal, but coolant, engine oil, transmission fluid, brake fluid, fuel, and oily refrigerant residue require immediate attention. EV coolant and high-voltage damage require qualified technicians, not owner probing.
Corrosion protection is part of a proper repair. Cut or welded metal should receive the specified primer, seam sealer, cavity wax, and underbody coating where the OEM procedure requires them.
Step 5: Verify Electronics, Airbags, and ADAS
Turn the ignition on without starting the engine and observe the warning-light self-test. Airbag, ABS, brake, traction-control, steering, battery, and check-engine indicators should illuminate as designed and then turn off after startup; a light that never illuminates may also indicate a disabled bulb or altered cluster.
Test every function related to the damaged area. Operate windows, locks, mirrors, lamps, wipers, horn, heated features, cameras, parking sensors, blind-spot alerts, lane-warning functions, and the infotainment controls. Confirm that the charging port, charge door, and thermal warnings operate on an EV.
ADAS calibration cannot be inferred from a straight bumper. Radar sensors, cameras, ultrasonic sensors, and their brackets can be disturbed by a small impact, bumper replacement, wheel-alignment change, windshield replacement, or suspension repair. Ask for the manufacturer-specific calibration report, not merely a statement that the vehicle was scanned.
Do not deliberately trigger automatic emergency braking or lane-keeping systems during a public-road test. Verify operation through the vehicle display and calibration documentation, and ask an authorized repair facility about any unavailable or restricted test mode.
Signs That Calibration Evidence Is Incomplete
| Statement from shop | Why it is insufficient | Better evidence |
|---|---|---|
| “The warning light is off” | Some systems have no warning light | System scan and calibration report |
| “The bumper is aftermarket” | Sensor compatibility is unknown | Part number and manufacturer approval |
| “The camera was reset” | Reset is not always calibration | Target or dynamic calibration result |
| “The car drives straight” | Alignment does not prove camera aim | Alignment and ADAS records |
| “The computer has no codes” | Stored faults may have been cleared | Pre-repair and post-repair scan history |
Step 6: Conduct a Controlled Road Test
Take a 15-20 minute road test on a quiet local route and, when safe and legal, a higher-speed road. The vehicle should accelerate, brake, steer, and shift normally, with no new vibration, pulling, warning lights, rattles, wind noise, or water movement.
Keep the steering wheel centered while driving on a reasonably level road. A brief drift caused by road crown is normal, but persistent pulling, steering-wheel offset, uneven tire wear, or a vehicle that does not return smoothly from a turn requires an alignment check.
Listen with the radio and climate fan off. Wind noise points toward glass, door, mirror, or weather-seal fit; a low-speed knock may indicate suspension or underbody hardware; a vibration that rises with speed may involve a wheel, tire, hub, or axle.
Request the actual four-wheel alignment printout. An alignment can show green values while the steering wheel remains off-center if the steering wheel was not locked or the thrust angle was not corrected.
Road-Test Result Guide
| Symptom | First request | Do not accept until |
|---|---|---|
| Pulls left or right | Four-wheel alignment inspection | Values and steering center meet specification |
| Steering wheel crooked | Steering-angle and alignment check | Wheel is centered on level road |
| Wind noise | Seal, glass, and door adjustment | Leak or noise source is corrected |
| Rattle over bumps | Undertray, bumper, and suspension check | Fasteners and components are secure |
| Warning light appears | Full diagnostic scan | Root fault is repaired and documented |
Should You Use a DIY, Independent, or OEM Inspection?
DIY inspection is sufficient for a small cosmetic repair when the owner has daylight, documentation, and no safety-system involvement. An independent post-repair inspection is the stronger choice after structural damage, airbag deployment, suspension impact, repeated defects, or an insurance dispute.
An OEM-certified inspection is especially valuable for vehicles with complex ADAS, air suspension, high-voltage systems, aluminum structures, or brand-specific repair procedures. No inspection type guarantees that a repair is perfect, but independent measurement provides evidence that an owner’s visual inspection cannot.
| Inspection option | Typical cost | Typical duration | Best application |
|---|---|---|---|
| Owner checklist | $0-$30 | 30-45 minutes | Bumper, trim, minor dent, repaint |
| Independent technician | $200-$600 | 2-4 hours | Frame, suspension, airbag, repeated defects |
| Dealership inspection | $150-$500 | 1-3 hours | Brand-specific electronics and ADAS |
| Frame measurement | $250-$800 | 2-5 hours | Rail, apron, pillar, or unibody damage |
| Diagnostic and ADAS review | $150-$400 | 1-3 hours | Camera, radar, sensor, or warning faults |
Which Inspection Is Appropriate for Your Situation?
- Minor scrape or bumper cover: Perform the owner checklist, confirm parking sensors, and inspect paint and gaps.
- Wheel, tire, steering, or suspension impact: Obtain the alignment printout and consider an independent inspection.
- Airbag deployment or structural repair: Hire an independent collision inspector before signing a final release.
- Tesla, Rivian, luxury vehicle, or advanced ADAS model: Request brand-capable scanning and calibration documentation.
- Vehicle with a new warning light: Stop treating the issue as cosmetic and obtain a complete diagnostic report.
What Should You Do If the Vehicle Fails Inspection?
Photograph each defect, record the date and mileage, and write the issue on the delivery paperwork before leaving. Ask the shop manager for a written correction plan that identifies the part, operation, responsible party, and expected completion date.
Do not authorize an unrelated repair without separating it from the collision-repair complaint. Keep the estimate, supplements, invoices, scan reports, alignment sheets, calibration reports, photographs, rental records, and communications together.
If the shop disputes a safety concern, obtain a written opinion from an independent collision repair professional or manufacturer-authorized facility. Insurance escalation, a state repair regulator, consumer-protection agency, or legal advice may be appropriate depending on jurisdiction and contract terms.
Common Acceptance Mistakes
- Inspecting at night: Artificial light hides color mismatch, sanding marks, and clear-coat defects. Return in daylight.
- Accepting during rain: Droplets conceal texture and scratches. Wait for dry panels.
- Signing before driving: A signature can complicate later proof of when a defect appeared. Record concerns first.
- Checking only the damaged side: A collision can affect opposite-side sensors, wheel alignment, and wiring.
- Relying on a clean dashboard: A cleared code does not prove the underlying fault was repaired.
- Ignoring the interior: Metal dust, grease, glass fragments, and deployed-seat-belt damage require cleanup or correction.
How Much Time and Money Should You Budget?
A straightforward owner inspection normally takes 30-45 minutes and costs nothing beyond travel, while a professional review typically costs $200-$600. Structural measurement, mobile inspection, dealership labor rates, EV expertise, and a formal written report can raise the total above that range.
The least expensive inspection is not always the least expensive decision. A missed wheel or ADAS problem can create tire wear, unsafe braking intervention, repeated visits, or a later dispute about whether the shop caused the defect.
| Situation | Owner time | Professional budget | Recommended evidence |
|---|---|---|---|
| Cosmetic bumper repair | 30-45 minutes | $0-$250 | Photos and invoice |
| Door or quarter-panel repair | 45-60 minutes | $200-$500 | Gap, seal, and leak checks |
| Suspension or wheel impact | 45-60 minutes | $250-$600 | Alignment and tire inspection |
| Airbag deployment | 60 minutes | $300-$800 | SRS scan and independent report |
| Structural or EV repair | 60 minutes | $400-$1,000+ | Frame, scan, and OEM procedure records |
These are typical planning ranges, not statutory prices. Local labor rates, vehicle complexity, inspection scope, and whether the inspector travels to the shop determine the actual charge.
FAQ
Can I inspect a repaired car in a parking lot?
Yes, but a parking-lot inspection cannot confirm hidden structural alignment, restraint-module integrity, or complete ADAS calibration. Use the lot for paint, gaps, lights, controls, leaks, and a short road test, then obtain professional measurement when the collision involved structure, airbags, steering, suspension, or sensors.
How long should I wait before washing a repaired vehicle?
Ask the repair facility for its paint-care instructions because curing varies by paint system and shop process. Avoid automated brushes until the shop approves them, and use gentle washing only when permitted. Washing too early can damage uncured refinishing or expose defects the shop should correct first.
Is a paint-depth reading enough to prove a panel was repaired correctly?
No. A paint-depth gauge measures coating thickness at selected points, not weld quality, corrosion protection, panel shape, sensor alignment, or crash performance. Use readings to identify inconsistent refinishing, then rely on repair documentation and qualified structural inspection for safety conclusions.
What if the shop will not provide a scan or calibration report?
Ask for the request and refusal in writing, then contact the insurer, manufacturer-authorized facility, or applicable consumer-protection authority. A missing report does not automatically prove a failed repair, but it removes evidence that modern electronic and ADAS procedures were completed.
Can a repaired vehicle lose resale value even after a proper repair?
Yes. A collision history can reduce market value even when the vehicle is safe and correctly repaired. Keep the repair file, photographs, and inspection report because those records help explain the work to a future buyer and may support a diminished-value claim where local rules permit.
The Bottom Line
To check a car after collision repair, verify the paperwork first, then inspect paint, gaps, seals, structure, electronics, ADAS evidence, and road behavior in that order. A clean appearance is only one result. Do not accept the vehicle until documented defects are recorded, safety-related records are available, and the vehicle drives normally.


