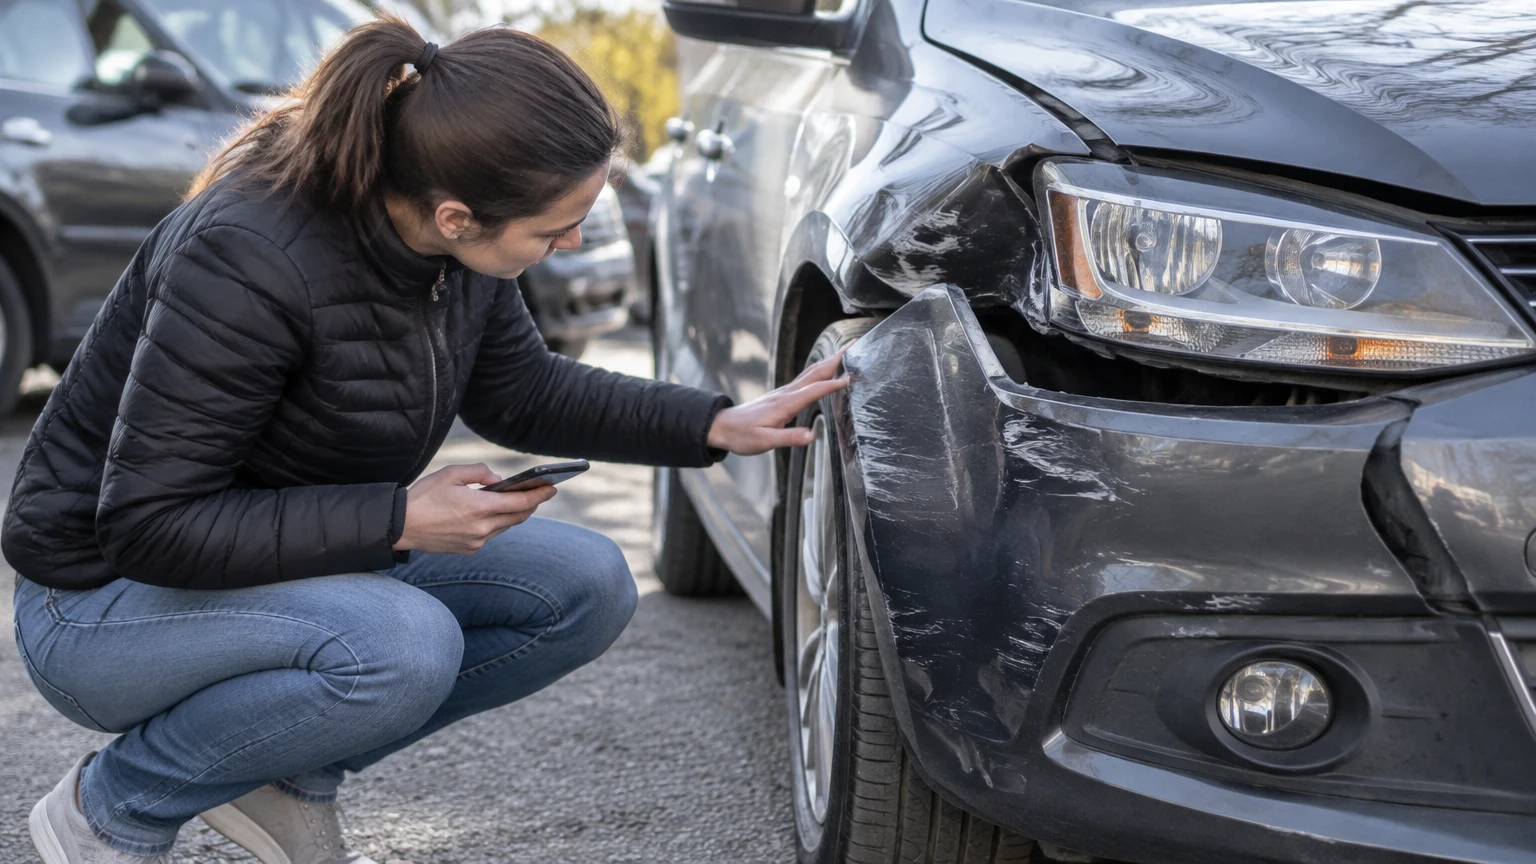
To assess car damage after an accident, first protect people, document the scene, check whether the vehicle is safe to move, and notify the relevant insurer within the policy deadline. Then combine a visual inspection with underbody checks, restraint-system diagnostics, electronic scanning, alignment measurements, and a written repair estimate before deciding whether to drive, claim, repair, or settle privately.
Key Facts at a Glance
A straight-looking bumper does not prove that the reinforcement bar, absorber, sensors, or crash structure is undamaged.
A vehicle with leaking fluid, deployed airbags, a damaged wheel, steering problems, smoke, or warning lights should normally be towed rather than driven.
An OBD-II scan identifies many electronic faults, but it cannot confirm that a frame rail, suspension mount, or crumple zone is straight.
Panel gaps, door operation, tire position, fluid leaks, and warning lights provide useful clues, not a complete structural diagnosis.
ADAS cameras, radar, and ultrasonic sensors may require calibration after an impact even when the exterior damage appears minor.
Repair cost, vehicle value, salvage value, policy excess, and local insurance rules determine whether a vehicle is economically repairable.
What Does Car Damage Assessment Include?
Car damage assessment is the documented evaluation of a vehicle’s safety, structure, mechanical systems, electronics, appearance, repair cost, and post-repair risks after a collision. The process gives the owner, insurer, repairer, and sometimes a court a common record of what happened and what work is justified.
A proper assessment has two separate questions. The first is whether the vehicle can be occupied or driven safely now. The second is whether repairing it makes financial sense. Those questions can produce different answers: a car may be safe but uneconomic to repair, or apparently cheap to fix while concealing serious structural damage.
The assessment normally combines scene evidence, photographs, a physical inspection, a diagnostic scan, a repair estimate, and measurements against manufacturer specifications. A qualified repairer may need to remove bumper covers, lamps, interior trim, carpets, or other panels before identifying all damaged components.
Who Uses the Assessment?
Insurers use the assessment to evaluate coverage, liability, repair authorization, and possible total loss. Repair shops use it to create a parts and labor plan. Vehicle owners use it to decide whether to drive, claim, sell, repair, or obtain a second opinion.
A police report, insurer estimate, and independent engineer’s report are different documents. None automatically replaces the others. Policy wording and local law control reporting deadlines, permitted repairs, parts selection, and total-loss treatment.
How Should You Assess Car Damage After an Accident?
The safest sequence has six stages: secure the scene, preserve evidence, exchange information, report the incident, perform a visual and operational inspection, and obtain professional measurements and diagnostics. Do not begin with a repair quote before recording the original condition, because cleaning, disassembly, or moving the vehicle can remove useful evidence.
Step 1: Make the Vehicle and Scene Safe
Check for injuries, fire, fuel or battery-fluid leaks, unstable traffic conditions, and electrical hazards before approaching the vehicles. Turn on hazard lights if the vehicle still has electrical power, move to a safe location when permitted, and call emergency services when anyone is injured or the road remains dangerous.
Do not crawl beneath a vehicle supported only by a jack. Do not touch exposed high-voltage components on an electric or hybrid vehicle. A damaged airbag, pretensioner, or high-voltage battery can remain hazardous after the collision.
When Should the Vehicle Be Towed?
Request a tow when the car has a fluid leak, a displaced wheel, damaged steering, brake problems, tire sidewall damage, smoke, severe suspension damage, deployed restraints, a high-voltage warning, or a dashboard warning that affects propulsion or braking. Towing also makes sense when the car pulls sharply, scrapes the road, or cannot maintain normal door and hood closure.
A short drive to a repairer is not automatically safe because the engine starts and the bumper remains attached. Starting the engine tests only a narrow part of the vehicle.
Step 2: Record the Scene and Vehicle
Photograph the vehicles before moving them when doing so is safe and lawful. Capture wide images showing road layout, lane markings, signs, traffic signals, weather, skid marks, debris, and vehicle positions, followed by close images of every impact area.
Record the vehicle identification number, license plate, mileage, dashboard warning lights, tire positions, and visible leaks. Photograph the undamaged sides and interior as well as the impact area, because comparison images can establish pre-existing conditions and post-impact changes.
| Evidence item | Minimum record | Why it matters |
|---|---|---|
| Scene location | 4 wide photos from different angles | Establishes road position and traffic context |
| Vehicle exterior | 8-12 images including all sides | Shows damage distribution and prior marks |
| Impact areas | 3-5 close images per area | Records paint transfer, cracks, gaps, and deformation |
| Dashboard | Ignition-on photo and mileage | Preserves warning-light and odometer evidence |
| Other party | Plate, vehicle model, insurer and driver details | Links the evidence to the collision |
| Witnesses | Name and contact method | Supports later fact verification |
Keep original files without editing, and retain the capture time where available. Store copies in two locations. Do not post photographs publicly while liability or injury issues remain unresolved.
Step 3: Exchange Information Without Arguing Fault
Exchange names, contact details, vehicle registration information, insurer details, and witness contacts as required by local law. Photograph documents only when legally permitted and protect identification numbers from unnecessary distribution.
Describe observable facts such as “the rear door does not latch” or “fluid is dripping under the front.” Avoid guessing speed, admitting legal liability, promising payment, or signing a release before understanding its scope. A polite apology for the situation is not the same as a formal admission, but statements can still be misunderstood.
Step 4: Notify the Insurer and Follow the Policy
Notify the insurer within the period required by the policy and local rules, even when the damage looks minor or the parties discuss private settlement. In some markets, motor policies require reporting within 24 hours or the next working day; that requirement is not universal, so the policy and insurer instructions control.
Ask whether the insurer requires an approved repairer, an inspection before repairs, a police report, photographs, a claim number, or a specific assessment center. Obtain those instructions in writing. Do not authorize teardown or dispose of damaged parts before the insurer has had a reasonable opportunity to inspect them.
What Damage Categories Should You Check?
Collision damage falls into cosmetic, mechanical, electrical, restraint, ADAS, and structural categories. These categories can overlap, and the visible outer panel often provides only partial evidence of the underlying impact.
| Damage category | Typical components | Detection method | Main consequence |
|---|---|---|---|
| Cosmetic | Paint, trim, bumper skin, shallow dent | Lighting, visual inspection, paint-depth gauge | Appearance and corrosion risk |
| Mechanical | Radiator, suspension arm, steering rack, exhaust | Leak test, lift inspection, road-test substitute, measurements | Overheating, instability, loss of control |
| Electrical | Wiring, lamps, modules, battery connections | Scan tool, voltage testing, connector inspection | Intermittent faults, fire or system failure |
| Restraint | Airbags, seat belts, pretensioners, crash sensors | SRS scan and component inspection | Reduced occupant protection |
| ADAS | Radar, camera, parking sensors, brackets | Scan, aiming procedure, calibration report | Incorrect warnings or missed hazards |
| Structural | Rails, pillars, aprons, floor, suspension mounts | Dimensional measurement and teardown | Reduced crash performance and poor alignment |
What Visual Signs Suggest Hidden Damage?
Uneven panel gaps, a hood or trunk that no longer closes normally, doors that bind, a wheel sitting farther back in the arch, cracked lamps, broken mounting points, or a steering wheel that is no longer centered can indicate movement behind the exterior.
Look for fresh tire scuffing, damaged inner fenders, wrinkled metal near suspension towers, buckled floor panels, torn seam sealer, and paint cracking around structural joints. A plastic bumper can rebound while the metal reinforcement, energy absorber, or mounting panel remains deformed.
A paint-depth gauge can help identify repainting, but it cannot prove structural safety. Similarly, a visual inspection is useful for triage but cannot replace dimensional measurement when the impact was significant.
What Diagnostics Are Needed After a Collision?
A complete post-collision assessment may require an OBD-II scan, supplemental restraint-system scan, battery and charging checks, wheel-alignment measurement, underbody inspection, and ADAS calibration. The required combination depends on the impact location, vehicle technology, warning lights, and manufacturer repair procedure.
An OBD-II reader is not a structural inspection tool. It can retrieve diagnostic trouble codes from supported modules, but a code-free scan does not prove that metal, wiring, sensors, or restraint components are safe.
Request a scan of the airbag and restraint modules, not only the engine-control module. Inspect seat-belt retractors and pretensioners, because a collision can activate them without leaving obvious exterior damage. Check the cooling system after front impacts and inspect exhaust, fuel, and evaporative systems after rear or underside impacts.
ADAS equipment creates an additional requirement. A replaced windshield, moved bumper, changed ride height, suspension repair, or impact near a sensor can require static or dynamic calibration. Request the calibration result, target procedure, software status, and any failed-test explanation.
What Does a Professional Teardown Reveal?
Teardown exposes parts hidden behind bumper skins, lamps, fenders, carpets, and trunk linings. Technicians may find crushed absorbers, bent reinforcement beams, broken brackets, displaced cooling packs, damaged wiring, water intrusion, or distorted crumple-zone metal.
The repairer should photograph hidden damage and identify each replacement part in the estimate. Ask whether measurements were taken against the manufacturer’s dimensional data, whether suspension mounting points were checked, and whether discarded parts will be retained until claim approval.
When Is a Damaged Car Unsafe to Drive?
A damaged car is unsafe to drive when collision effects may compromise braking, steering, visibility, wheel retention, occupant restraint, electrical safety, or vehicle stability. A tow is the prudent choice when a safety-critical defect cannot be ruled out at the roadside.
| Warning sign | Likely concern | Recommended action |
|---|---|---|
| Airbag or SRS light | Restraint fault or deployed pretensioner | Do not treat as cosmetic; arrange inspection |
| Brake-fluid leak | Reduced hydraulic braking | Do not drive; tow immediately |
| Coolant leak or rising temperature | Engine overheating | Stop and tow |
| Wheel tilt or tire cut | Suspension or wheel-retention damage | Do not drive |
| Steering pull or non-centered wheel | Alignment or structural movement | Tow for measurement |
| High-voltage warning | EV battery or isolation fault | Keep clear and use qualified EV recovery |
| Headlamp displacement | Poor visibility or loose assembly | Repair before night driving |
| Fuel smell or smoke | Fire risk | Shut down, leave the area, call emergency services |
Do not use a short, slow trip as a safety test when a brake, steering, wheel, restraint, or high-voltage issue is present. A professional inspection is cheaper than converting uncertain damage into a secondary crash.
How Do You Decide Between Repair, Total Loss, and Private Settlement?
Repair is usually reasonable when the vehicle can be restored to manufacturer specifications at a cost comfortably below its pre-loss value and when parts, labor, and calibration are available. A total loss is an insurer’s economic decision, while a private settlement is a financial agreement between parties and does not remove reporting or safety obligations.
Insurers commonly compare the estimated repair cost with the vehicle’s actual cash value, then consider salvage value, taxes, storage, rental costs, and local rules. There is no universal 80% or 100% threshold. A policy or jurisdiction may use a different formula, and some vehicles become uneconomic before a formal percentage is reached.
| Decision route | Typical direct cost pattern | Main benefit | Main risk |
|---|---|---|---|
| Insurance claim | Excess plus possible premium impact | Formal process and covered repairs | Valuation, delay, deductible, record |
| Private settlement | Agreed payment, often below minor repair cost | May avoid a claim on small damage | Later injury, hidden damage, nonpayment |
| Authorized repairer | Insurer-directed estimate and billing | Administrative simplicity | Parts or process limits |
| Independent assessment | Typical inspection fee of $100-$400, market-dependent | Second opinion and technical detail | Upfront cost and disputed reimbursement |
| Total-loss settlement | Vehicle value less applicable deductions | Ends uneconomic repair process | Valuation dispute and replacement gap |
These amounts are typical planning ranges, not universal prices. Labor rates, vehicle brand, region, paint materials, sensor calibration, and parts availability can change the result substantially.
When Does a Private Settlement Make Sense?
A private settlement may suit a documented, low-value, cosmetic claim when no one reports injury, both parties agree voluntarily, the repair cost is below the policy excess, and local law permits the arrangement. Obtain a written agreement describing the vehicles, date, damage, payment, deadline, and whether the payment resolves property damage only.
A private agreement is dangerous when the other driver refuses identification, damage is not fully assessed, symptoms appear later, the vehicle has warning lights, or the proposed payment is based only on a bumper photograph. Notify your insurer when the policy requires it, even if the eventual outcome is no claim payment.
How Do Repair Costs and Timeframes Vary?
Typical cosmetic work takes 2-4 business days when parts and paint capacity are available. Moderate panel, lamp, cooling, or suspension repairs often take 1-2 weeks, while structural repairs, parts delays, battery inspection, and ADAS calibration can extend the process to several weeks.
| Repair scope | Typical assessment time | Typical repair duration | Main variable |
|---|---|---|---|
| Scratch or shallow dent | 30-90 minutes | 1-4 business days | Paint blending and curing |
| Bumper and lamp replacement | 1-3 hours | 3-7 business days | Parts and sensor setup |
| Cooling or suspension damage | 2-5 hours | 5-12 business days | Hidden damage after teardown |
| Structural measurement and repair | 1-2 days | 2-6 weeks | Parts, fixtures, and alignment |
| EV impact inspection | 1-3 days | 1-6 weeks | Battery isolation and specialist access |
Ask whether the estimate includes teardown, diagnostic scans, wheel alignment, calibration, corrosion protection, sublet labor, taxes, rental transportation, and post-repair testing. An estimate that excludes these items is not a final repair cost.
Authorized Shop or Independent Repairer: Which Is Better?
An insurer-authorized repairer is usually the efficient choice for direct billing, claim administration, and policy-compliant repairs. An independent specialist may be preferable for a performance vehicle, complex structure, unusual technology, suspected valuation error, or a second opinion.
| Criterion | Authorized network shop | Independent specialist |
|---|---|---|
| Billing | Often direct to insurer | Owner may pay first |
| Claim administration | Usually integrated | May require more owner coordination |
| Parts choice | Policy and insurer controlled | More opportunity to request OEM parts |
| Specialist equipment | Varies by facility | Choose based on documented capability |
| Second opinion | Less independent from insurer | Greater independence |
| Dispute support | Usually limited to repair file | May provide engineering evidence |
Ask both types of repairer who will perform structural measurement, SRS diagnosis, ADAS calibration, paint matching, and final roadworthiness checks. A familiar logo does not prove equipment competence, and an independent label does not prove technical quality.
What Common Assessment Mistakes Cause Problems?
The most damaging mistakes are moving or repairing the vehicle before documenting it, treating a visual inspection as a complete diagnosis, and accepting a settlement before hidden damage and injury possibilities are understood. Each mistake can reduce evidence quality or leave the owner responsible for later costs.
- Driving because the bumper looks normal. Check leaks, steering, braking, warning lights, wheel position, and restraints first. Tow when any safety-critical question remains.
- Using only a basic code reader. Request SRS, body, chassis, battery, and ADAS-related diagnostics where supported.
- Accepting the first estimate as final. Ask whether the quote follows teardown and includes calibration, alignment, clips, brackets, fluids, and corrosion protection.
- Admitting fault at the scene. Exchange facts without making legal conclusions; insurers and authorities assess responsibility using evidence and applicable law.
- Missing the reporting deadline. Report promptly even when the parties discuss cash payment, because a later dispute can leave the owner without documented notice.
- Discarding replaced parts immediately. Retain damaged components until the insurer or assessor approves disposal, especially when the cause or extent is disputed.
What If the Insurer’s Assessment Is Too Low?
Request the estimate, valuation basis, comparable vehicles, parts assumptions, labor rate, depreciation deductions, salvage calculation, and written explanation for excluded damage. Compare the report with photographs, manufacturer procedures, repairer measurements, and an independent estimate.
Keep a dated communication log containing claim numbers, names, calls, emails, inspection dates, and promised actions. Escalate through the insurer’s complaint process, then use the appropriate regulator, ombudsman, mediation service, or court process for the jurisdiction. A technical report is more persuasive than a general claim that the offer feels low.
What Special Cases Need Extra Care?
Electric vehicles, deployed airbags, rear impacts, flood exposure, and low-speed sensor collisions require additional checks because important hazards may not appear on the visible body panels. Manufacturer repair procedures and qualified technicians matter more than a generic inspection checklist in these cases.
- Electric and hybrid vehicles: Request high-voltage isolation testing and battery-enclosure inspection. Do not repair orange cables or open a battery pack without appropriate training.
- Airbag deployment: Inspect the complete restraint system, including modules, sensors, belts, pretensioners, seats, and wiring. Replacing only the visible bag is not a complete repair.
- Rear impacts: Check the trunk floor, rear body panel, exhaust, fuel system, parking sensors, and hidden reinforcement.
- Flooded vehicles: Do not start a water-exposed vehicle. Corrosion and module failures can develop weeks after drying.
- Windshield or front-camera damage: Ask whether camera aiming or calibration is required after glass replacement.
- Low-speed parking impacts: Check parking sensors, radar brackets, bumper absorbers, and grille shutters even when the paint damage is small.
What Should a Final Assessment Report Contain?
A useful report identifies the vehicle, incident date, mileage, visible and hidden damage, diagnostic results, measurements, repair method, parts assumptions, calibration requirements, estimated labor, and exclusions. It should distinguish confirmed damage from suspected damage that requires teardown.
Review the report for missing safety systems, unexplained “repair as necessary” language, absent photographs, generic labor descriptions, and parts with no source or specification. Request a revised estimate when a component is safety-critical or when the proposed repair conflicts with the manufacturer’s procedure.
Before collecting the vehicle, verify that warning lights are clear only when the underlying fault has been repaired, doors and hood latch normally, tires and wheels are undamaged, alignment readings are within specification, leaks are absent, and required ADAS or restraint checks are documented. Retain the final invoice, scan report, calibration certificate, alignment printout, and photographs.
FAQ
Can a Car Have Frame Damage Without Looking Bad?
Yes. A low-speed or offset collision can bend a rail, apron, floor section, or suspension mounting point while leaving the bumper skin and paint relatively intact. Uneven gaps, steering changes, wheel displacement, crushed seams, and alignment abnormalities justify dimensional measurement rather than reliance on appearance.
Does a Clean OBD Scan Mean the Car Is Safe?
No. An OBD scan can identify electronic faults in supported modules, but it cannot prove that structural metal, suspension geometry, tire integrity, or crash-energy management components are sound. Safety assessment requires physical inspection, and significant impacts may also require manufacturer-specific SRS and ADAS procedures.
Should I Replace a Bumper After a Minor Impact?
Replace or repair a bumper according to the manufacturer’s repair limits and the condition of its absorber, reinforcement, mounts, sensors, and energy-management components. A cracked cover may be cosmetic, while a visually minor impact can damage hidden brackets or radar alignment. A repairer should inspect behind the cover before deciding.
How Long Should I Keep Accident Photos and Reports?
Keep photographs, estimates, invoices, diagnostic reports, settlement documents, and insurer correspondence for the period required by local law and the policy, commonly several years. Retain them longer when an injury, warranty, resale disclosure, finance agreement, or unresolved dispute exists.
Can I Choose OEM Parts After an Insurance Claim?
You may be able to request original-equipment parts, but the policy, vehicle age, repair terms, local law, and insurer agreement determine payment. Ask in writing whether aftermarket or recycled parts are proposed, whether safety-related components have a required specification, and who pays any price difference.
Does a Car Lose Value After Proper Repairs?
A collision can reduce resale value even after a technically correct repair, particularly when structural damage, airbag deployment, or a vehicle-history record is disclosed. The amount varies with severity, age, market, brand, repair quality, and documentation. Keep calibration records, alignment results, invoices, and photographs to demonstrate repair quality.
The Bottom Line
Assessing car damage after an accident requires more than photographing a dent or reading a dashboard code. Secure the scene, preserve evidence, report the incident promptly, and use a qualified inspection that covers structure, suspension, restraints, electronics, ADAS, and hidden components. Use the written findings to decide whether to drive, claim, settle, repair, or challenge the valuation. Accurate documentation is the strongest protection against unsafe repairs and incomplete compensation.


