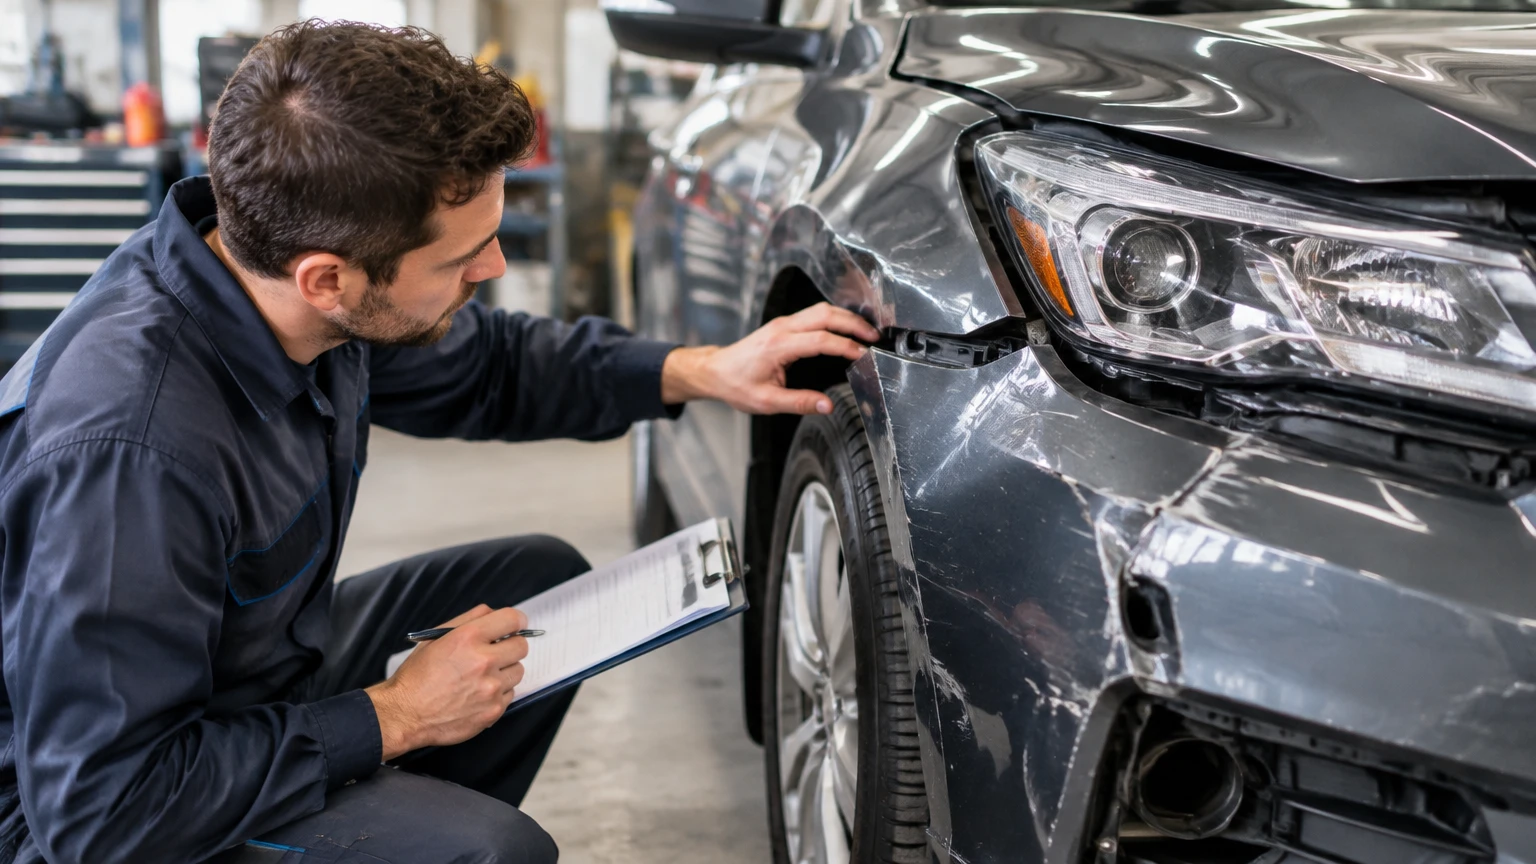
A collision repair inspection is a structured examination of a damaged vehicle by a collision estimator, trained technician, insurer, or independent appraiser. The inspection identifies safety, structural, mechanical, electrical, and cosmetic damage, then converts those findings into a repair plan and itemized estimate. It may include scanning, photographs, teardown, frame measurement, and ADAS calibration planning.
Key Facts at a Glance
- A collision inspection determines whether a vehicle is safe to drive and what repairs are required.
- A diagnostic scan can reveal airbag, restraint, sensor, and communication faults that are invisible outside the vehicle.
- A photo estimate is a preliminary assessment, not necessarily a complete repair blueprint.
- Teardown, also called blueprinting, exposes damage behind bumpers, lamps, fenders, doors, and other exterior parts.
- Structural measuring compares the vehicle with manufacturer dimensions, not merely with how straight it appears.
- Most initial inspections take about 1-4 hours; a teardown and complete blueprint commonly takes 1-2 business days.
- A supplemental estimate is issued when disassembly reveals damage absent from the original estimate.
What Happens During a Collision Repair Inspection?
A collision repair inspection normally follows seven connected stages: intake and safety triage, visual documentation, electronic scanning, mechanical examination, teardown, structural measurement, and estimate preparation. The exact sequence varies with impact severity, vehicle design, insurer requirements, and whether the vehicle can be safely moved.
The inspector records the accident history, impact location, mileage, warning lights, pre-existing damage, and the owner’s concerns. The technician then compares visible evidence with likely force paths. For example, a damaged bumper corner can transfer force into a reinforcement bar, absorber, radiator support, headlamp mounting points, wheelhouse, and steering or suspension components.
A sound inspection is therefore more than a body-panel walkaround. It connects each damaged component to the collision event, the manufacturer’s repair procedures, and the safety systems affected by the impact.
1. Intake and Safety Triage
The first step is determining whether the vehicle can be inspected and moved safely. The technician checks leaking fuel or coolant, damaged high-voltage components, loose body parts, deployed airbags, broken glass, exposed wiring, tire damage, and fluid loss.
The shop also documents the vehicle identification number, mileage, warning indicators, keys, accessories, and existing dents or scratches. Accurate intake records prevent unrelated damage from being added to the claim and help establish the vehicle’s condition before repairs begin.
2. Visual and Photographic Documentation
The inspector photographs the entire vehicle, not only the impact area. Images usually include all four corners, the odometer, VIN label, tire condition, engine compartment, trunk or cargo area, interior, warning lights, and close-ups of damaged parts.
The examination covers panel gaps, paint transfer, buckling, cracks, lamp alignment, glass, weather seals, door operation, hood and trunk latches, and evidence that the impact reached adjacent panels. A door that opens normally can still have hinge, intrusion-beam, wiring, or side-impact sensor damage.
3. Pre-Repair Diagnostic Scanning
A pre-repair scan connects a diagnostic tool to the vehicle’s OBD-II system and checks electronic control modules. Depending on the vehicle, the scan can identify faults in airbags, seat-belt pretensioners, anti-lock braking, supplemental restraint systems, steering angle, parking sensors, cameras, radar, and battery management.
A scan is evidence, not a complete diagnosis. A module can store a fault without visible damage, while a physically damaged sensor may not trigger a dashboard warning. The technician records fault codes, module status, and scan results before repairs so the post-repair scan can be compared with the original condition.
A useful practitioner rule is simple: no warning light does not mean no electronic damage.
How Does a Shop Find Hidden Collision Damage?
A shop finds hidden damage through a combination of force-path analysis, diagnostic scanning, measurements, and controlled disassembly. The exterior often conceals bent brackets, crushed energy absorbers, distorted rails, damaged wiring, broken clips, displaced cooling components, and compromised sensor mounts.
What Happens During Teardown?
During teardown, the technician removes selected bumpers, lamps, trim, liners, grilles, absorbers, and panels to inspect the components behind them. The shop photographs each discovery and adds necessary operations to a supplement rather than guessing at concealed damage.
Blueprinting is usually performed before parts are ordered when the impact is significant. A bumper cover may hide a crushed reinforcement bar; a front-end impact may also affect the radiator, condenser, shutter system, hood latch, horn, wiring harness, and front radar bracket.
Teardown does not automatically mean the vehicle is totaled or badly damaged. It means the shop is replacing assumptions with direct evidence. If the owner moves the vehicle after disassembly, the shop should explain which components no longer secure the body or protect occupants.
How Is Structural Damage Measured?
Structural damage is assessed with dedicated measuring equipment, reference points, visual inspection, and manufacturer repair specifications. A computerized measuring system compares selected chassis points with the vehicle’s original dimensions and identifies length, width, height, and diagonal deviations.
The technician may measure front rails, apron assemblies, strut towers, rocker panels, floor sections, rear rails, suspension mounting points, and body openings. A vehicle that drives straight can still have structural displacement, especially when electronic stability systems compensate for alignment or the collision affected a non-steering area.
There is no universal rule that every 1-millimeter difference makes a vehicle unsafe. Acceptable tolerances depend on the manufacturer, measuring system, reference point, and repair procedure. The correct standard is the applicable factory specification, not a generic internet threshold.
How Are Mechanical and Safety Components Checked?
Mechanical inspection checks systems that can affect control, occupant protection, or continued operation after impact. The technician examines steering, suspension, brakes, wheels, tires, cooling, exhaust, fuel or high-voltage systems, and restraint components.
Typical checks include:
- Bent tie rods, control arms, knuckles, struts, subframes, and stabilizer links.
- Wheel runout, tire sidewall damage, brake-line damage, and alignment condition.
- Radiator, condenser, cooling fan, hoses, engine mounts, and fluid leaks.
- Airbag deployment, seat-belt pretensioners, buckle sensors, impact sensors, and restraint modules.
- Exhaust, fuel lines, EV battery casing, charging components, and underbody shielding.
- Water intrusion around windshields, doors, lamps, trunks, and damaged seals.
A vehicle may need a mechanical inspection even when the visible damage is cosmetic. A curb strike during a collision can bend suspension parts without creating a major body dent.
How Are Cameras, Radar, and ADAS Checked?
Advanced driver-assistance systems are checked through physical inspection, electronic scanning, alignment verification, and calibration when required by the vehicle manufacturer. ADAS includes forward cameras, radar, blind-spot sensors, parking sensors, surround-view cameras, lane-departure systems, adaptive cruise control, and automatic emergency braking.
The inspection identifies whether a sensor was hit, moved, replaced, disconnected, or mounted to a damaged structure. A camera behind a windshield may require glass replacement, aiming, a level vehicle, controlled lighting, and a clear calibration target. Radar calibration may require precise thrust-angle and ride-height conditions.
The Insurance Institute for Highway Safety has repeatedly documented the growing role of front crash-prevention systems in vehicle safety evaluation. That does not mean every accident disables ADAS, but it does mean a repair estimate should identify calibration requirements rather than assume the system will reset automatically.
Calibration can be static, dynamic, or both. Static calibration uses targets and measured distances; dynamic calibration uses a controlled road drive or manufacturer-directed procedure. The repair file should identify the procedure performed and retain the result.
What Goes Into the Collision Repair Estimate?
The estimate translates inspection findings into repair operations, parts, labor, materials, procedures, and required quality checks. It commonly separates body labor, frame labor, mechanical labor, paint labor, refinishing materials, scanning, calibration, sublet work, towing, storage, and taxes.
| Estimate element | Typical entry | Why it matters |
|---|---|---|
| Parts | Bumper cover, lamp, reinforcement, sensor | Identifies the actual replacement component |
| Body labor | 4.5 hours at $75-$120 per hour | Covers removal, replacement, fitting, and adjustment |
| Refinishing | 3.0 paint hours plus materials | Accounts for preparation, color, and clear coat |
| Mechanical labor | 2.0 hours at $100-$175 per hour | Covers suspension, cooling, or electrical operations |
| Diagnostics | $75-$200 per scan or procedure | Documents faults before and after repair |
| ADAS calibration | $250-$1,000 typical range | Covers targets, equipment, setup, and testing |
| Structural measurement | $150-$500 typical charge | Compares damaged points with factory dimensions |
Prices vary by region, vehicle, labor market, shop equipment, and insurer contract. The estimate should also state whether operations are included, omitted, or subject to a manufacturer procedure.
Why Can the First Estimate Change?
The first estimate changes because an initial inspection often occurs before damaged parts are removed. A supplement is required when teardown reveals additional damage, when a hidden component cannot be reused, or when a manufacturer procedure requires an operation missing from the original estimate.
Common supplement discoveries include crushed absorbers, bent brackets, damaged wiring, broken fasteners, nonreusable one-time-use bolts, corrosion behind a panel, and calibration requirements. A supplement is not automatically evidence of poor estimating; it can be the normal result of gaining access to concealed areas.
Industry-wide supplement percentages vary by data source and repair mix. A shop should not present a universal 60-70 percent figure as a guaranteed benchmark. The more reliable conclusion is that concealed damage makes supplements common, especially after moderate and severe impacts.
How Are Replacement Parts Selected?
Replacement parts are selected according to vehicle age, policy language, availability, safety requirements, manufacturer procedures, customer preference, and applicable state insurance rules. The estimate should identify whether a part is OEM, aftermarket, recycled, remanufactured, or repairable.
| Part category | Typical price position | Main advantage | Main limitation |
|---|---|---|---|
| OEM | 100% of manufacturer list price | Factory design, fit, and documented application | Highest cost and possible backorder |
| Certified aftermarket | 60%-90% of OEM price | Lower cost with new production | Fit, coating, and specification vary |
| Recycled OEM, LKQ | 40%-80% of OEM price | Genuine part and lower waste | Donor condition and color may differ |
| Remanufactured | 50%-85% of new price | Rebuilt mechanical or electronic unit | Warranty and rebuilding quality vary |
OEM means original equipment manufacturer. LKQ means like kind and quality, commonly referring to recycled parts. The safest choice is not automatically the most expensive part, because a replacement must match the required function, mounting, material, and manufacturer procedure.
Owners should ask whether a proposed non-OEM part affects crash sensors, lighting performance, corrosion protection, warranty coverage, or calibration. Insurance policies and local law control many payment disputes, so the shop’s preference alone does not decide coverage.
What Types of Collision Inspections Exist?
Collision inspections differ by purpose, timing, and the person paying for the service. An insurance estimate controls claim evaluation, while a repair blueprint guides the shop’s actual work.
| Inspection type | Typical timing | Primary purpose | Typical cost |
|---|---|---|---|
| Photo or visual estimate | Same day to 2 days | Establish preliminary visible damage | $0-$75 |
| Shop blueprint or teardown | Before parts ordering | Find concealed damage and plan repairs | $0-$500 |
| Independent damage appraisal | Before authorization or dispute | Provide a separate damage valuation | $200-$600 |
| Diminished-value appraisal | After completed repairs | Estimate reduced resale value | $150-$500 |
| Post-repair inspection | Before final acceptance | Verify safety, quality, and documentation | $150-$500 |
A diminished-value inspection does not determine repair quality. It estimates potential market-value loss after a recorded collision, and eligibility depends on jurisdiction, vehicle age, claim circumstances, and insurer rules.
How Long Does the Inspection Take?
A basic collision inspection typically takes 30-90 minutes, a scan and detailed visual inspection commonly take 1-4 hours, and a teardown with blueprinting often takes 1-2 business days. Structural measurement, parts research, manufacturer procedures, or severe damage can extend the process.
| Situation | Typical inspection time | Main delay |
|---|---|---|
| Minor bumper or door damage | 30-90 minutes | Parts identification |
| Moderate front or rear impact | 1-4 hours | Scanning and access checks |
| Teardown blueprint | 1-2 business days | Disassembly and supplement writing |
| Structural damage | 1-3 business days | Measuring and repair planning |
| EV or aluminum vehicle | 2-5 business days | Specialized equipment and procedures |
| Independent post-repair check | 1-3 hours | Records, measurements, and road test |
Inspection time is not the same as repair time. A two-hour inspection can lead to several weeks of repairs if parts are backordered, structural work is required, or calibration cannot be scheduled immediately.
How Much Does a Collision Inspection Cost?
A simple visual estimate is often free, while a detailed teardown, independent appraisal, structural measurement, or post-repair inspection can cost approximately $150-$600. Insurance may pay inspection-related charges when they are necessary parts of an authorized claim, but payment responsibility depends on the policy and jurisdiction.
Ask for the price before authorizing disassembly. Confirm whether the fee is credited toward repairs, billed to insurance, or payable if the vehicle is moved to another shop.
When Is the Vehicle Unsafe to Drive?
A vehicle is unsafe to drive when collision damage affects steering, braking, suspension, tires, restraints, fluid containment, visibility, structural integrity, or high-voltage components. Visible leaks, deployed airbags, a damaged wheel, severe misalignment, loose panels, broken lights, or exposed electrical wiring justify towing rather than driving.
The dashboard can remain free of warnings even when a vehicle has dangerous mechanical or structural damage. A collision shop should provide a direct drive-or-tow recommendation, and an owner should not rely on whether the car starts or moves under its own power.
A vehicle that has been torn down should travel by flatbed. Removed bumpers, lamps, crash absorbers, panels, or restraint components can change how the vehicle behaves in another impact and may leave parts unsecured.
How Do EV, Luxury, and Classic Vehicle Inspections Differ?
EV and luxury vehicle inspections require brand-specific information, scanning tools, and repair procedures. A collision affecting an EV battery enclosure, orange high-voltage cables, charging port, or thermal system requires trained personnel and a documented high-voltage safety process.
Aluminum structures, carbon-fiber components, air suspension, matrix lighting, and integrated sensor systems can impose repair limits that differ from conventional steel vehicles. Tesla, Rivian, BMW, Mercedes-Benz, Lucid, and other manufacturers publish distinct procedures and may require certified facilities for particular operations.
Classic and custom vehicles need independent valuation because standard estimating databases may not represent hand-built parts, rare trim, custom paint, upgraded suspension, or documented restoration work. Photographs, receipts, appraisal records, and agreed-value policy documents are especially important.
What Should You Do When Insurance and the Shop Disagree?
When an insurer and repair shop disagree, request the disagreement in writing and ask the shop to identify the specific part, labor operation, procedure, or calibration being disputed. The shop can submit photographs, teardown evidence, frame measurements, diagnostic reports, and manufacturer repair documentation.
Use this sequence:
- Ask for the insurer’s estimate and the shop’s estimate.
- Compare omitted operations, part categories, labor hours, and rates.
- Request a supplement review involving the estimator, technician, and adjuster.
- Ask whether the manufacturer procedure requires the disputed operation.
- Escalate through the insurer’s supervisor, appraisal clause, regulator, or legal adviser when appropriate.
- Avoid authorizing repairs whose payment responsibility remains unclear.
Insurance-preferred network status can simplify communication, but it does not remove the owner’s right to understand the repairs or choose a qualified shop where local law permits. A lifetime network warranty may cover workmanship, while it generally does not cover a later collision or unrelated mechanical failure.
What Happens During a Post-Repair Inspection?
A post-repair inspection verifies that the completed vehicle matches the authorized repair plan and manufacturer requirements. The inspector checks panel fit, paint quality, lights, glass, latches, wheel alignment, warning indicators, scan results, ADAS calibration records, and road-test behavior.
| Post-repair check | Specific evidence | Failure example |
|---|---|---|
| Diagnostic scan | No unresolved collision-related codes | Airbag or radar fault remains |
| Alignment | Printed before-and-after readings | Steering wheel remains off-center |
| ADAS | Calibration report and target procedure | Lane camera was not aimed |
| Body fit | Even gaps and flush panels | Hood or door does not latch correctly |
| Paint | Consistent color, gloss, and texture | Overspray or visible blend edge |
| Safety operation | Seat belts, lamps, horn, wipers | Pretensioner or brake light fault |
A post-repair inspection cannot prove that every internal weld or hidden operation was completed unless the repair file contains suitable documentation. It is valuable, but it is not a substitute for a reputable repair process, manufacturer procedures, and retained records.
Common Inspection Mistakes and Their Fixes
- Treating a photo estimate as final: Request an in-person inspection and teardown when impact forces could have reached hidden components.
- Skipping the pre-repair scan: Require a recorded scan before work and a post-repair scan after assembly.
- Assuming straight driving proves a straight structure: Ask for frame or suspension measurements against factory specifications.
- Ignoring calibration: Obtain written confirmation that each affected camera, radar, or sensor received the required procedure.
- Driving a partially disassembled vehicle: Use a flatbed tow truck after teardown.
- Approving parts without reviewing categories: Confirm OEM, aftermarket, recycled, or remanufactured status before ordering.
- Discarding damaged parts too early: Ask whether the insurer or independent appraiser needs to inspect them.
- Failing to record pre-existing damage: Photograph unrelated dents and scratches during intake.
Frequently Asked Questions
Does a collision inspection include an alignment check?
A collision inspection may include an alignment check when the impact reached a wheel, tire, steering, suspension, subframe, or structural mounting point. A full four-wheel alignment is not always necessary for a purely cosmetic repair, but the estimate should explain why alignment was included or omitted.
Can I choose my own collision repair shop?
In many jurisdictions, vehicle owners can choose their repair shop, but insurance contracts and local laws differ. A preferred network shop may simplify estimates and warranty administration, while an independent shop may offer different expertise, parts policies, or manufacturer certifications.
What if the shop finds more damage after I approve the estimate?
The shop should stop affected work, document the discovery, and submit a supplemental estimate to the insurer or customer. Do not assume approval is automatic. Request photographs, the affected part number, the added labor operation, and an explanation of why the original inspection could not identify the damage.
How do I know whether a vehicle is a total loss?
An insurer generally compares the estimated repair cost and related expenses with the vehicle’s actual cash value, subject to state thresholds and policy rules. Structural damage, salvage value, rental cost, and hidden damage can affect the decision. The shop does not independently decide the insurance settlement.
Should I get an independent inspection after repairs?
An independent post-repair inspection is useful when damage was severe, safety systems were involved, workmanship appears questionable, or the vehicle’s resale value is important. Request the repair estimate, supplements, scan reports, calibration records, alignment printout, and warranty information before the inspection.
The Bottom Line
A collision repair inspection determines more than which panels look damaged. It combines safety triage, photographs, electronic scanning, mechanical checks, teardown, structural measurement, parts research, and estimate preparation. The strongest inspection produces documented evidence that connects the collision to each repair operation and confirms the vehicle can be safely restored.
Before authorizing work, ask whether the vehicle received a pre-repair scan, whether hidden damage requires teardown, whether frame measurements follow factory specifications, which parts categories are proposed, and whether ADAS calibration is required. Those questions make the answer to “What Happens During a Collision Repair Inspection?” practical: the vehicle is tested, measured, documented, and converted into a repair plan before final approval.


