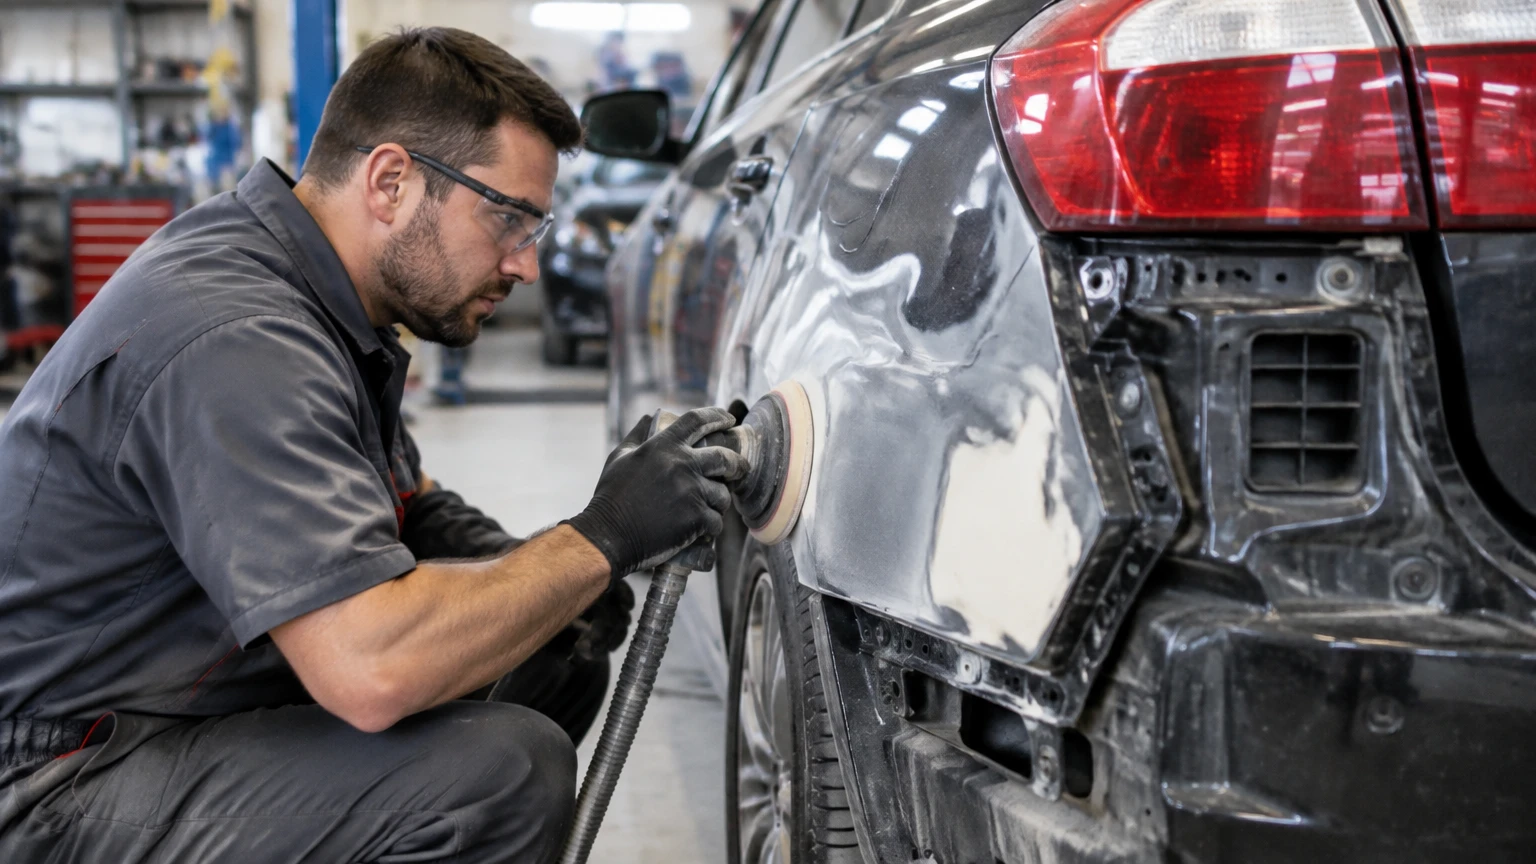
The auto collision repair process is a documented sequence that restores a vehicle’s structure, mechanical systems, appearance, and safety technology after a crash. A typical repair moves through intake, teardown, estimating, authorization, structural and mechanical work, refinishing, reassembly, calibration, and final quality control; hidden damage and parts availability determine the final cost and duration.
Key Facts at a Glance
- A first visual estimate is provisional because concealed damage often appears after panels and trim are removed.
- Structural repairs require measurement against manufacturer specifications, not merely an acceptable-looking exterior.
- Insurance supplements add newly discovered repair operations, parts, labor, or calibration requirements to the original estimate.
- ADAS calibration may be required after bumper, windshield, suspension, grille, mirror, camera, radar, or structural repairs.
- Typical repair duration ranges from 1-3 business days for minor cosmetic work to 3-6 weeks for severe structural damage.
- A complete repair includes a final diagnostic scan, calibration records when applicable, panel and paint inspection, and a road test.
What Happens During Intake?
The collision repair process begins with vehicle identification, damage documentation, safety screening, and an initial repair estimate. The shop records the vehicle identification number, mileage, warning lights, pre-existing damage, customer concerns, and collision circumstances before creating a photographic record.
The advisor or estimator usually photographs every exterior side, the interior, the odometer, warning indicators, wheels, tires, and damaged areas. A diagnostic scan may identify stored fault codes in airbag, restraint, powertrain, braking, steering, or body-control modules. A scan is evidence of electronic conditions, not proof that every physical problem has been found.
A technician also determines whether the vehicle is safe to drive. Leaking fluids, deployed airbags, damaged steering or suspension, exposed high-voltage components, unstable body panels, and compromised tires can require towing. Driving a vehicle with a damaged wheel bearing or restraint system can turn a repairable collision into a more serious safety event.
The initial estimate commonly lists visible operations such as removing a bumper, replacing a lamp, repairing a fender, or refinishing a door. It does not reliably show the complete repair until disassembly exposes mounting brackets, crash absorbers, reinforcement beams, wiring, sensors, and structural metal.
What should you bring to the estimate?
Bring the insurance claim number, registration, photos from the crash scene, key fobs, wheel-lock key, and information about warning lights or drivability changes. Tell the estimator whether the vehicle pulled to one side, vibrated, overheated, or developed electrical faults after impact.
Why Is Disassembly Necessary?
Disassembly, often called teardown or blueprinting, removes damaged panels and components so technicians can inspect the collision path and identify hidden damage. A bumper cover can conceal a crushed absorber, broken radar bracket, bent reinforcement, damaged condenser, or shifted mounting point.
The shop documents newly discovered conditions with photographs and adds repair operations to a supplement. Blueprinting also identifies the complete parts list, repair procedures, labor sequence, paint materials, calibration needs, and sublet work before reconstruction begins.
A common mistake is treating teardown as wasted labor. Removing and reinstalling a bumper may appear repetitive, but the operation can be necessary to determine whether a sensor bracket or energy absorber still meets its intended position. Hidden damage explains why a repair estimate can increase after authorization.
The repair plan should distinguish repairable, replaceable, reusable, and single-use components. Many manufacturers specify replacement of certain bolts, rivets, clips, sensors, steering parts, or restraint components after a crash. Reusing a one-time fastener can create a failure that an exterior inspection will not reveal.
How Do Insurance Supplements Work?
An insurance supplement is a documented request for payment for collision damage discovered after the original estimate. The repairer photographs the condition, identifies the required operation or part, explains why the original estimate was incomplete, and submits the revised amount to the insurer for review.
Supplement approval can involve insurer inspection, electronic estimate review, parts-price verification, engineering consultation, or agreement between the shop and adjuster. The vehicle may remain disassembled while the parties resolve the added operations, which is one reason a repair can pause unexpectedly.
The vehicle owner normally remains responsible for the policy deductible, while the insurer pays covered costs subject to policy terms and liability decisions. A shop cannot guarantee that every requested operation will be approved, so ask which items are authorized, disputed, pending, or excluded.
What should you ask about the estimate?
Ask for the estimate version, repair-versus-replace decisions, parts categories, calibration charges, corrosion protection, paint blending, deductible, and supplement status. Request written confirmation before authorizing customer-pay work that insurance has not accepted.
Which Replacement Parts Are Used?
Collision repair parts may be OEM, aftermarket, recycled, remanufactured, or repaired original components. The correct choice depends on the vehicle, part function, manufacturer repair procedure, insurer policy, availability, warranty, and safety consequences.
| Part category | Typical use | Main advantage | Main limitation |
|---|---|---|---|
| OEM | Airbags, structural parts, lamps, sensors, body panels | Manufacturer design and documented fit | Highest price and possible delivery delay |
| Certified aftermarket | Exterior panels, grilles, lamps, brackets | Lower cost and wider availability | Fit, finish, and sensor compatibility vary |
| Recycled OEM | Doors, hoods, trim, mechanical assemblies | Original design at reduced cost | Color, mileage, corrosion, and inventory vary |
| Remanufactured | Steering racks, alternators, electronic modules | Restored function with warranty potential | Quality depends on remanufacturer and part type |
| Repaired original | Minor dents, selected plastic or metal panels | Preserves original fit and reduces replacement waste | Not suitable for every deformation or safety part |
OEM does not automatically mean every repair decision is superior. A recycled OEM door may fit better than a low-grade replacement panel, while a new aftermarket grille may be appropriate if it accepts the original radar sensor and meets the required mounting geometry.
Safety-critical components deserve stricter scrutiny than cosmetic trim. Ask whether the proposed part is compatible with the vehicle’s restraint system, lighting system, radar, camera, parking sensors, and manufacturer repair information.
How Is Structural Damage Corrected?
Structural repair uses a frame machine, anchoring system, measuring equipment, and manufacturer dimensions to return the vehicle’s unibody or frame to specified locations. Technicians secure the body at approved points, measure reference locations, apply controlled pulling force, and verify dimensions throughout the operation.
Most modern passenger vehicles use a unibody, where the floor, pillars, rails, and roof form a load-bearing safety structure. Pickup trucks and some SUVs may use a body-on-frame design, where the separate frame carries major loads. The repair method differs, but both require dimensional verification.
A technician should not judge structural success by panel gaps alone. A vehicle can have attractive gaps while suspension mounting points, rail ends, crush zones, or steering geometry remain outside specification. Measurement records provide stronger evidence than a visual inspection.
Welding, sectioning, adhesive bonding, and replacement procedures must follow vehicle-specific instructions. Heat control matters because excessive heat can weaken high-strength steel, damage nearby electronics, or compromise corrosion protection. Aluminum and mixed-material construction require separate tools and contamination controls.
How do you know structural repair is complete?
Ask whether pre-repair and post-repair measurements were taken, whether the vehicle reached manufacturer dimensions, and whether the shop followed the applicable repair procedure. Alignment results, steering-angle data, and calibration reports provide additional confirmation, but none replaces structural measurement.
What Mechanical and Body Repairs Follow?
Mechanical collision repairs restore suspension, steering, braking, cooling, exhaust, lighting, restraint, and electrical systems before the final body finish. Technicians replace or repair damaged components, route wiring correctly, install required fasteners, and test systems that may have been affected by impact.
Body technicians repair metal when the panel remains dimensionally sound and replacement would provide no safety benefit. They replace panels when damage exceeds practical repair limits, corrosion protection would be compromised, mounting points are distorted, or the manufacturer specifies replacement.
Paintless dent repair is appropriate for shallow dents when the paint remains intact and technicians can access the back of the panel. PDR does not correct cracked paint, torn metal, sharp creases, stretched aluminum, corrosion, or damage behind the panel.
| Repair method | Typical application | Typical duration | Typical cost range |
|---|---|---|---|
| Paintless dent repair | 1-10 small intact-paint dents | 1-8 hours | $150-$600 |
| Metal panel repair | One dented steel door or fender | 1-3 business days | $400-$1,500 |
| Panel replacement | Damaged bolt-on door, hood, or fender | 2-5 business days | $600-$2,500 |
| Bumper replacement | Cracked or distorted plastic cover | 2-4 business days | $600-$2,000 |
| Structural and suspension repair | Shifted rail, control arm, or cradle | 1-3 weeks | $2,500-$6,000 or more |
The least expensive visible repair can create the highest later cost if it ignores a bent mounting point. Practitioners commonly verify suspension and steering geometry before approving extensive cosmetic work.
How Does Refinishing Restore the Paint?
Refinishing restores corrosion protection, color, gloss, and texture after a panel is repaired or replaced. Technicians clean and sand the surface, apply compatible primer and sealer, mix the color, blend adjacent panels when necessary, apply basecoat and clearcoat, then cure and inspect the finish.
Modern shops may use a spectrophotometer to measure color variation, but the device does not replace technician judgment. Factory paint changes with ultraviolet exposure, production batches, repair history, and panel angle. Blending into an adjacent panel can make a repair less visually obvious than applying a perfect formula to only the replacement panel.
A controlled spray booth reduces dust and stabilizes temperature and airflow. Cure time depends on paint system, booth temperature, humidity, film thickness, and whether the shop uses infrared or force-dry equipment.
Look for uniform color, consistent gloss, correct texture, clean edges, and no overspray on seals or hardware. Orange peel, solvent pop, fisheyes, dry spray, dirt nibs, and visible blend edges are finish defects that should be documented before acceptance.
When Is ADAS Calibration Required?
Advanced driver assistance system calibration is required when collision damage or repair work changes the position, view, aim, or operating conditions of a camera, radar, ultrasonic sensor, steering system, suspension component, windshield, bumper, grille, mirror, or related control module. Required procedures depend on the vehicle manufacturer.
Static calibration uses targets, measuring equipment, a level floor, specified distances, and controlled lighting. Dynamic calibration uses a road drive under required conditions, such as visible lane markings, suitable traffic, speed, weather, and uninterrupted operating time. Some vehicles require both methods.
ADAS functions can include forward collision warning, automatic emergency braking, adaptive cruise control, lane departure warning, lane-centering assistance, blind-spot monitoring, pedestrian detection, and parking assistance. A dashboard with no warning light does not prove accurate aiming.
Calibration can fail because of incorrect ride height, improper wheel alignment, uneven floor conditions, windshield installation errors, an incorrect tire size, low battery voltage, or a damaged bracket. The shop should provide calibration documentation and confirm that post-repair diagnostic scans show no unresolved faults.
How Long Does the Process Take?
Typical collision repair takes 1-3 business days for minor cosmetic damage, 3-7 business days for a single-panel or bumper repair, 1-3 weeks for complex structural work, and 3-6 weeks for severe collisions. These are planning ranges, not guarantees.
| Damage level | Typical work | Typical repair time | Typical total cost |
|---|---|---|---|
| Minor cosmetic | PDR, scratches, small dents | 1-3 business days | $150-$600 |
| Moderate | Bumper, lamp, single panel, paint blend | 3-7 business days | $600-$2,500 |
| Complex | Multiple panels, suspension, structural alignment | 1-3 weeks | $2,500-$6,000 or more |
| Severe | Airbags, rails, engine bay, multiple systems | 3-6 weeks | $6,000-$12,000 or more |
Parts backorders, supplement negotiations, sublet alignment, glass availability, calibration scheduling, paint rework, and additional hidden damage create most delays. A repair with fewer labor hours can take longer than a larger repair when one unavailable sensor or lamp blocks reassembly.
Ask the shop for milestone updates rather than a single promised date: teardown complete, supplement submitted, parts received, structural repair complete, paint complete, calibration scheduled, and quality control complete.
What Does Collision Repair Cost?
Typical collision repair costs range from $150 for a small paintless dent repair to more than $12,000 for severe structural and restraint-system damage. Labor rates, regional taxes, vehicle technology, parts choices, calibration, rental time, and hidden damage often matter more than the visible dent.
A collision estimate may include body labor, structural labor, mechanical labor, paint labor, materials, parts, scanning, calibration, alignment, towing, storage, and sublet charges. Paint materials are often calculated through estimating software rather than measured as a simple percentage of labor.
Insurance coverage does not mean every repair is free. The deductible remains the customer’s responsibility under most policies, and excluded operations or policy limits can create additional charges. Obtain written approval before accepting any customer-pay balance.
When does repair become a total loss?
A vehicle becomes a total loss when the insurer determines that repairing it is not economically or legally appropriate under the applicable state rule and policy terms. The decision commonly considers repair cost, salvage value, vehicle value, title requirements, and hidden damage.
A high repair estimate does not independently decide total-loss status. Ask the adjuster for the valuation report, comparable vehicles, projected repair total, salvage calculation, and applicable threshold or formula if the vehicle may be totaled.
What Changes for EVs and Hybrids?
Electric vehicles and hybrids require high-voltage safety procedures, vehicle-specific isolation methods, and technicians trained to identify battery, cable, inverter, and thermal-management damage. A vehicle that appears drivable can still require a high-voltage inspection after an impact near the battery enclosure.
Technicians may need to disable the high-voltage system, inspect battery housing and underbody protection, test insulation resistance, and follow manufacturer procedures before lifting or repairing the vehicle. Standard collision shops are not automatically equipped to diagnose battery damage.
Do not touch orange cables, damaged battery enclosures, leaking coolant, or smoke from an EV or hybrid. Follow the manufacturer’s emergency guidance and use a qualified tow provider when high-voltage damage is suspected.
Common Mistakes and How to Fix Them
- Treating the first estimate as final: Request a teardown-based supplement review before relying on the price or completion date.
- Choosing solely by the lowest quote: Compare repair procedures, parts categories, calibration, warranty, and structural measurement records.
- Accepting an unsafe drive-away condition: Stop and request a tow if steering, braking, restraint, tire, fluid, or high-voltage concerns exist.
- Skipping calibration documentation: Ask for the required calibration report and final diagnostic scan.
- Allowing unauthorized customer-pay work: Require written approval for excluded parts, labor, storage, or supplement items.
- Inspecting only in a dim shop: Examine the vehicle outdoors in daylight, then test functions before signing final acceptance.
An experienced repairer also checks for pre-existing damage before teardown. Previous paintwork, mismatched panels, corrosion, worn tires, and earlier structural repairs can affect insurance responsibility and the final appearance.
How Should You Inspect the Finished Repair?
Inspect the vehicle in daylight before signing completion paperwork. Check panel gaps, door and hood operation, paint color and texture, weather seals, lamps, trim, wheels, tire pressure, warning lights, and interior cleanliness.
| Inspection area | Specific check | Acceptable result |
|---|---|---|
| Panel alignment | Hood, doors, hatch, fenders, bumper gaps | Even spacing and smooth operation |
| Paint finish | Color, gloss, texture, edges, overspray | Consistent appearance without defects |
| Electronics | Warning lamps, windows, locks, cameras, sensors | Functions operate without fault messages |
| Road behavior | Steering, braking, vibration, pulling | Straight tracking and predictable braking |
| Documentation | Scan, alignment, calibration, warranty records | Copies supplied or available on request |
Test headlights, turn signals, brake lamps, parking sensors, climate controls, charging equipment, and driver-assistance alerts. A warning light that appears after leaving the shop should be reported immediately and photographed.
Request copies of the final estimate, supplement approvals, parts warranty, paint or repair warranty, wheel alignment results, diagnostic scan, ADAS calibration report, and structural measurement report when applicable. Documentation protects the owner during later resale, warranty questions, and recurring fault investigations.
FAQ
Can I choose my own collision repair shop?
In many jurisdictions and insurance policies, vehicle owners can select their repair facility, although insurer programs may offer direct billing, warranty, or scheduling benefits. Compare the shop’s repair procedures, certifications, warranty terms, parts policy, calibration capability, and communication process instead of choosing solely from an insurer’s list.
Should I repair a bumper with cracks?
A bumper cover with minor cosmetic damage may be repairable, but cracks near sensor mounts, lamps, retainers, or structural reinforcement can require replacement. The correct decision depends on plastic type, damage location, manufacturer procedure, and whether the repaired cover can hold sensors in the specified position.
Does a wheel alignment prove the car is safe?
A wheel alignment confirms selected suspension angles, but it does not prove that the unibody, frame, restraint system, wiring, or ADAS sensors are correct. A safe repair combines structural measurements, mechanical inspection, diagnostic scanning, required calibration, and a road test.
How long should I wait before washing a freshly painted car?
Follow the refinishing product’s instructions because cure time varies by paint system and drying method. Many shops recommend avoiding automated brushes and harsh chemicals for at least several days, while full solvent release and polishing instructions may require longer.
What if a problem appears after I pick up the car?
Photograph the problem, record warning messages or driving symptoms, and contact the repair shop promptly. Do not continue driving if braking, steering, restraint, tire, fluid, or high-voltage problems appear. Ask the shop to compare the symptom with the repair order and warranty terms.
The Bottom Line
The auto collision repair process works as a controlled sequence: document the vehicle, inspect and blueprint hidden damage, authorize supplements, source suitable parts, restore structure and mechanical systems, refinish panels, reassemble the vehicle, calibrate safety technology, and verify the result. Cost and timing become reliable only after teardown and parts confirmation.
The most important questions are whether the vehicle reached manufacturer dimensions, whether required ADAS and diagnostic procedures were completed, whether the parts match the repair plan, and whether the final inspection confirms safe operation. A clean appearance is only one part of a complete repair.


