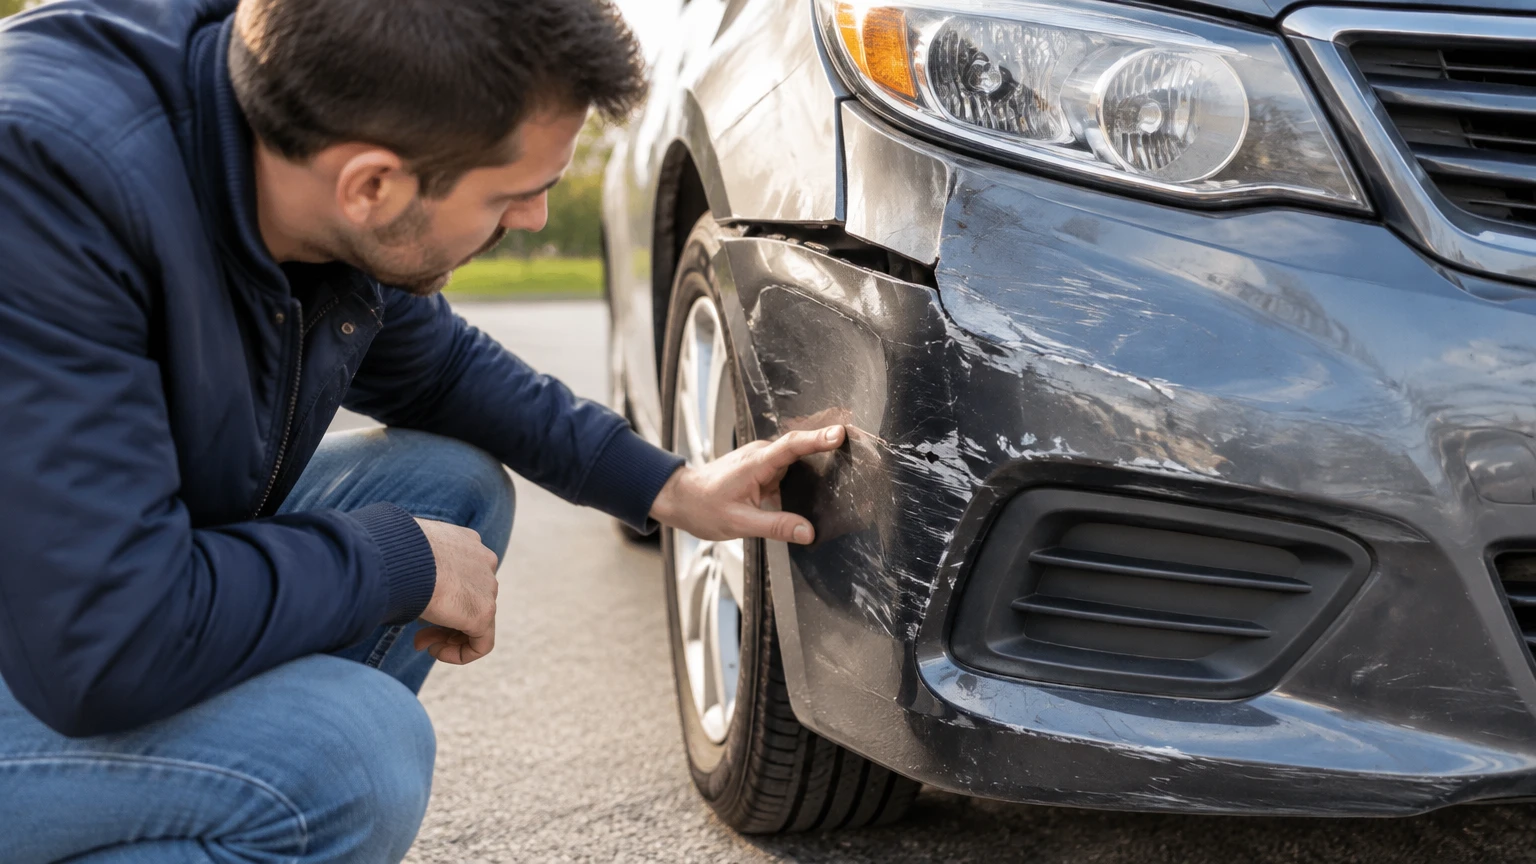
A bumper needs replacement when its mounting structure, impact absorber, reinforcement bar, sensor bracket, or crash-relevant geometry is damaged, not merely because its paint is scratched. A bumper cover with a small, stable crack away from mounts can often be repaired, while a loose corner, deep split, crushed absorber, bent reinforcement bar, or post-impact ADAS fault requires professional replacement or further collision repair.
Key Facts at a Glance
- A bumper assembly usually includes a plastic cover, energy absorber, reinforcement bar, mounting hardware, and sometimes radar or parking sensors.
- A cosmetic scuff does not automatically require bumper replacement, but a crack that reaches a mounting point usually makes replacement more reliable.
- A bumper that looks normal can still conceal a broken sensor bracket, crushed foam absorber, bent reinforcement beam, or damaged grille support.
- A dashboard warning after bumper impact requires a diagnostic scan before the vehicle is considered repaired.
- Bumper replacement commonly costs about $700-$1,200 on basic vehicles and $1,300-$4,500 or more on vehicles with sensors and advanced driver-assistance systems.
- ADAS calibration may be required after bumper removal, sensor replacement, bracket damage, wheel-alignment changes, or related collision repairs.
What a Bumper Actually Contains
A modern bumper is an impact-management assembly, not a single plastic panel. The outer cover controls appearance and airflow, the absorber manages some impact energy, and the reinforcement bar transfers larger forces into the vehicle’s body structure.
Which parts can be damaged?
| Component | Typical material | Main function | Replacement concern |
|---|---|---|---|
| Bumper cover | TPO, polypropylene, ABS, or PC blend | Covers the front or rear structure | Cracks, torn tabs, distortion, sensor fit |
| Energy absorber | Expanded polypropylene foam or molded plastic | Compresses during low-speed impact | Crushing, missing sections, permanent deformation |
| Reinforcement bar | Steel or aluminum | Resists larger impact forces | Bending, kinks, corrosion, shifted mounting |
| Mounting hardware | Plastic tabs, rails, brackets, retainers | Holds cover in factory position | Sagging, loose corners, repeated separation |
| Radar bracket | Polymer or vehicle-specific bracket | Maintains sensor angle and location | Misalignment, fracture, false warnings |
| Ultrasonic sensor | Electronic sensor in cover | Measures nearby obstacles | Broken holder, water intrusion, sensor fault |
The cover can look repairable while another layer is unsafe. That is why a visual inspection alone cannot clear a bumper after a meaningful impact.
What does not count as structural damage?
A shallow scrape, paint transfer, small dent in flexible plastic, or short crack away from fasteners may be cosmetic. A technician can often repair those defects through plastic welding, controlled heat reshaping, sanding, priming, and refinishing.
Repairability depends on the bumper’s material, not only the defect’s size. TPO and polypropylene require compatible welding material and surface preparation; conventional filler alone does not restore torn plastic or broken attachment points.
How to Tell If a Bumper Needs Replacement
The most reliable answer comes from combining visible damage, attachment security, hidden-component inspection, and electronic diagnostics. No single crack length or percentage of damaged surface applies to every make and model, so published rules such as a universal 6-inch or 30% threshold should be treated as estimates rather than factory standards.
1. Look for deep cracks, holes, and missing sections
Replace the bumper cover when a crack is deep, branches into several directions, removes plastic, reaches a mounting point, or leaves the cover unable to retain its original shape. A puncture near a grille opening, fog lamp, radar module, or headlamp also deserves closer inspection because surrounding brackets may have moved.
| Damage type | Typical repair decision | Reason |
|---|---|---|
| Paint scuff under 12 inches | Repair and refinish | Plastic shape remains stable |
| Shallow dent under 4 inches | Repair if plastic is not stretched | Heat reshaping may restore contour |
| Crack under 3 inches away from mounts | Plastic repair may work | Low load on attachment area |
| Crack reaching a tab or rail | Replace cover or mounting section | Repair is exposed to vibration and pullout |
| Hole over 2 inches | Replace or professionally rebuild | Missing material affects shape and support |
| Torn corner with missing tabs | Replace cover | Fastener retention is compromised |
The important measurement is location and function, not surface area alone. A 2-inch tear at a bumper rail can be more consequential than a 10-inch scrape in the center of an undamaged cover.
2. Check panel gaps and bumper alignment
A bumper that sits lower than the opposite side, bows outward, separates from a fender, or leaves an uneven headlamp gap may have broken tabs, bent rails, displaced absorber material, or body damage behind it. Alignment defects often appear after a low-speed impact that seems too minor to affect the reinforcement bar.
Compare both sides from several feet away, then inspect the joint where the bumper meets the fender, grille, quarter panel, trunk, or liftgate. Do not force a corner back into place if it immediately springs out again. The underlying retainer or molded tab may be broken.
3. Test for looseness without forcing the plastic
With the vehicle parked and switched off, apply only light hand pressure to the damaged corner. Excessive movement, rattling, or a gap that opens under gentle pressure indicates failed attachment hardware or damage behind the cover.
A bumper cover should not wobble independently of the body. Do not use this test to bend the panel, and do not crawl beneath a vehicle supported only by a jack. A shop should inspect loose lower shields, wheel-liner fasteners, brackets, and bumper rails on a lift.
4. Inspect behind the cover for crushed components
A flashlight can reveal displaced foam, broken brackets, and bent metal through accessible openings, but complete hidden inspection often requires removing the cover. A crushed energy absorber or bowed reinforcement bar should not be ignored simply because the outer plastic was polished or repainted.
The reinforcement bar is especially important. A steel beam with a crease, kink, shifted bolt position, or deformed mounting flange may no longer distribute impact forces as designed. Aluminum reinforcement components can suffer permanent deformation even when their surface damage is subtle.
5. Scan for electronic and ADAS faults
A warning for parking assist, blind-spot monitoring, forward collision warning, automatic emergency braking, or adaptive cruise control changes the repair decision. The fault may come from a damaged sensor, wiring connector, sensor bracket, calibration target, or radar-transparent cover area.
A diagnostic scan identifies fault codes, but a scan alone does not prove correct sensor aim. After repair, the shop may need a static calibration using targets, a dynamic calibration on a marked road, or both, depending on the vehicle manufacturer.
Can a Cracked Bumper Be Repaired?
A cracked bumper can usually be repaired when the plastic remains complete, the crack is away from mounting points and sensor brackets, and the cover can return to its original shape. Replacement is safer when the crack has stretched the plastic, removed tabs, crosses a fold or attachment rail, or follows a prior repair.
Plastic repair involves cleaning, identifying the polymer, opening and stabilizing the crack, welding compatible material, reinforcing the rear side when appropriate, reshaping, priming, and refinishing. Body filler only levels a surface; it does not restore the strength of a torn bumper edge.
When repair is usually reasonable
- Surface scuffs without distortion.
- Small dents in flexible plastic.
- Short cracks in the central cover area.
- Broken cosmetic trim that does not hold a sensor or lamp.
- Minor damage on a vehicle without bumper-mounted radar or camera hardware.
When replacement is usually better
- The crack reaches a mounting tab, rail, grille opening, or lamp pocket.
- Plastic is missing or severely stretched.
- The same area has already been repaired.
- The bumper cannot maintain alignment after fasteners are installed.
- A sensor bracket or radar mounting surface is damaged.
- A replacement cover costs less than extensive labor and refinishing.
A professional may repair a cover that a dealership replaces, because labor methods and local parts availability differ. Ask for the written reason, the identified material, and confirmation that the repair preserves sensor mounting and factory panel alignment.
Is a Loose or Sagging Bumper Safe to Drive?
A loose bumper is not reliably safe for normal driving because wind pressure, tire contact, road vibration, or a second impact can detach the cover. A short, slow trip to a repair facility may be possible when the cover is secured away from tires, lamps, exhaust components, and the road surface.
Do not drive if the bumper drags, blocks a headlamp, covers a license plate, exposes sharp edges, touches a tire, or leaves wiring hanging. Temporary fastening with approved straps may help transport the vehicle, but household rope, tape, or improvised drilling does not restore crash performance.
A loose bumper can also hide a displaced absorber or bar. The safest practical option is towing when the impact involved a high curb, another vehicle, a pole, or visible body distortion.
When Do Bumper Sensors Require Calibration?
Bumper-mounted sensors require calibration when the manufacturer specifies it after sensor removal, bracket replacement, bumper replacement, impact damage, alignment changes, or a stored ADAS fault. Calibration requirements vary by make, model, year, sensor type, and repair procedure.
| Technology | Common location | Typical post-repair action | Failure symptom |
|---|---|---|---|
| Ultrasonic parking sensor | Bumper face | Functional scan and sensor test | False obstacle alert |
| Blind-spot radar | Rear bumper corners | Radar aiming or calibration | Blind-spot system unavailable |
| Front radar | Grille or bumper center | Static or dynamic calibration | AEB or cruise warning |
| Surround-view camera | Bumper, mirror, grille | Camera calibration and image check | Distorted stitched image |
| Forward camera | Windshield, not usually bumper | Windshield or alignment calibration | Lane warning fault |
A radar-transparent bumper cover has specified material and thickness in the sensor area. Unapproved metallic filler, foil-backed repair material, thick reinforcement, or an incorrectly shaped aftermarket cover can attenuate or redirect radar energy.
A counterintuitive repair rule is that a perfect-looking cover can still require replacement if the sensor bracket behind it is tilted. Sensor angle is measured in degrees and millimeters, so visual symmetry is not a calibration measurement.
Repair Versus Replacement: Which Is Better?
Repair is better for stable cosmetic damage that leaves attachment points, sensor areas, and underlying impact components intact. Replacement is better when the cover cannot hold its shape, mounting tabs are broken, hidden impact components are deformed, or technology requires an undamaged and correctly specified sensor surface.
| Decision factor | Professional repair | Bumper replacement |
|---|---|---|
| Small scuff | Usually appropriate | Unnecessary |
| Short central crack | Often appropriate | Needed if plastic is stretched |
| Broken mounting tab | Temporary or limited repair | Usually more durable |
| Crushed absorber | Not sufficient | Replace damaged absorber |
| Bent reinforcement bar | Not appropriate | Replace or repair structural parts |
| Damaged radar bracket | Not sufficient alone | Replace bracket or cover as specified |
| Paint match | Existing cover refinished | New cover requires paint |
| Typical labor time | 2-6 hours | 1-3 days including paint |
Plastic welding can be durable when the technician identifies the polymer and adds a suitable rear reinforcement. It is not a substitute for a bent reinforcement bar, collapsed energy absorber, or damaged sensor mount.
How Much Does Bumper Replacement Cost?
Typical bumper replacement costs range from $700-$1,200 for a basic vehicle without sensors, $1,300-$2,400 for a mid-range vehicle with parking or blind-spot systems, and $2,500-$4,500 or more for luxury vehicles, EVs, and complex ADAS-equipped models.
| Vehicle and damage tier | Parts | Labor and paint | Calibration | Typical total |
|---|---|---|---|---|
| Basic compact, no sensors | $200-$400 | $500-$800 | $0 | $700-$1,200 |
| Mid-size vehicle, parking sensors | $400-$800 | $600-$1,000 | $300-$600 | $1,300-$2,400 |
| SUV, blind-spot radar | $500-$1,200 | $700-$1,300 | $400-$900 | $1,600-$3,400 |
| Luxury vehicle or EV | $900-$2,000+ | $800-$1,500 | $500-$1,000+ | $2,500-$4,500+ |
| Reinforcement and absorber damage | $600-$2,500+ | $900-$2,000 | $300-$1,000 | $1,800-$5,500+ |
These are typical United States repair-planning ranges, not guaranteed estimates. Labor rates, paint blending, vehicle year, parts availability, dealership pricing, taxes, and regional calibration requirements can change the total substantially.
Repair may cost $300-$900 when the damage is limited to plastic and paint. A replacement cover can become more expensive after adding brackets, grilles, fog-lamp bezels, parking sensors, clips, paint blending, and calibration.
Which Replacement Bumper Should You Buy?
OEM is the safest default when the vehicle has radar, complex parking sensors, a camera, unusual trim integration, or an active warranty requirement. A CAPA-certified aftermarket part can reduce cost on some conventional vehicles, while a verified recycled OEM cover can provide accurate fitment for older models.
| Part type | Typical part cost | Best fit | Main risk |
|---|---|---|---|
| New OEM | $500-$2,000+ | ADAS-equipped or newer vehicle | Highest price |
| CAPA-certified aftermarket | $250-$1,000 | Basic or mid-range vehicle | Fit and sensor compatibility must be confirmed |
| Non-certified aftermarket | $150-$700 | Budget cosmetic repair | Variable material and mounting accuracy |
| Recycled OEM | $150-$900 | Older or discontinued model | Prior repairs, hidden damage, color mismatch |
| Primed replacement cover | $200-$1,200 | Shop-controlled refinishing | Requires paint and exact part verification |
CAPA certification addresses defined fit and performance testing for covered parts, but certification does not eliminate the need to verify the exact vehicle trim, sensor openings, grille design, and calibration procedure.
Ask the repairer whether the quoted part is CAPA-certified, whether it is primed or painted, whether all brackets are included, and whether the vehicle manufacturer permits it around radar or camera hardware. A low part price can disappear when missing sensors and trim must be purchased separately.
What Should You Check After the Repair?
A completed bumper repair should pass physical, visual, electronic, and road-test checks. The shop should document damaged components, replacement part numbers, diagnostic codes, calibration results, and any remaining warning messages.
Use this handover checklist:
- Confirm even gaps at both fenders, lamps, grille, trunk, or liftgate.
- Check that the bumper does not move under light hand pressure.
- Verify that parking sensors activate without constant false alerts.
- Confirm that blind-spot, collision-warning, and cruise systems show no fault.
- Ask whether calibration was static, dynamic, or unnecessary under the manufacturer procedure.
- Inspect lower shields, wheel liners, lamp mounts, and exhaust clearance.
- Confirm that the paint surface has no overspray on lamps, rubber seals, or sensors.
- Request a written scan and calibration report when ADAS was involved.
One practitioner rule matters here: calibration should occur after ride height, wheel alignment, and bumper geometry are correct. Calibrating a sensor before those conditions are fixed can produce a documented procedure without producing accurate real-world detection.
Situational Verdicts for Common Damage
The bumper looks fine, but a warning light appeared
Treat the bumper as potentially damaged until a scan and sensor inspection are complete. A low-speed impact can shift a radar bracket or break an ultrasonic sensor holder without leaving a visible mark.
One corner keeps popping out
Replacement is usually preferable when the corner will not remain flush after correct fasteners are installed. The molded tab, side retainer, bumper rail, or fender bracket may be fractured.
The bumper has a deep gouge near radar
Do not approve ordinary filler without confirming the radar repair specification. The cover may need replacement if the gouge changes thickness, shape, or material in the sensor field.
A parking-lot impact caused only a dent
A plastic dent may be repairable if the cover rebounds, gaps remain even, and diagnostics show no faults. The shop should still inspect the absorber and mounts if the impact was hard enough to move the vehicle.
The vehicle is older and the OEM part is discontinued
A recycled OEM bumper can be sensible when the part is inspected for previous repairs, matching sensor openings, intact tabs, and correct trim. Photograph the part before installation and confirm its history with the supplier.
Insurance, Estimates, and Repair Authorization
Insurance estimates often separate the bumper cover from absorbers, reinforcement bars, brackets, grilles, sensors, paint materials, labor, and calibration. Approving a cover-only repair before teardown can leave hidden damage outside the initial estimate.
Request a supplement when the shop finds crushed foam, bent metal, broken sensor mounts, hidden wiring damage, or calibration requirements. Compare estimates by total repair scope rather than by bumper-cover price alone.
A repair estimate should identify:
- Vehicle identification number and exact trim.
- New, recycled, OEM, or aftermarket part status.
- Paint and blend operations.
- Sensor diagnosis and calibration.
- Structural inspection findings.
- Warranty period for plastic repair or replacement.
- Any remaining warning light or diagnostic code.
Common Mistakes That Make Bumper Repairs Fail
- Judging only the outside: Polishing hides scratches, not displaced absorbers or brackets. Require a behind-cover inspection after a meaningful impact.
- Using generic filler on a sensor area: Filler can alter radar transmission and does not restore torn plastic. Follow the vehicle-specific repair procedure.
- Reusing broken retainers: A new cover with damaged rails can sag immediately. Replace fasteners and brackets that no longer hold factory tension.
- Skipping the scan: No warning light does not prove that every sensor works. Stored codes and intermittent faults require a diagnostic check.
- Calibrating before alignment: Incorrect ride height, wheel alignment, or bumper position can invalidate sensor aiming.
- Accepting an unverified used part: A recycled bumper may contain old welds, stretched plastic, or incompatible sensor openings.
FAQ
Can I drive with a cracked bumper?
You may drive a short distance to a repair facility when the crack does not create loose edges, tire contact, lamp obstruction, or exposed wiring. Do not use the vehicle normally if the bumper drags, blocks lighting, affects sensors, or separates from the body.
Does a rear bumper protect the trunk?
A rear bumper cover alone does not protect the trunk from every collision. The absorber and reinforcement bar manage specific impact forces, while the rear body structure protects the passenger and cargo compartments during larger crashes.
How long does bumper replacement take?
A basic cover replacement may take one business day when the part is available and no calibration is needed. Sensor-equipped vehicles commonly require 2-4 days because paint curing, parts delivery, diagnostics, and calibration add separate operations.
Can a dealership require an OEM bumper?
A dealership can recommend an OEM part, especially for a vehicle with radar or warranty concerns, but insurance and local repair rules vary. Ask for the technical reason, then compare the part specification, certification, warranty, and calibration compatibility.
Does bumper replacement affect resale value?
A properly documented bumper replacement usually has less resale impact than an unresolved warning light, poor paint match, uneven gaps, or evidence of structural damage. Keep invoices, part information, diagnostic results, and calibration records with the vehicle history.
Should I replace the bumper after hitting a curb?
Replace or repair the bumper based on the resulting damage, not the curb impact alone. Inspect the lower cover, absorber, reinforcement, mounting rails, wheel liner, undertray, and any parking sensors before choosing a cosmetic repair.
The Bottom Line
Knowing how to tell if a bumper needs replacement requires more than measuring a crack. Replace the cover when mounting tabs, sensor brackets, impact components, or factory shape are compromised; repair it when damage is cosmetic, localized, and structurally stable. Confirm hidden components and ADAS operation before approving the final repair, because a bumper that looks acceptable can still reduce crash protection or disable safety systems.


