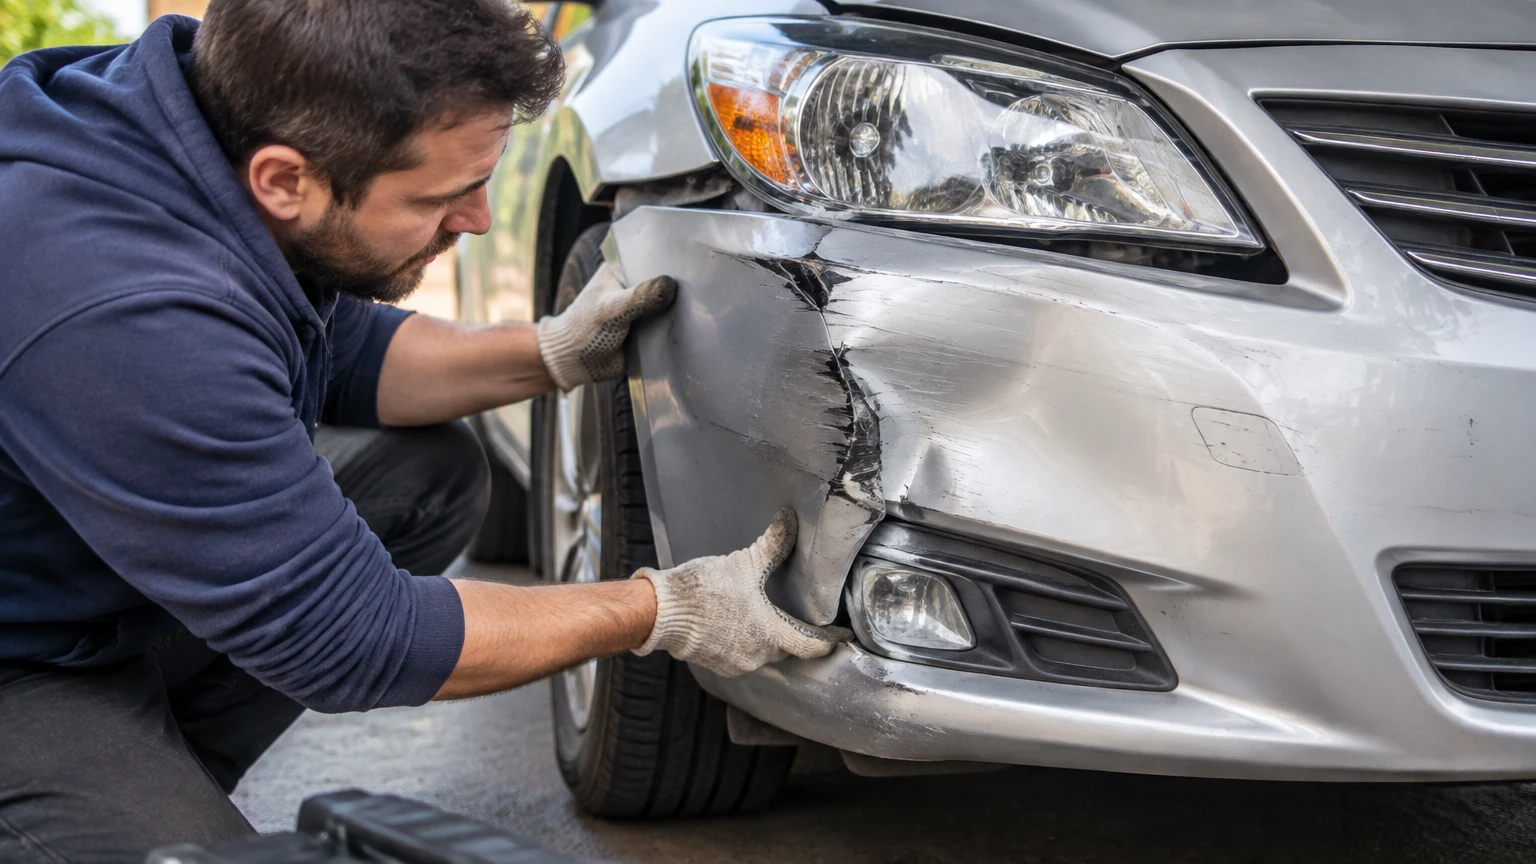
A front bumper repair restores the bumper cover’s shape, attachment points, finish, and related safety components after a collision. The correct process is to inspect the reinforcement and energy absorber first, identify the plastic, repair or replace the cover according to the damage, refinish it, then test sensors and calibrate ADAS when required.
Key Facts at a Glance
- A bumper cover is cosmetic and aerodynamic, while the reinforcement bar and energy absorber manage collision energy.
- A cracked polypropylene cover can often be plastic-welded, but crushed absorbers, bent reinforcement bars, and damaged sensor brackets require replacement or structural inspection.
- Typical professional bumper-cover repair costs $250-$1,200; complete replacement commonly costs $1,000-$2,500 or more.
- Radar, camera, and parking-sensor work must follow the vehicle manufacturer’s repair and calibration procedures.
- Standard metal-panel body filler can crack on flexible plastic; use a product approved for the bumper’s material and paint system.
- A repair is unsafe to drive with when the cover is loose, sharp, detached, rubbing a tire, or obstructing a lamp or sensor.
How the Front Bumper System Works
A modern front bumper system contains three main layers: the flexible bumper cover, the energy absorber, and the reinforcement bar. The cover provides the visible shape, the absorber cushions low-speed impact energy, and the bar transfers larger collision loads into the vehicle structure.
The bumper cover is commonly polypropylene, polyethylene, thermoplastic olefin, polyurethane, or a composite material. The absorber may be expanded polypropylene foam, expanded polystyrene foam, or molded plastic. The reinforcement bar is often steel, aluminum, or a composite beam attached to frame rails.
Damage to one layer does not prove that the other layers are intact. A bumper can look repairable while its absorber is crushed behind the cover. A bent reinforcement bar can also leave uneven gaps, hood misalignment, or hidden frame damage.
What should you inspect before repairing?
Inspect the cover, mounting tabs, absorber, reinforcement, fog lamps, grille supports, wiring, parking sensors, radar brackets, and nearby fenders. Photograph every damaged area before disassembly, including panel gaps and warning lights on the dashboard.
Do not begin cosmetic repair until you know whether the impact displaced a headlamp, hood latch, radiator support, condenser, washer reservoir, or cooling duct. A bumper repair cannot correct a bent front structure, and covering such damage can create a later alignment or cooling problem.
Before You Start
A localized bumper-cover repair typically takes 4-8 hours of hands-on work, plus paint curing time, and has moderate difficulty because plastic identification, surface preparation, and paint blending determine the result.
| Requirement | Typical specification | Why it matters |
|---|---|---|
| Work temperature | 18-27°C | Supports adhesive, primer, and clearcoat curing |
| Inspection time | 30-60 minutes | Finds hidden absorber, bracket, and sensor damage |
| DIY materials | $75-$250 | Covers abrasives, repair compound, primer, paint, and PPE |
| Professional repair | $250-$1,200 | Depends on damage, paint, labor, and sensor work |
| Safety equipment | Gloves, eye protection, respirator | Controls sharp plastic and paint exposure |
| Required references | OEM repair and calibration procedure | Defines material, torque, and sensor requirements |
Gather trim tools, a socket set, screwdrivers, masking materials, a heat gun with temperature control, a plastic identification tool or light, a rotary tool, compatible welding rod or adhesive, flexible filler, abrasive paper, plastic cleaner, adhesion promoter, primer-surfacer, color-matched basecoat, and clearcoat.
Disconnecting a battery is not a universal substitute for an OEM restraint procedure. Wait the manufacturer-specified time before working near airbag wiring, and never probe yellow restraint connectors with a test light or multimeter.
Step 1: Triage the Collision Damage
Park the vehicle on a level surface, switch it off, photograph the damage, and check whether the vehicle can be moved safely. A loose bumper, leaking fluid, exposed sharp edge, disabled headlamp, damaged tire, or obstructed cooling opening requires towing or immediate professional inspection.
Check the dashboard for airbag, parking-assist, forward-collision, lane-assist, and check-engine warnings. Scan the vehicle before clearing codes because stored faults help document the impact and may identify a sensor or communication problem.
Measure panel gaps visually before removal. Compare the damaged side with the undamaged side, noting bumper-to-fender alignment, hood clearance, grille position, and lamp seating.
You will know this step worked when: the damage is documented, the vehicle is safe to move, and hidden structural or electronic concerns have a plan for inspection.
Common mistake: treating a drivable vehicle as undamaged because no warning light appears.
Step 2: Remove the Bumper Cover Carefully
Disconnect the battery only when the manufacturer’s procedure requires it, then remove the upper fasteners, wheel-liner screws, lower splash-shield fasteners, and side retainers. Keep fasteners in labeled containers because similar-looking screws may have different lengths or thread types.
Pull the cover outward from the fender guide with steady pressure. Do not twist it across a sensor harness. Disconnect fog lights, adaptive-cruise radar, parking sensors, ambient-temperature sensors, grille shutters, cameras, and washer lines before fully separating the cover.
Use masking tape to label connectors and take photographs of harness routing. Inspect every mounting tab after removal because a broken tab often causes repeated cracking even when the visible face looks smooth.
You will know this step worked when: the cover is detached without stretched wiring, missing clips, or distorted guide brackets.
Common mistake: forcing a cover forward while one wheel-liner fastener or electrical connector remains attached.
Step 3: Identify the Bumper Plastic
Identify the bumper material from the molded code on the inside surface, usually near a mounting area. Common markings include PP, PE, TPO, PUR, and combinations such as PP-EPDM; the repair method must match the material and the adhesive manufacturer’s instructions.
Thermoplastics such as PP, PE, and many TPO parts can be repaired with compatible plastic welding or a two-part structural adhesive. Polyurethane and thermoset materials generally require an approved adhesive system because they do not remelt into a reliable weld.
| Material marking | Typical repair method | Main limitation | Suitable filler |
|---|---|---|---|
| PP | Hot-air welding or structural adhesive | Low surface energy | Flexible plastic filler |
| PE | Compatible welding or adhesive | Adhesion can be difficult | Manufacturer-approved filler |
| TPO | TPO rod or structural adhesive | Additives vary by part | Flexible bumper filler |
| PUR | Two-part polyurethane adhesive | Heat can char material | PUR-compatible filler |
| Fiberglass composite | Resin and reinforcement | Cracks can extend beneath paint | Flexible composite system |
A welding rod that looks similar is not necessarily chemically compatible. Test the repair process on an unseen edge or use the product maker’s material chart.
You will know this step worked when: the plastic code and repair product agree.
Common mistake: welding polyurethane because the cover appears to be plastic.
Step 4: Restore a Dent Without Overheating
Clean the inside and outside of the dent, then warm the area gradually with a controlled heat gun. Typical reshaping temperatures are approximately 60-80°C at the plastic, but the correct temperature depends on material, thickness, paint, and the manufacturer’s procedure.
Keep the heat gun moving 15-20 centimeters from the surface. Push from the rear with a broad, padded tool or gloved hand rather than a sharp point. Allow the panel to cool in its original position instead of forcing a rapid temperature change that can create new distortion.
Heat will not restore a sharply creased area if the plastic has stretched, whitened, torn, or lost its mounting geometry. In that case, reshape the area only enough to align it, then use a repair or replacement decision based on the remaining damage.
You will know this step worked when: the contour matches the opposite side and the paint has not blistered, glossed, or discolored.
Common mistake: holding heat in one spot until the plastic bubbles or the paint softens.
Step 5: Repair a Crack or Tear
Clean and degrease the repair area using a plastic-safe cleaner. On the rear side, stop-drill the ends of a spreading crack only when the repair product or OEM procedure permits it, then create a controlled V-groove along the crack with a rotary tool.
For a weldable thermoplastic, heat the groove and introduce a matching rod until the material fuses rather than merely sits on top. For PUR or a difficult-to-weld plastic, apply a two-part structural adhesive to the prepared groove and reinforce the rear with the product’s approved mesh or backing material.
Repair both sides when access allows. The front side restores the visible surface, while the rear side carries much of the tensile load when the cover flexes.
You will know this step worked when: the repair bends with the surrounding plastic without reopening and no visible void remains in the groove.
Common mistake: using a rigid metal-panel repair compound as the only reinforcement.
Step 6: Rebuild Broken Tabs and Mounts
Replace a severely damaged mounting tab when the tab is part of a sensor bracket, headlamp alignment feature, or load-bearing guide. Small non-structural tabs can sometimes be rebuilt with a compatible plastic repair system and a shaped backing piece.
Set the cover on the vehicle before the adhesive cures whenever the repair system permits it. This confirms that the tab sits in the correct position and prevents a repaired mounting point from locking the cover too high, low, or far outward.
Do not use ordinary cyanoacrylate glue for a flexible bumper tab. It becomes brittle, provides limited gap-filling, and can fail after temperature cycling.
You will know this step worked when: the repaired tab accepts its original fastener without stressing the cover and panel gaps match the opposite side.
Common mistake: repairing a tab without checking the guide, fastener, and adjacent fender together.
Step 7: Sand, Fill, Prime, and Paint
Sand the cured repair with approximately 80-grit abrasive to level high material, then refine with 180-grit and 320-grit. Feather old paint beyond the repair so the edge disappears gradually rather than creating a visible ring under primer.
Apply a thin flexible bumper filler only where the weld or adhesive leaves low spots. Clean the surface with the paint manufacturer’s plastic-safe cleaner, apply adhesion promoter to exposed plastic, then use a compatible primer-surfacer.
After curing, block-sand primer with approximately 400-600 grit according to the paint system. Apply color-matched basecoat in controlled coats, blend into the surrounding area when needed, and apply compatible clearcoat. A flex additive is not automatically correct; use it only when specified by the coating manufacturer, because unnecessary additives can alter cure and gloss.
You will know this step worked when: the repaired contour is invisible under primer and the finished surface has even gloss without mapping, fisheyes, or peeling edges.
Common mistake: spraying primer or paint over silicone, tire dressing, wax, or uncured repair material.
Step 8: Reinstall, Scan, and Calibrate
Reinstall the absorber, reinforcement-related trim, brackets, harness clips, lamps, grilles, wheel liners, and splash shields in the reverse order. Tighten fasteners to the service-manual torque values rather than estimating by feel.
Scan for diagnostic trouble codes after reconnection. Parking sensors may need a functional test, while forward radar, camera systems, and some surround-view systems may require static or dynamic calibration after bumper removal, bracket movement, paint repair, or replacement.
Thick paint, body filler, a displaced bracket, metallic contamination, or incorrect sensor angle can affect radar and ultrasonic performance. Only the vehicle manufacturer’s procedure or a qualified calibration provider can establish whether calibration is mandatory for a specific model.
You will know this step worked when: all fasteners are installed, warning lights are absent or properly diagnosed, sensors respond, and the vehicle passes the required calibration or aiming procedure.
Common mistake: clearing a warning code without confirming sensor alignment and calibration status.
Should You Repair or Replace the Bumper?
Repair the original cover when damage is localized, the plastic remains dimensionally stable, mounting tabs are recoverable, and the absorber, reinforcement, and sensor brackets are undamaged. Replace the cover when cracks reach several mounts, large sections are missing, the plastic is badly stretched, or repair would cost close to a correctly fitted replacement.
| Option | Typical cost | Typical time | Best use |
|---|---|---|---|
| DIY cosmetic repair | $75-$250 | 1-2 days | Small dent, scuff, or short crack |
| Mobile bumper repair | $250-$450 | 2-4 hours | Localized cosmetic damage |
| Traditional body shop | $600-$1,200 | 2-4 days | Extensive repair and refinishing |
| OEM bumper replacement | $1,500-$3,500+ | 1-3 days | Sensor brackets, severe damage, exact fit |
| Aftermarket replacement | $1,000-$2,500+ | 1-3 days | Cost-sensitive replacement with verified fit |
Prices are typical U.S. ranges, not estimates for a particular vehicle. Labor rates, paint color, parts availability, radar calibration, corrosion, and hidden structural damage can change the final invoice substantially.
How do OEM and aftermarket covers compare?
OEM covers usually provide the most predictable fit, material consistency, and sensor-bracket geometry. Aftermarket covers can reduce part cost, but a poor fit may require trimming, extra alignment labor, or transfer of brackets and grilles.
Ask the repairer whether the replacement is CAPA-certified where applicable, whether all mounting hardware is included, whether the cover is primed, and whether ADAS calibration is included in the estimate. A low part price does not guarantee a low installed cost.
What Damage Cannot Be Safely Repaired?
A crushed energy absorber, bent reinforcement bar, torn frame rail, displaced radar bracket, broken headlamp mount, leaking cooling component, or damaged restraint system should not be concealed by cosmetic cover repair. These parts affect crash management, pedestrian protection, lighting, cooling, or driver-assistance operation.
Stop driving and arrange inspection when the bumper contacts a tire, hangs from wiring, blocks a lamp, exposes a sharp edge, leaks fluid, or prevents the hood from latching. Short movement to a repair facility may be possible in some cases, but the collision damage must be assessed first.
Electric and hybrid vehicles require extra caution around high-voltage components, cooling circuits, and manufacturer-specific isolation procedures. A front-end impact can damage components that are not visible through the bumper opening.
Common Mistakes and How to Fix Them
| Failure | Likely cause | Corrective action | Preventive rule |
|---|---|---|---|
| Paint peels in sheets | No adhesion promoter | Strip loose coating and redo plastic preparation | Follow the paint-system sequence |
| Crack reopens | Wrong rod, shallow groove, or weak rear repair | Remove failed material and repair both sides | Match material and reinforce the rear |
| Filler cracks | Rigid metal filler used on flexible plastic | Remove it and apply approved flexible filler | Confirm flexibility on the product sheet |
| Bumper sits unevenly | Broken guide or tab | Repair or replace the mounting point | Test-fit before curing adhesive |
| Radar faults remain | Bent bracket or incorrect paint thickness | Inspect bracket and follow calibration procedure | Scan and calibrate after repair |
| Visible repair ring | Abrasive edge too sharp | Feather the transition and reprime | Use a block and progressive grits |
One practical rule is to diagnose the inside before perfecting the outside. The visible cover is the least reliable indicator of collision severity.
Cost, Insurance, and Documentation
Take photographs from several angles, record warning lights, retain broken parts when safe, and request a written estimate separating cover repair, replacement parts, paint labor, scanning, calibration, and structural inspection. This makes insurer and repair-shop comparisons more accurate.
Insurance decisions depend on the policy, deductible, fault, local law, and repairability. Do not authorize sanding or painting before the adjuster or repair facility documents hidden damage if a claim is pending.
A body shop should identify the repair procedure and calibration responsibility in writing. Ask whether the quoted price includes blending adjacent panels, clips, sensor tests, and post-repair scanning.
The Bottom Line
How to Repair a Front Bumper After an Accident depends first on hidden damage, plastic type, attachment points, and sensor equipment. Repair a stable, localized cover with the correct plastic process and flexible refinishing materials; replace damaged covers, absorbers, reinforcement components, or sensor brackets when repair would compromise fit or safety. Finish with diagnostic scanning and required ADAS calibration.
Frequently Asked Questions
Can I drive with a cracked front bumper?
You can drive only when the cover remains securely attached, does not contact the tire, does not obstruct lighting or sensors, and has no sharp or loose sections. A cracked cover can worsen through vibration, so temporary fastening should not replace inspection. Tow the vehicle when structural, fluid, restraint, or high-voltage damage is possible.
Does bumper repair remove the vehicle’s safety protection?
A correctly repaired cover does not replace a damaged absorber or reinforcement bar. The safety risk comes from ignoring those internal parts or altering sensor brackets and mounts. A professional inspection should confirm that crash-management components remain within the manufacturer’s service limits before the vehicle returns to normal use.
Can a bumper be repaired without repainting?
A shallow dent with intact paint may be reshaped without repainting if the finish remains smooth and firmly bonded. Scratches through the clearcoat, gouges, exposed plastic, welded cracks, and filled areas normally require primer and color refinishing. Heat cannot restore missing paint or hide a repair edge.
How long should a repaired bumper cure?
Cure time depends on the adhesive, filler, primer, paint, temperature, humidity, and airflow. Typical two-part repair products reach handling strength within several hours, while paint systems may need 24 hours or longer before normal washing. Follow the product data sheet rather than judging cure by surface dryness.
Will bumper repair affect parking sensors?
Bumper repair can affect parking sensors when a sensor, bracket, wiring connector, hole, or surrounding paint thickness changes. Test every sensor after reassembly and scan for faults. A sensor that clicks or responds inconsistently may still be misaligned, so use the vehicle’s specified diagnostic test rather than relying only on sound.
Should I choose a mobile bumper repair service?
Choose mobile repair for localized cosmetic damage when the technician has suitable weather, ventilation, material-matching equipment, and access to the required vehicle procedures. Choose a fixed body shop for structural damage, extensive refinishing, poor weather, damaged radar brackets, or any repair requiring frame measurement or formal ADAS calibration.


